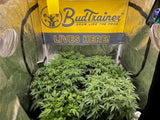
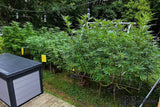
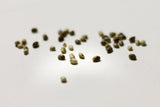
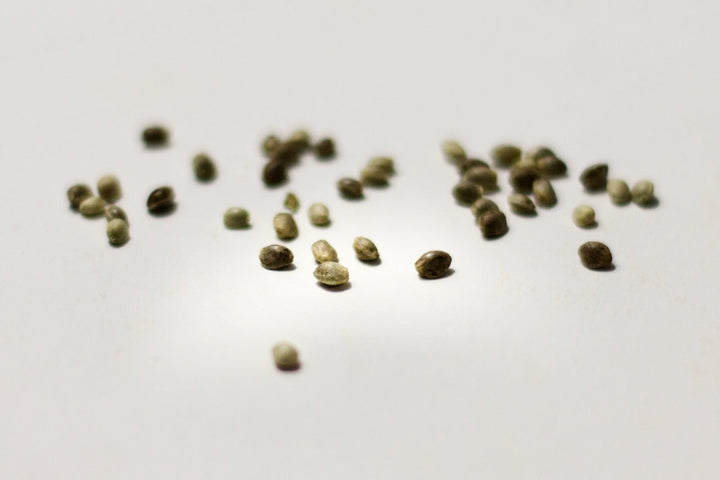
Quick answer: To grow weed you make five decisions - indoor or outdoor, photoperiod or autoflower, which seeds, what pot and medium, and whether to train - then run twelve steps in order: pick your seeds, germinate, plant, raise the seedling, water by weight, transplant, grow it through veg, top and train it, flip it to flower, harvest by the trichomes, dry slow, and cure in jars. One feminized plant in a 5 gallon (19 L) fabric pot takes about 3 to 4 months from seed to jar as an autoflower and 4 to 6 months as a photoperiod.
Here is the claim the rest of this guide backs up: a first grow is a sequencing problem, not a knowledge problem. The plant already knows how to grow. What ends most first grows is three things done out of order or out of patience - drowning a small root ball, a room that swings hot and cold, and cutting the plant a week or two before the resin is ripe. In our survey of 440 home growers the median grower produced for about $0.75 per gram, all costs in, and most of them were not doing anything exotic. What separates a good first grow from a frustrating one is rarely knowledge. It is the order of a few decisions, and patience at the end. This is the map, with a photograph or a diagram at every step.
Note: where photoperiod and autoflower plants need different handling - and they do, in a few places that matter - this guide flags it. If you do not know which one you have yet, the seed section below sorts it out.

Learning how to grow weed - or cannabis, or marijuana; it is all the same plant, just different names - looks complicated because most guides bury the five things that matter under a hundred things that do not. Here is the reframe that makes it simple: growing high-quality cannabis is just growing a healthy plant and not getting in its way. The plant wants to grow. Your whole job is to make a few good decisions up front, then avoid the handful of mistakes that wreck a grow. Nail the early calls - your genetics, your container, and whether you train the plant - and you are most of the way there before the seed even cracks.
This guide maps the entire grow in twelve steps and routes you to a deeper walkthrough for every one of them, from germinating your first seed to the jar. Read it top to bottom once to get the shape of the thing, then come back to the step you are on when you are on it.
What It Actually Takes to Grow Weed
Strip away the forum arguments and a successful first grow comes down to five decisions. Make them deliberately and the rest of the grow is execution. Make them by accident and you spend three months fighting problems you created on day one.
Here are the five, in the order they actually hit you:
- Indoor or outdoor. This sets your budget, your schedule, and how much control you have over quality.
- Photoperiod or autoflower. This decides whether you control when the plant flowers, or the plant does.
- Which seeds. Feminized seeds save beginners from the single most common heartbreak: a male plant pollinating the crop.
- Pot and medium. A fabric pot full of good soil forgives more beginner mistakes than any other setup. Not all fabric pots are built the same, and the differences only show up once you fill one.
- Train or do not train. A few minutes of bending the plant once it has five nodes changes the entire shape - and the yield potential - of the harvest.
That is the whole framework. Everything else - nutrients, pH, light schedules, defoliation - is downstream of these five and far easier to learn once the foundation is set. When you get to the feeding part, our guide on what nutrients cannabis needs covers it start to finish. The diagram below is the cheat sheet: the five decisions, and the pick I would hand a first-time grower for each.

The honest truth that the old growing forums got right: roughly 90% of growing weed is simply not screwing it up. Overwatering, swinging temperatures, panic-feeding nutrients, harvesting too early - these kill more grows than any exotic technique ever saves. Keep the plant in a stable environment, make the five decisions above on purpose, and you have already beaten most first-timers. And when a leaf does go yellow on you, read the leaves before you reach for a bottle - most of what looks like hunger is not.

What You Need to Grow Weed: The Starter Kit
The second question every first-timer asks after "how" is "what do I have to buy." The honest list is shorter than a grow shop wants you to think. For one plant indoors, this is all of it: a small tent, an LED light, a timer, a fan or two, a thermometer that also reads humidity, a fabric pot, a starter cup, a bag of potting soil, feminized seeds, a pH pen with a bottle of pH Down, a basic nutrient, a loupe, and a few jars for the end. Clip that thermometer-hygrometer in among the plants, not on the tent wall, and read its two numbers together with our VPD chart. A budget setup runs $350 to $750 up front and about $200 a year in electricity; used or borrowed gear brings that down a lot. Outdoors you can drop the tent, the light, the timer and the fans, because the sun and the wind do those jobs for free.
| What | Why it matters |
|---|---|
| Grow tent, 2 ft by 2 ft (60 x 60 cm) for one plant | A light-tight, reflective box you can control. One trained plant fills it. |
| Full-spectrum LED, 120 to 150 W for that tent | The single biggest lever on yield. Buy the light before you buy anything fancy. |
| Plug-in timer | Runs the 18-hour days and, on a photoperiod, the 12-hour nights that trigger flowering. |
| Clip fan, plus an exhaust fan with a carbon filter | Moving air across the leaves and a way to pull heat, moisture and smell out of the tent. |
| Thermometer-hygrometer | The two numbers you will read every day: temperature and humidity at canopy height. |
| Fabric pot, 5 gallon (19 L), and a starter cup | Roots that air-prune instead of circling, and a seedling home you can lift out of without tearing anything. |
| Potting soil | A plain seedling mix for the cup, and a quality bagged soil for the final pot. |
| Feminized seeds | Every plant flowers. No males to hunt for. |
| pH pen and pH Down | Water in the wrong pH range locks nutrients out of the roots no matter how much you feed. |
| One base nutrient | Used at half the label dose. You do not need the twelve-bottle lineup. |
| Loupe, scissors, a few jars | To read the harvest, make the cuts, and cure the result. |
Inside the tent every part has one job, and once you see them laid out the setup stops feeling like a science project. The diagram below is the whole thing; the full buying guide, with tent sizes, light wattages and what each piece costs, is in how to grow weed indoors.

Indoor vs Outdoor: Which Setup Fits You
Your first real fork is where the plant lives. This is a decision about cost, control, and your calendar - not about which one is "better," because both grow excellent weed when done right. Most beginners are better served indoors for one reason: control. But outdoor is dramatically cheaper, so let me give you the trade honestly.
Cost. Growing weed outdoors is far cheaper because the sun is free. You can grow a plant that yields half a pound (225 g) to over a pound (450 g) with as little as $100 in pots, soil, and nutrients. Most of that decision is the medium, and we cover how to choose the right soil for cannabis separately. A decent indoor setup - tent, light, fan, and a controller - runs between $350 and $750 up front, plus maybe $200 a year in electricity. Once the gear has paid for itself over the first year or two, that works out to roughly $1 per gram indoors versus about $0.20 per gram outdoors. Those estimates line up with real-world data: in our survey of 440 home growers, the median US grower produced for about $0.75 per gram, all costs in. Indoors gets cheaper every year after the gear is paid off, but it is never as cheap as sunlight.

Quality and control. This is where indoor earns its cost. Outdoor cannabis is at the mercy of the weather: too much rain, a humid week, a pest bloom, or an early cold snap all show up in the final product. Indoors, you set the temperature, the humidity, the light intensity, and the schedule. That consistency is why indoor flower tends to be cleaner, denser, and more potent - you removed the bad days. Commercial outdoor crops often get sold for extraction precisely because they cannot hold the consistency that indoor environments can.
Schedule. Outdoor growing runs on the sun's calendar. In the northern US and Canada you start seeds indoors from late March to mid-April, move the plants outside once nighttime lows stay above 50°F (10°C), usually mid to late May, and harvest from late September to early November depending on your region and the cultivar. Indoors you grow year-round on whatever schedule you set, which is a real advantage if you want more than one harvest a year.

For a first grow with control and a fast feedback loop, go indoors with a small tent, the full setup we walk through in how to grow weed indoors. If budget is the deciding factor and you have a private, sunny spot, outdoor is genuinely viable - and the techniques that produce the biggest plants outside (early start, huge containers, and training) are worth a dedicated read. We cover that end to end in growing massive cannabis plants outdoors. The rest of this guide applies to both; I will flag the few places they diverge.
Photoperiod vs Autoflower: The Choice That Shapes Everything
This decision sounds technical and is actually simple, but it quietly controls more of your grow than any other single choice. The question is who decides when the plant starts flowering: you, or the plant.
Photoperiod plants flower based on light. They stay in vegetative growth as long as they get long days (typically 18 hours of light indoors), and they begin flowering only when you cut the light cycle to 12 hours on, 12 hours off - the "flip." Outdoors, the shortening days of late summer do this for you. Because you control the flip, you control the plant's final size: keep it in veg longer and it gets bigger before you flower it.
Autoflowers flower on an internal clock regardless of light. Around 3 to 5 weeks from seed, they start flowering on their own, finish the whole life cycle in roughly 9 to 11 weeks (some larger cultivars run to 13), and stay smaller. You trade control and ultimate size for speed and simplicity.

Here is the decision rule. If you want the simplest possible first grow and a fast result, start with an autoflower - it forgives timing mistakes because there is no flip to get wrong. If you want bigger plants, bigger yields, and the ability to clone and dial in genetics over time, grow photoperiod and accept the slightly steeper learning curve.

This choice also changes how you train the plant, which matters enough that it is one of our core rules at BudTrainer: photoperiods get two toppings plus continuous low-stress training; autoflowers get at most one topping, plus that same continuous low-stress training. The reason is recovery time. A photoperiod plant you can keep in veg long enough to bounce back from two cuts. An autoflower is on a clock, so it gets one topping at most, and only when you are taking very little plant material and the plant is visibly vigorous. A slow or stressed auto should not be topped at all - shape that one by gently bending instead. More on that in step 8 below.
How to Grow Weed Step by Step: 12 Steps From Seed to Jar
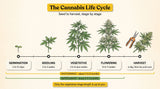
Every cannabis plant runs the same five stages: germination, seedling, vegetative growth, flowering, and harvest. Here they are as twelve things you actually do, in order. Each step gives you the one or two numbers that matter, a picture of what right looks like, and the link to the full guide for when you want the depth. For the week-by-week version of the whole lifecycle, the cannabis growth stages guide is the companion to this section.

Prefer to watch a whole grow before you read one? This is one of ours, a photoperiod plant topped and trained from seed to harvest in 28 minutes. Watch it once, then follow the steps.

▶ Watch the full seed-to-harvest grow on YouTube
Step 1 - Pick your seeds
Buy feminized seeds, and for the simplest first grow make them autoflower. Feminized seeds are bred to produce only female, flower-producing plants, which removes the classic beginner disaster of a hidden male pollinating the crop. Regular seeds come out roughly half male, and a single male you miss turns prize flower into a bag of seeds. Photoperiod feminized seeds are the pick if you want bigger plants and control over the timeline.

Genetics set the ceiling on your grow. You cannot out-grow bad seeds, and you cannot fix the heartbreak of discovering halfway through flower that you have been raising a male - here is how to spot a male vs female weed plant before it does any damage. We use SeedSupreme for our own test grows because the feminized selection is broad and the shipping is predictable, but any reputable feminized seed source works. Buy a strain described as compact or indoor-friendly for a small tent; a sativa that stretches to three times its height at the flip is the wrong first plant. For the full breakdown of regular vs feminized vs autoflower and how to read a strain page, see our guide to choosing cannabis seeds.
Step 2 - Germinate the seed
Fold the seed inside a damp paper towel on a plate, cover it with a second plate, and keep it warm and dark at 70 to 85°F (21 to 29°C). Check it every 12 hours. Most fresh seeds crack within 24 to 72 hours and push out a white taproot; some take up to 5 days. Plant it the moment the taproot is 5 to 13 mm long (about a quarter to a half inch), and never touch the taproot itself.

Germination is just convincing a dry seed to wake up. The towel should be damp, never dripping - a seed sitting in a puddle rots before it sprouts. Plain tap water is fine. If nothing has happened by day 7 the seed is almost certainly not viable, and there is no trick that revives it. The moment you see a root, the clock is running: a taproot left to grow long in a towel snaps when you plant it. The full method, plus the glass-of-water and direct-plant alternatives and what to do with a seed that will not crack, is in our germination guide.

Step 3 - Plant it in a starter cup
Fill a starter cup with a plain, pre-moistened seedling mix, poke a hole a quarter inch (6 mm) deep, lower the seed in taproot down, cover it loosely, mist the surface, and put a clear cup over it as a humidity dome. Do not start in a hot, pre-fertilized bagged soil; that is the transplant destination, not the seedling medium. The seed carries its own food for the first week or two.


We start seedlings in a starter cup like the BudCups because the removable bottom plate lets you check root development and transplant without shocking the plant - you hold the cup upright, push the bottom plate up from below, and the root ball rises clear of the rim untouched, ready to set into its next pot. You check roots by popping that bottom plate, not by squinting through drainage holes. Whatever you start in, the seedling stage is about gentle, consistent moisture and not drowning the tiny root. The step-by-step, from hole to dome, is in how to plant a cannabis seedling; the starter-cup walkthrough lives in how to use the BudCups.

Step 4 - Raise the seedling
For the first two weeks a seedling wants a warm root zone, humid air and gentle but real light: 72 to 78°F (22 to 26°C) with the lights on and never below 65°F (18°C) with them off, 70 to 80% humidity under the clear cup, and 200 to 400 PPFD on an 18 hours on, 6 hours off schedule. Crack the dome once a day, and water only when the cup feels light, a little at a time.


PPFD is simply how much usable light lands on the leaf. If you do not own a meter, a free phone lux app gets you close: aim for 16,000 to 32,000 lux at the top of the seedling, with an LED no closer than 24 inches (61 cm). The widely repeated advice to keep seedlings under dim light is wrong - it is why so many first seedlings come out tall, thin and floppy. A healthy two-week seedling is short with a thick stem and its first serrated leaves flat and wide; a lanky one that has to be propped up with a bit of wire was starved of light, and the fix is to turn the dimmer up, not to lower the lamp. In weeks 3 and 4 raise the light to 400 to 600 PPFD and let the humidity drift down to 60 to 70%. Everything about this stage, including the climate numbers and the eight mistakes we see most, is in the planting guide.

Step 5 - Water by weight, not by calendar
Lift the pot. Water when it has lost about half the weight it gained at the last watering, which for an established plant in bagged soil is every 2 to 4 days, and pour about a quarter to a third of the pot's volume each time. In a bottle-fed medium like coco let 15 to 20% run out the bottom; in a pre-charged soil, water it damp through with little or no runoff. Water at lights-on, not before the dark period.

This is the step that kills more first grows than any other, and almost always in the same direction: too much, too often, in a pot that is far too big for the roots in it. A seedling in a 5 gallon (19 L) pot sits in soil that stays wet for a week, and roots that never dry out never get air. Learn the two weights - just watered, and half gone - and the schedule takes care of itself. When a plant droops, lift the pot before you reach for the can: droop plus a heavy pot is overwatering, droop plus a light pot is thirst. An overwatered plant has firm, thick leaves curling down from the stalk and does not recover for days; an underwatered one has thin, papery, limp leaves and stands back up within an hour or two of a drink. The full method, the arithmetic behind the volume, and what to do with a pot that has gone bone dry are in how often to water cannabis.


Step 6 - Transplant when the roots reach the edge
Move the seedling up when the root ball is finished: white root tips at every edge of the cup, and a plug that holds its shape when you turn it over. Set it into its next pot at the same depth and soak the whole pot once, slowly, until water runs from the bottom. Then leave it until the pot has lost about half the weight the soak added, usually 4 to 7 days, and for the next few waterings water only around the outside of the pot, away from the stem, so the roots grow out to reach it. For most first grows the next pot is the final one: a 5 gallon (19 L) fabric pot indoors, or 3 gallon (11 L) for a small autoflower in a tight space.

The timing is the whole trick. Too early and the plug crumbles and tears roots; too late and the roots have circled into a mat that takes weeks to recover. The ladder we use is the same on every grow: the starter cup, then a 1 to 5 gallon (4 to 19 L) pot, and only for big outdoor plants a 7 to 15 gallon (26 to 57 L) step and a 25 gallon (95 L) or larger final home. An autoflower is on a clock, so it gets one move, from the cup into its final pot, the moment the root ball is ready. With a starter cup that has a removable bottom plate the transplant is a two-second push: the plate acts as a piston, the root ball rises up and out of the top, and nothing pulls on the stem. What stalls a transplant is not that soak but watering again too soon, topping up a pot that is still wet from it, which is why the next watering waits for the dry-back. The full walkthrough is in how to transplant cannabis.


Step 7 - Grow it through veg: light, air, and food
Vegetative growth is the muscle-building phase: 18 hours of light a day, 71 to 82°F (22 to 28°C), 55 to 65% humidity, a fan moving air across the leaves, and a light hung at the height its maker specifies - for a 2 ft by 2 ft (60 x 60 cm) tent that is a 120 to 150 W LED. A quality bagged soil feeds the plant for roughly its first 3 to 4 weeks in the pot; after that, feed with one base nutrient at half the label dose and keep your water at pH 6.0 to 7.0 in soil (aim for 6.5).
Light is the lever most beginners under-pull. Chandra and colleagues measured a cannabis leaf's photosynthesis rising with light all the way to about 1,500 micromoles per square meter per second at 77 to 86°F (25 to 30°C), far beyond what most first grows deliver,1 and Potter and Duncombe found that plants in brighter rooms put a larger share of their weight into flower, with the potency of that flower unchanged by the extra light.2 Feeding is the lever most beginners over-pull. Caplan, Dixon and Zheng grew vegetative plants at five fertilizer rates and found yield peaked at a middle rate - 1.8 times the yield at the lowest rate - and fell off above it,3 which is why half strength is the right starting dose and a burnt leaf tip is the signal to back off, not push harder. The pH matters because nutrients are only available to the roots inside a window; in coco or hydro the window is 5.5 to 6.5, aiming for 5.8 to 6.0. What to feed, how much, and how to read the label are in the cannabis nutrients guide, and the tent numbers by stage are in how to grow weed indoors. The table below is the whole environment in one place.
| Stage | Light | Temperature, lights on | Humidity |
|---|---|---|---|
| Seedling, weeks 1 to 2 | 18 on, 6 off; 200 to 400 PPFD | 72 to 78°F (22 to 26°C) | 70 to 80%, under a clear cup |
| Seedling, weeks 3 to 4 | 18 on, 6 off; 400 to 600 PPFD | 72 to 78°F (22 to 26°C) | 60 to 70% |
| Vegetative | 18 on, 6 off | 71 to 82°F (22 to 28°C) | 55 to 65% |
| Flowering | 12 on, 12 off | 70 to 80°F (21 to 27°C) | 55 to 65% early, 50 to 60% mid |
| Late flower | 12 on, 12 off | 65 to 75°F (18 to 24°C) | 45 to 55% |

Step 8 - Top it and train it flat
Once the plant shows its 6th node - the sixth point where a pair of branches meets the stem, usually 3 to 5 weeks from germination - cut the main growing tip off cleanly between the 5th and 6th nodes. That one cut turns one top into two. Then bend the branches outward and tie them down so the plant grows wide and flat instead of tall and pointy; hold each bend with a clip for about two weeks, three at the most, and remove it. Photoperiods get a second topping 2 to 3 weeks later once the new growth has hardened into branches; an autoflower gets one topping at most.

If you do one "advanced" thing on your first grow, make it this. An untrained cannabis plant grows like a Christmas tree: one dominant top (the cola) towering over a bunch of weak, shaded lower branches. Training reshapes it so light reaches many tops instead of one, which is how you turn a single big cola into a flat canopy of many even buds. Danziger and Bernstein showed that changing a plant's architecture changes how evenly cannabinoids are distributed across it,4 and Backer and colleagues' meta-analysis of the published yield trials found light intensity, plant density, fertilization and pot size among the handful of factors that actually decide how much flower a plant makes5 - and a flat canopy is how one plant catches more of the light you already paid for.

The two techniques are cutting and bending. Topping is the cut described above; after two toppings and continuous bending, the eight main branches you end up with carry 16 to 32 colas. Low-stress training is the bending: anchor a tie at the base, pull each branch toward the rim of the pot with branch ties like the BudHuggers hooked to the pot's grommets, and hold the sharper bends with LST clips like the BudClips. Bending does not wound the plant, so it works on autoflowers too. You can also run it bend-first, laying the main stalk over at the 5th node (3 to 4 weeks in) and topping later or not at all; that is the method in the low-stress training guide. The cut itself, node by node, is in the topping guide, and the whole routine, including the second topping and mainlining, is in the training hub.

Two rules keep training safe. First, the plant must be healthy and growing before you cut or bend it - a stressed plant gets rest, not surgery. Second, training is a vegetative-stage activity. Everything structural is finished by the time you flip the lights, and the clips come off in veg; once a plant is in flower its bud sites are set, so a new bend cannot add one and only risks the ones you have. The canopy science behind why an even, flat canopy yields better is in canopy development science.

Step 9 - Flip to flower and manage the stretch
Flip a photoperiod plant to 12 hours of light and 12 hours of uninterrupted darkness once it has filled about half the height you can give it, because it will grow by half to double again in the first three weeks of flower. Flowering starts at the flip, not when you see white hairs; those show up 7 to 14 days later. Keep tucking branches under a trellis net through the stretch and stop at about day 21. From then on you support the plant, you do not reshape it. An autoflower skips the flip and starts flowering on its own at 3 to 5 weeks.

The stretch is normal and expected, and it is where your training pays off: a well-trained, flat canopy stretches into an even wall of tops, while an untrained plant stretches into one tall cola and a lot of shaded filler.

What you do during the stretch is tuck, not bend - a net is the one piece of training that continues into flower, exactly the way a SCROG works.

After day 21 it is support only: as buds swell, branches get heavy and can fold, so tie opposite branches to each other so they hold each other up, and leave the clips in the drawer - they are a veg tool. Bring the humidity down as the buds fill in, from 55 to 65% early to 50 to 60% mid and 45 to 55% in the last weeks, because a dense bud in wet air is how you meet bud rot. Keep the grow feed through the stretch and switch to a bloom feed as the stretch slows, around weeks 2 to 3. A photoperiod plant flowers for about 8 to 11 weeks; if a branch does crack under the weight, it is usually salvageable with a clean splint and tape, which we cover in the broken branch repair guide. Everything that happens week by week through bloom is in the flowering stage guide.

Step 10 - Harvest when the trichomes say so
Harvest when the trichomes - the tiny resin glands on the buds - have turned from clear to 80 to 90% milky with 5 to 10% amber. Read them on the calyxes of the buds, not the sugar leaves, with a 30 to 60x jeweler's loupe, at three to five spots across the plant. White or brown hairs cannot time a harvest, and the trichomes on the little leaves ripen about a week ahead of the bud, so they lie too.

Cutting early is the last of the three grow-enders, and it is pure impatience: a plant that looks done to the naked eye is usually a week or two short. Hold the loupe against the bud and draw it back until the heads snap into focus, and do it under a white light rather than the grow light, which makes clear heads read as milky. About a week out, strip the plant of everything but a few fan leaves at the top, and take those the day before you cut; it makes the trim faster and the dry more even. Then cut the plant down, whole or branch by branch, and get it into the dry room the same day. Outdoors the same read lands somewhere between late September and early November depending on your region and cultivar. The full ripeness read, with photos of every stage, is in the harvesting guide.

Step 11 - Dry slow and cool
Hang the plant in a dark room at 60 to 68°F (15 to 20°C) with a fan moving air but not pointed at the buds, and step the humidity: 50% for the first two days so nothing molds, then 55% from day 3 until a thin stem snaps instead of bending. Most flower is ready around day 7; dense colas can take up to 14 days. If the room is above 55% in those first two days add a fan, and above 60% point it straight at the buds for those two days only.

Drying is where quality gets locked in or thrown away. Booth and Bohlmann's review lays out what the terpenes are, the compounds behind the smell and flavor of the finished flower,6 and heat is what strips them: dry warm and fast and you get grassy, hay-flavored smoke. The 60/60 rule you will read everywhere appears in no paper; the drying studies put it at 50 to 55% humidity and 60 to 68°F (15 to 20°C), and the stepped schedule above is how we run it.

Trim the sugar leaves either before the dry (wet trim, faster) or after it (dry trim, better for flavor); the trimming guide settles which. The full schedule, the room setup, and the evidence behind it are in how to dry weed.

Step 12 - Cure in jars
Once a stem snaps, trim the buds off and fill glass jars to about three quarters with a small hygrometer inside each. Hold the jars at 58 to 62% humidity, opening them for a few minutes every day for the first week and every few days after that. Fourteen days is the minimum for smokeable flower; about a month is the target. Down to 55% is acceptable; above 65% is mold territory.

Curing redistributes the last of the moisture and breaks down the chlorophyll that makes fresh weed harsh - it is the difference between smooth, aromatic flower and the scratchy stuff. If a jar reads high, leave the lid off for an hour and check again; if it reads low, you jarred too dry and no pack fixes that. A two-way humidity pack holds a jar that started right; it cannot rescue one that did not. You will be tempted to skip this step after three months of waiting. Do not be most first-timers. The complete schedule, containers, and what a finished cure looks like are in the curing guide.

How Long It Takes, Seed to Jar
Total time from seed to a jar you can actually smoke is about 3 to 4 months for an autoflower and about 4 to 6 months for a photoperiod plant. The big variable is the vegetative stage: a photoperiod holds in veg until you flip the lights, so you control the total time, while an autoflower runs its own clock, finishes in 9 to 11 weeks from seed, and cannot be stretched into a bigger plant. Germination takes 3 to 10 days, the seedling stage 2 to 3 weeks, veg 3 to 8 weeks or more, and flowering 8 to 11 weeks for a photoperiod. Then comes the tail most beginners forget to count: 7 to 14 days of drying and a minimum of 14 days in the jar, about a month to be good, so 3 to 6 weeks between the cut and the first smoke. The full seed-to-harvest timeline breaks down every stage in days and weeks for both paths.

Is This Normal? What a Healthy First Grow Looks Like
Half of the panic in a first grow is over things that are supposed to happen. Seed leaves go yellow and fall off. A plant droops for a day after a transplant. A topped plant looks like nothing is happening for a week. White hairs appear a week or two after the flip, and lower fan leaves go yellow in the last weeks of flower as the plant pulls what it can out of them. None of that needs a bottle, a spray, or a forum post. The other half of the panic is over things that do need you today, and the difference is usually visible from across the room.

When something is on the right-hand side of that poster, each has one first move. A droop with a heavy pot means stop watering and let the pot dry back, then learn the weight. A seedling stretching and falling over is starved of light: turn the lamp up, and prop the stem with a ring of wire until it thickens, as in the planting guide. Crispy brown tips on an otherwise dark green leaf is nutrient burn; cut the dose in half and check the pH before you assume hunger. White powder that smudges off a leaf is powdery mildew, and a gray or brown patch inside a bud is bud rot; both get the affected material bagged and removed the day you see them, and the air in the room fixed.
What Most Beginner Guides Get Wrong
A lot of cannabis advice online is recycled from a decade ago and quietly wrong. Here are the four corrections that will put you ahead of most first-time growers - and ahead of most of the articles you will read. These are the corrections we make at BudTrainer, based on how licensed producers actually run.

1. Flowering starts at the 12/12 flip, not when pistils appear. The white hairs are evidence the plant has already entered flowering, not the moment it begins. Flowering is triggered by 12 hours of uninterrupted darkness. Why it matters: if you wait for pistils to "start counting" your flowering weeks, your harvest math is off by a week or more, and people chronically harvest at the wrong time because of it.
2. Train from grow one, not "once you have more experience." The internet treats training as an advanced move to add later. It is the opposite: training is the single highest-leverage thing a beginner can do, and low-stress training is gentle enough to start on your first plant the moment it shows its 5th node, about three weeks in. Waiting until you are "experienced" just means your first several plants yield a fraction of what they could.
3. Transplant into 3-to-5x the volume, not 2-to-4x. The old rule of bumping a plant into a pot two to four times its current root volume is too conservative and leads to more transplant shocks from doing it too often. We use 3-to-5x: bigger steps, fewer transplants, less shock. A 5 gallon (19 L) pot is the usual final home for an indoor photoperiod; bigger grows keep climbing the same ladder - BudCups, then a 1 to 5 gallon (4 to 19 L), then a 7 to 15 gallon (26 to 57 L), then a 25 gallon (95 L) or larger final. The full mechanics are in the transplanting guide.
4. Dry in steps, not at one fixed humidity. The widely-copied "60/60 rule" appears in no paper, and the reviews put drying at 18 to 21°C and 50 to 55% RH. A flat target still gets half of it wrong: a room that is wet from day one invites mold on fresh buds, and a room that stays dry the whole way strips terpenes. What we do is start at the dry end and finish slow: 50% RH for the first two days, then 55% from day 3 until the stems snap, all at 60°F to 68°F (15°C to 20°C), and then into the jar at 58% to 62%. Most home-grow content has not caught up with that yet.
None of these are exotic. They are small, specific corrections to consensus advice, and getting them right is most of what separates a confident grower from a frustrated one.
Frequently Asked Questions
How much does it cost to grow weed at home?
Outdoors, as little as $100 per plant in pots, soil, and nutrients, because the sun is free. A first indoor setup - a small tent, a light, a fan, and a basic controller - runs roughly $350 to $750 up front, plus around $200 a year in electricity. Indoor cost per gram drops sharply after the gear is paid off, but outdoor stays cheaper overall.
How long does it take to grow weed from seed to harvest?
About 2 to 3 months for an autoflower and 3 to 5 months for a photoperiod plant, seed to the day you cut. The variable is the vegetative stage, which you control on photoperiods and the plant controls on autoflowers. Then budget 3 to 6 weeks for drying and curing, which most beginners forget to count, so a finished jar is about 3 to 4 months out for an autoflower and 4 to 6 for a photoperiod.
Is it cheaper to grow weed indoors or outdoors?
Outdoors is far cheaper because sunlight is free - roughly $0.20 per gram versus about $1 per gram indoors once the gear has paid for itself over the first year or two. Indoors costs more up front and in electricity but gives you year-round growing and far more control over quality. For pure cost, outdoor wins; for consistency and control, indoor wins.
How many plants should a beginner start with?
One. A single plant teaches you the entire cycle with the least cost, least risk, and least overwhelm, and one healthy plant can still yield several ounces. Scale up on your second or third grow once you have seen the full process once. Always check your local legal plant limit before you start.
Do I need expensive lights to grow weed?
No. A modern LED grow light sized for a small tent is enough for a strong first harvest, and you do not need a top-tier commercial fixture to learn. The bigger beginner mistakes are environment and watering, not light brand. Outdoors, of course, the sun handles it for free.
What do I need to grow weed at home?
For one plant indoors: a 2 ft by 2 ft (60 x 60 cm) tent, a 120 to 150 W LED, a timer, a clip fan and an exhaust fan with a carbon filter, a thermometer-hygrometer, a 5 gallon (19 L) fabric pot, a starter cup, potting soil, feminized seeds, a pH pen with pH Down, one base nutrient, a loupe and a few jars. Outdoors, drop the tent, the light, the timer and the fans.
Should a beginner grow photoperiod or autoflower seeds?
Autoflowers are the simplest first grow: they flower on their own clock, so there is no light-cycle "flip" to time, and they finish in about 3 months. Photoperiods are worth it if you want bigger plants, bigger yields, and the ability to dial in genetics over time. Either way, buy feminized seeds.
How do I tell a male plant from a female?
Look at the nodes, where the branches meet the stem; by about six weeks from seed most plants show a pre-flower there. A female shows a small teardrop-shaped pod with one or two fine white hairs. A male shows smooth, round pollen sacs on a short stalk and no hairs. Remove a male the day you confirm it, because one open sac can seed every plant in the room. Feminized seeds avoid the problem almost entirely.

When does the flowering stage actually start?
The moment a photoperiod plant gets 12 hours of uninterrupted darkness - the "flip" - or, outdoors, when late-summer days shorten enough. The white pistils you see are a sign the plant has already entered flowering, not the trigger for it. Counting your flowering weeks from the flip, not from first pistils, keeps your harvest timing accurate.
Do I have to train my plant, or can I just let it grow?
You can let it grow, but training is the highest-return thing a beginner can do. An untrained plant puts most of its energy into one tall top and shades out the rest; low-stress training spreads the plant flat so light reaches many tops, which means more even buds. It is gentle, costs nothing, and you can start as soon as the plant shows its 5th node.
How much weed does one plant produce?
It varies enormously with genetics, environment, pot size, and training, so treat any single number with suspicion. Indoors, a well-grown plant commonly yields a few ounces; a large, well-trained outdoor plant can yield far more. The honest answer is that healthy roots, good light, and training move this number more than the strain name on the packet does.
What size pot should I use for one weed plant?
A 5 gallon (19 L) fabric pot is the reliable default for a full-size plant; 3 gallon (11 L) works for smaller autoflowers or tight spaces. Fabric pots air-prune the roots and drain well, which forgives overwatering. Five gallons (19 L) is also the usual final pot indoors; a larger outdoor plant climbs one more rung, 7 to 15 gallons (26 to 57 L), before its 25 gallon (95 L) or bigger final home.
Is it legal to grow weed at home?
It depends entirely on where you live - home cultivation is legal in some countries, states, and provinces, restricted in others, and banned in some. Plant limits and rules vary widely even where it is legal. Check your local laws before you germinate a single seed; this guide assumes you are growing legally.
How often should I water a cannabis plant?
Water when the pot has lost about half the weight it gained at its last watering, not on a fixed schedule - for an established plant in bagged soil that is every 2 to 4 days. Lift the pot and learn the two weights, just watered and half gone. Droop with a heavy pot is overwatering, droop with a light pot is thirst. Fabric pots help because they drain and breathe.
What is the easiest way for a beginner to grow weed?
One feminized autoflower, indoors, in a 5 gallon (19 L) fabric pot of quality soil, under a small LED in a tent, with low-stress training started at the 5th node. That combination removes the most common failure points - male plants, mistimed flowering, root shock, and a runaway environment - and gets you to harvest in about three months.
Can I grow one plant in a closet?
Yes. A closet with a small LED light, one clip-on or floor fan for airflow, and a way to manage smell is a perfectly good first grow space. Keep the plant small with an autoflower or by flipping a photoperiod early, use low-stress training to keep the canopy flat under a low ceiling, and watch your temperature and humidity.
What do first-time growers get wrong most often?
Overwatering, swinging temperatures, harvesting too early, and rushing the dry and cure. Almost all of it is impatience. The plant grows itself if you give it a stable environment and leave it alone between waterings - roughly 90% of growing weed is just not screwing it up. Master patience and you have beaten most beginners.
Next Steps: Your First Grow, Start to Finish
You now have the whole map. The way to use it is in order, seed to jar: it runs from seed selection to germination to planting to watering to transplanting to training to flowering to harvest to drying to curing. Start at the top and work down with your first plant.
If you only take one thing from this guide into your first grow, make it this: get the five decisions right, train from the 5th node, and be patient at the finish. A plant grown in a fabric pot like the BudPots and trained with LST clips like the BudClips gives you a flat, even canopy that produces denser, more even buds - which then dry and cure predictably. Everything compounds from the start. Pick your genetics, germinate your first seed, and begin.

References
- Chandra, S., Lata, H., Khan, I. A., & ElSohly, M. A. (2008). Photosynthetic response of Cannabis sativa L. to variations in photosynthetic photon flux densities, temperature and CO2 conditions. Physiology and Molecular Biology of Plants, 14(4), 299-306. https://link.springer.com/article/10.1007/s12298-008-0027-x
- Potter, D. J., & Duncombe, P. (2012). The effect of electrical lighting power and irradiance on indoor-grown cannabis potency and yield. Journal of Forensic Sciences, 57(3), 618-622. https://onlinelibrary.wiley.com/doi/10.1111/j.1556-4029.2011.02024.x
- Caplan, D., Dixon, M., & Zheng, Y. (2017). Optimal rate of organic fertilizer during the vegetative-stage for cannabis grown in two coir-based substrates. HortScience, 52(9), 1307-1312. https://journals.ashs.org/hortsci/view/journals/hortsci/52/9/article-p1307.xml
- Danziger, N., & Bernstein, N. (2021). Plant architecture manipulation increases cannabinoid standardization in drug-type medical cannabis. Industrial Crops and Products, 167, 113528. https://www.sciencedirect.com/science/article/pii/S0926669021002958
- Backer, R., Schwinghamer, T., Rosenbaum, P., et al. (2019). Closing the yield gap for cannabis: A meta-analysis of factors determining cannabis yield. Frontiers in Plant Science, 10, 495. https://www.frontiersin.org/articles/10.3389/fpls.2019.00495/full
- Booth, J. K., & Bohlmann, J. (2019). Terpenes in Cannabis sativa - From plant genome to humans. Plant Science, 284, 67-72. https://www.sciencedirect.com/science/article/pii/S0168945219301487

About the Author
Henrique Dias is the CEO and co-founder of BudTrainer. He is a mechanical engineer who also holds a graduate certificate in Commercial Cannabis Production from Niagara College in Ontario, Canada - the first college-level cannabis cultivation program in North America. Before founding BudTrainer, Henrique worked with Health Canada licensed cannabis producers, where he gained hands-on experience in cultivation, processing, and post-harvest management of cannabis at commercial scale. He started BudTrainer to bring that same level of craft to home growers through better-designed gardening tools and clear, science-backed education.
DISCLAIMER: Everything taught and sold by BudTrainer® is to be used strictly for legal purposes. We do not endorse the production of illegal substances and it is your duty to ensure that you are complying with the law. The words "hemp," "cannabis," "weed," and "marijuana" are used interchangeably to refer to the same plant (legal hemp with less than 0.3% THC) for the purposes of this lesson.