Quick answer: To grow weed indoors you need five things - a light-tight space (a small tent), an LED grow light, air exchange (an exhaust fan and a clip fan), a fabric pot with quality soil, and a way to measure temperature and humidity. You run the plant on an 18-hours-on light schedule to grow it, flip to 12-hours-on to flower it, and hold the environment steady: roughly 71-82°F (22-28°C) and 55-65% humidity in veg, cooler and drier in flower. Start to finish is about 3 to 6 months, depending on which type you grow. The whole game indoors is control plus training - you set the weather, and you train the plant flat so more of it sits in strong light.
This guide covers the exact setup, how to size your space and light, the temperature and humidity targets by stage, the seed-to-jar sequence, the training that makes a small tent punch above its size, and the mistakes that quietly wreck first grows.
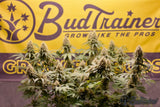
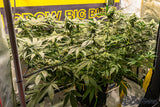
What actually decides an indoor grow is a short list of numbers - light intensity, temperature, humidity, and pot size - and one habit most beginners skip until it is too late: training the plant early so it grows wide instead of tall. Get those right and the rest is mostly not screwing up. Below is what a healthy indoor grow looks like when you do.

This is the indoor-specific playbook. If you want the wider view first - the five decisions that shape any grow and the full seed-to-jar overview for both indoor and outdoor - start with our complete beginner's guide to growing weed. If you have a private, sunny yard and cost is the deciding factor, read growing cannabis outdoors instead. Everything below assumes you have decided to grow inside.
Why Grow Cannabis Indoors (and What You Are Signing Up For)
Growing indoors buys you three things outdoor growing cannot: control, consistency, and a calendar you set yourself. You choose the temperature, humidity, light intensity, and day length, which removes the bad weather that shows up in outdoor flower as loose, uneven, or mold-damaged buds. It also means you can grow year-round and time harvests whenever you want. The first fork, indoor or outdoor, is one of five decisions that shape the whole grow.

The trade is cost and attention, though the cost is lower than the stereotype: in our survey of 440 home growers, 43% spent under $250 all-in on their first grow, gear and seeds included, and only 5% spent $2,000 or more. Buying everything new at once, the kit below lands between $350 and $750, plus around $200 a year in electricity. For what growers spend once the gear is paid off, see the State of Home Growing 2026 results: the median is $250 to $499 a year, and costs fall to about $0.75 per gram. Outdoor can cost as little as $100 per plant because sunlight is free. Indoors also asks for a few minutes most days: a glance at the thermometer, a check of the soil, a quick training pass each week.
For a first grow, the control is worth it. A tight feedback loop, where you change something and the plant responds within days in an environment you can actually read, is the fastest way to get good. You will make mistakes, but indoors you can see them and fix them before they cost you the harvest. The payoff is a clean, dense, repeatable result like these plants finishing in fabric pots.

What You Need to Grow Weed Indoors: The Setup
An indoor grow is five systems working together: a space, light, air, a root zone, and measurement. You can spend a little or a lot on each, but you cannot skip any of them. Here is what each one does and the beginner-sane version.

1. The Space (a Grow Tent)
You need an enclosed, light-tight space you can control. A grow tent is the simplest answer: the reflective interior bounces light back onto the plant, the sealed walls hold humidity and block light leaks during flower, and the ports are built for ducting and cables. A closet or cabinet can work, but you will spend the money you saved on light-proofing and reflective film, so most first-timers are better off with a tent. Sizes start at 2 ft by 2 ft (60 cm by 60 cm).

2. The Light (LED)
The light is the single most important purchase, because light intensity is the biggest lever on yield in an indoor grow.1 A modern full-spectrum LED is right for a beginner: it runs cooler than the old HPS lamps, sips less electricity, and needs no bulb changes. Buy the light to match your space, not the other way around, and look at actual power draw in watts and the published PPFD - the light intensity actually landing on the canopy - rather than an inflated headline wattage. Once it is hung, our PAR to lux calculator lets you check it with a cheap lux meter.
3. The Air (Exhaust and Circulation)
Plants in a sealed box need two kinds of airflow. Air exchange pulls stale, humid air out and fresh air in, usually with an inline exhaust fan vented through a carbon filter that also scrubs the smell. Size that fan for your light's heat rather than your tent's volume: our guide to grow tent temperature shows the arithmetic. Air circulation is a small clip or oscillating fan moving air gently across the canopy so leaves get fresh CO2 and no humid pockets sit still. Do not point a strong fan directly at a small plant - you want a light breeze, not a windstorm.
4. The Root Zone (Pot and Medium)
For a first indoor grow, plant in quality potting soil in a fabric pot. Which bag, and how much perlite to add to it, is the whole subject of our guide to the best soil for cannabis. Soil is forgiving in a way hydroponics is not, and fabric pots air-prune the roots and drain freely, which prevents the overwatered, oxygen-starved root zone that kills more indoor seedlings than anything else.
A 5-gallon (19 L) fabric pot is the standard final home for one indoor plant. Pot size is not a detail: when the cannabis yield literature is pooled, container volume comes out as a measurable predictor of yield alongside light intensity, plant density and feeding.2 Reinforced fabric pots like the BudPots add a rigid rim and grommets that make training anchor points easy. Fabric pots vary more than the product photos suggest, and we measured four brands with calipers: the fabric-pot head-to-head has the thickness and true-volume numbers. The air-pruning is the real reason to use fabric: instead of circling the pot wall, roots hit air and branch, building the dense, fibrous root ball below that feeds a bigger plant.

5. Measurement (Thermometer and Hygrometer)
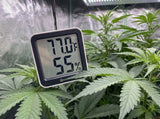
You cannot control what you do not measure. A cheap digital thermometer-hygrometer that reads temperature and relative humidity, ideally with a min-max memory, is non-negotiable. Put it at canopy height, not on the floor. A smart controller that runs your exhaust fan off humidity and temperature setpoints turns environment control into set-and-forget. This is the $30 tool that protects the $800 grow.
The Indoor Grow Shopping List (and What It Costs)
Here is the full kit for a first indoor grow, with rough 2026 prices so you can budget before you buy. You do not need the most expensive version of anything, you need the right size for your space. Buying every line new, a complete first setup lands between $350 and $750 depending on tent size and light quality - and plenty of first grows come in well under that on used or borrowed gear.
| What | Why it matters | Rough cost (USD) | Where |
|---|---|---|---|
| Grow tent, 2x2 to 4x4 ft (60 x 60 to 120 x 120 cm) | Light-tight, reflective, controllable space | $70 - $150 | Any grow shop |
| Full-spectrum LED light | The single biggest lever on yield | $100 - $300 | Any grow shop |
| Inline exhaust fan and carbon filter | Air exchange and odor control | $60 - $150 | Any grow shop |
| Clip or oscillating fan | Gentle air circulation across the canopy | $15 - $30 | Any hardware store |
| Thermometer-hygrometer | Measuring temperature and humidity at canopy height | $15 - $30 | Any hardware store |
| Fabric pot, soil, and training gear | An air-pruned root zone plus the clips and ties that flatten the canopy | ~$90 | The Big BudBundle |
| Indoor-friendly seeds | Compact, feminized or autoflower genetics bred for a short stretch | Varies by strain | SeedSupreme indoor seeds |
| Germination tool (optional) | A clean, repeatable start without fiddling with paper towels | Optional | CannaKan KAN (code BUDTRAINER) |
The first five rows are standard grow-shop gear - buy whatever size fits your space, wherever is cheapest. The three BudTrainer rows are really one system: the fabric pot, low-stress training (LST) clips, and branch ties that flatten the canopy and make a small tent out-yield its footprint, which is why we package them as the Big BudBundle. Indoor-friendly seeds and the optional germination canister are linked in the table above.
Sizing Your Space and Light (the Part Beginners Get Wrong)
The most common beginner mistake is buying a light that does not match the space, then holding it at the wrong height. Light intensity falls off fast with distance - roughly with the square of it, so a leaf twice as far from the light gets about a quarter of the intensity, not half. That inverse-square reality is why canopy height and light distance matter as much as the light's rated power - though inside a tent most of what a lower bud site loses was intercepted by the leaves above it, not lost to distance, which is why a flat canopy matters more than a few inches of hang height.

Match the light to the footprint of your tent, not to a headline wattage number. As a rough beginner guide for flowering-stage cannabis, aim for something like 30 to 40 watts of actual LED power draw per square foot of canopy, which is roughly 320 to 430 watts per square meter - the range the indoor lighting trials actually tested. That puts a 2 ft by 2 ft (60 cm by 60 cm) tent around 120 to 150 watts, a 3 ft by 3 ft (90 cm by 90 cm) tent around 250 to 300 watts, and a 4 ft by 4 ft (120 cm by 120 cm) tent around 450 to 600 watts. More light keeps paying, and further than most beginner guides admit. In the best-controlled indoor trial we have, dry bud yield rose in a straight line as canopy light went from 120 up to 1,800 micromoles per square meter per second - 116 to 519 grams per square meter - with no ceiling anywhere in that range, and no effect on potency at any intensity tested.1 What limits a home grow is not the plant refusing more light. It is the power bill: in a 2012 trial that ran HPS fixtures at three lighting densities, yield per watt was highest in the dimmest room, so each extra watt from those fixtures bought less bud than the one before it.3 So size the light to your space and your power bill, not to a ceiling that is not there. Where that light actually goes once it reaches the plant is the subject of our canopy management breakdown.
The reason a flat canopy matters so much is the way leaves pay their way: a well-lit top leaf is an energy source, while a shaded lower leaf is an energy drain. Build one bright, even layer and every leaf earns its keep.

Plant count follows footprint, but with a twist: how you train matters more than how many plants you cram in. Light intensity and plant density are the two factors that turn up together in every controlled indoor yield study, and they add rather than substitute - more plants does not make up for less light, or the other way round.4 One well-trained plant will fill a 2 ft by 2 ft (60 x 60 cm) tent. A 4 ft by 4 ft (120 x 120 cm) tent can hold one big trained plant or up to four smaller ones. Height is the sneaky constraint indoors - a tent gives you a fixed ceiling, and an untrained plant stretches straight into the light and burns. This is why indoor growers train: you spend vertical space you do not have and convert it into width you do.

| Tent size | Plants (trained) | LED draw (flower) | Best for |
|---|---|---|---|
| 2x2 ft (60x60 cm) | 1 | 120-150 W | First grow, tight spaces, one plant at a time |
| 3x3 ft (90x90 cm) | 1-2 | 250-300 W | A bigger single plant or a small rotation |
| 4x4 ft (120x120 cm) | 1-4 | 450-600 W | Bigger harvests, perpetual grows |
Dialing In the Environment: Temperature, Humidity, and Airflow
The environment is where indoor growers win or lose the quality game, and it is where generic guides go quiet. The targets are not "comfortable" - they are specific numbers that change by stage, because a seedling and a flowering plant want different weather. A single cannabis leaf photosynthesizes fastest somewhere around 77°F to 86°F (25°C to 30°C), and drops off above that.5 That is measured at the leaf, though, and leaf behavior is a poor guide to what a whole plant does - the same body of work found leaf photosynthesis saturating at light levels where whole-plant yield was still climbing.1 So read the numbers below as what works in a tent rather than as the plant's theoretical optimum: they are set by what keeps a canopy dry, a root zone breathing and a power bill payable.
Here are the working targets by stage. You do not need to hit them to the decimal - steady and close beats perfect and swinging - but you should know where you are aiming.

| Stage | Light schedule | Temperature (lights on) | Relative humidity | Notes |
|---|---|---|---|---|
| Seedling | 18/6 | 72-78°F (22-26°C) | 70-80% | High humidity, gentle light, no strong fan |
| Vegetative | 18/6 | 71-82°F (22-28°C) | 55-65% | Ramp light up, start training |
| Flowering | 12/12 | 70-80°F (21-27°C) | 50-60% | Lower humidity to prevent bud rot |
| Late flower | 12/12 | 65-75°F (18-24°C) | 45-55% | Cooler nights bring out color, protect resin |
Two rules sit underneath that table. First, humidity comes down as the plant matures: seedlings want it humid because their small roots cannot yet drink much, while flowering buds want it dry because dense colas, the thick flower clusters at each branch tip, at high humidity are exactly where Botrytis gray mold takes hold.6 Second, keep the night temperature within about 10°F (about 6°C) of the day temperature. The one-line version: warm and humid for babies, cooler and drier as they flower. Our VPD chart for cannabis turns those bands into a single number per stage, and shows where the two part company. Read the temperature at the height of the tallest colas as well as on the tent wall, because a hot top is where stress foxtailing starts in late flower.
Airflow ties it together. Gentle, constant movement keeps leaf surfaces refreshed with CO2 and denies mold the still, wet pockets it needs. Where that CO2 comes from, and why sealing a tent to add more usually backfires, is in our guide to CO2 in a grow tent. It matters most inside the canopy, where fresh air reaches the top easily but the interior goes stagnant and locally CO2-depleted unless you keep the plant open and the air moving. A shaded, still interior is also where powdery mildew on cannabis gets its start.

Photoperiod vs Autoflower Indoors
Indoors, the single biggest decision after your setup is whether to grow a photoperiod plant or an autoflower, because it changes how you use the one resource a tent controls perfectly: the light schedule.
Photoperiod plants flower on your command. They stay in vegetative growth as long as you give them long days (18 hours of light), and they begin flowering only when you cut the cycle to 12 hours on and 12 hours off - the "flip." Because you control the flip, you control the plant's final size. In a height-limited tent, that dial is a gift: you flip when the plant has filled about half the tent, because it will grow by half to double in height during the flowering stretch.
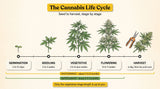
Autoflowers flower on a clock, not a schedule. They start flowering on their own around week 3 to 5 from seed no matter what the light does, so there is no flip to time and a faster finish: most are ready to cut 9 to 11 weeks from seed, with some larger cultivars running to 13. The catch is that their short timeline leaves no room to recover from mistakes, so you train them gently and top them once at most, only when very little material comes off and the plant is visibly vigorous. The two paths diverge mostly in length, as the timeline below shows.

For a first indoor grow where speed and simplicity matter, an autoflower is the lower-stress choice. For maximum size and control, a photoperiod is the better tool. Our guide to the three cannabis seed types breaks the decision down in full.
The Indoor Grow, Stage by Stage
Here is the full sequence for an indoor grow, from dry seed to sealed jar. Each stage has its own deeper guide, but this is the map and the indoor-specific notes that matter at each step.
Germination and Seedling
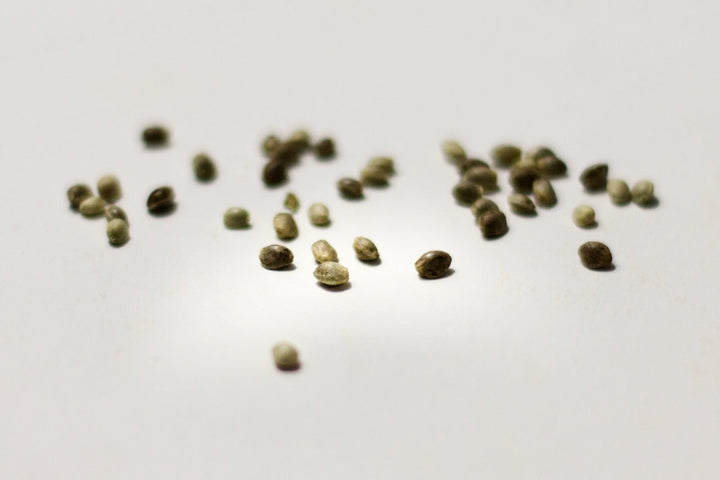
Start by germinating your seeds until the white taproot shows.

Plant into a small starter cup rather than straight into the big final pot - a seedling in a 5-gallon (19 L) pot sits in soil it cannot drink, and that soggy root zone stalls it. Self-draining nursery cups like the BudCups keep the root zone airy. Set the seed point-down, keep it warm, humid, and under gentle light on an 18/6 schedule.

Within a week or two you have a seedling establishing its first true leaves and roots, the start of the plant you will train.

Vegetative Growth and Transplant
Veg is the muscle-building phase: long days, more nutrients, and fast growth as the plant builds the frame that will hold flowers. This is also the only window where you can train and top, because the plant recovers quickly. The trigger to move up a pot is roots, not calendar - pop the BudCups bottom plate and look for white root tips at the edge of the root ball. What you feed matters more from here on too - our guide to cannabis nutrients covers the NPK ratios and the feed schedule by stage. Checking the roots first is also the fastest way to rule the root zone out when diagnosing cannabis deficiencies.

When the roots are ready, transplant up without shocking the roots into the final fabric pot. Indoors, aim for 3 to 5 times the current root volume on each step up, so roots colonize the new soil instead of sitting in a cold, wet margin they cannot use yet. There is one exception, and it is the one you are about to make: going from a fully rooted nursery cup straight into the 5-gallon (19 L) final pot is a far bigger jump than that, and it is safe precisely because the cup is fully rooted. A fully rooted cup can drink a pot that size down on time, so the new soil does not sit cold and wet around it.

Settle the transplant in with one slow soak of the whole pot, until water runs from the bottom. Then do not water again until the pot has lost about half the weight the soak added, usually 4 to 7 days, and for the next few waterings pour only around the outside of the pot, away from the stem, so the roots grow out to reach the water. Leave the plant alone to root in the meantime; the weight method shows how to judge the dry-back.

Training and Topping
During veg you bend the plant flat and, for photoperiods, top it twice (an autoflower once at most, if at all) so it grows into a wide, even canopy instead of one tall cola that stretches into the light. By the time it looks like this, bushy and filling its pot, it is ready to train in earnest.

The Flip and the Flowering Stretch
For photoperiods, flowering starts the day you flip the light to 12/12, not the day you first see pistils. In the first two to three weeks after the flip the plant stretches by half to double its height, so plan tent space around it. Structural training is finished at the flip: the bud sites are set, so a new bend cannot add one and can only put the ones you have at risk. The exception is the net. If you are running a trellis, keep tucking each branch back under the screen as it climbs, exactly the way a SCROG does, and stop when the stretch stops, around day 21. After that it is support only. The first white pistils at the branch crotches are your confirmation the flip took.

Our week-by-week flowering guide walks the whole window, from stretch to ripening.
Harvest, Dry, and Cure
When the trichomes - the tiny resin glands frosting the buds - turn from clear to mostly cloudy with a few amber, it is time to harvest. Then comes the part most beginners rush and regret - drying and curing - which gets its own section below.
Training to Maximize a Small Indoor Space
If you take one technique from this guide, take this one: train your plant flat. Indoors, light is your most expensive and most limited resource, and an even, flat canopy puts far more bud sites in the strong light band directly under the LED. That is a geometry argument rather than a physics one, and our canopy management breakdown works through the mechanism. A tall, untrained plant wastes light - the top cola hogs the intensity and everything below sits in shade, producing loose, airy larf. The difference in geometry is the difference in yield.

The core method is low-stress training (LST): you gently bend branches outward and hold them down while they are young and flexible, so the plant fills its footprint horizontally. Clips designed for the job, like the BudClips, hold a controlled bend without pinching the stem. If you are deciding what to buy, we put the three clip types side by side - the geometry, the plastic, and what each one costs you over a few grows.

Topping multiplies your main colas: cut the growing tip and the plant splits into two, then four, building the even spread of tops that a flat canopy needs. For photoperiods, we pair two toppings with continuous LST from the first grow; autoflowers get one topping at most, taken only when very little material comes off and the plant is visibly vigorous, because they cannot afford the recovery time a second cut costs.

Once the plant is bigger and the branches are woodier, you switch from clips to tie-downs. Garden wire like the BudHuggers anchors branches to the pot rim and holds a wider, flatter spread without pinching the stem, which is how you keep the canopy even right up to the flip.

Done consistently, the result is a low, wide, open plant with a dozen tops all sitting at the same productive height under the light instead of one dominant cola.

Timing matters: you build the structure in veg, keep tucking under the net through the stretch, and once the stretch ends around day 21 the canopy geometry is locked in. Push actual training past that and you stress a plant that should be pouring energy into buds.

If you want more structure than freehand LST, a SCROG net across the tent turns training into a paint-by-numbers exercise: you tuck growth under the screen until the canopy is a flat green table. The deeper reasoning is in our canopy management breakdown, the full menu of methods is in the cannabis training hub, and topping covers the cut in detail.
Common Indoor Growing Mistakes (and the Fixes)
Most failed indoor grows fail for the same handful of reasons, and every one is preventable once you know what to watch. Several of them are just beliefs that need correcting.

Light too close or too far. Too close and you bleach and burn the tops; too far and the plant stretches tall and airy, chasing intensity it is not getting. Our grow light distance guide gives starting heights and light targets by stage. Follow the maker's recommended hang height, then adjust by watching the plant - tight node spacing, meaning short gaps between leaf pairs, with the top leaves lifting slightly toward the light rather than curling away from it, means the light is right.
Overwatering in a small pot. The number one seedling killer indoors. A little plant in a big wet pot drowns because the roots cannot breathe. Water to the pot size, not the plant size, let the top inch (2.5 cm) of soil dry between waterings, and lift the pot - a light pot wants water, a heavy one does not. We walk through how often to water at every stage, seedling to late flower.

Humidity too high in a sealed tent. A closed tent traps the moisture the plants exhale, and in flower that is a direct invitation to bud rot. It is worth understanding why bud rot starts inside the bud before you set your humidity targets. If your hygrometer reads above target, increase exhaust, add a small dehumidifier, and thin dense growth so air can move through the canopy. How big that dehumidifier needs to be depends on how much you water, and our grow tent humidity guide works it out. Defoliation done right - see defoliating - opens airflow exactly where mold would start.
Flipping to flower too late. Because photoperiods stretch by half to double their height after the flip, waiting until the plant already fills the tent means it slams into the light mid-stretch. Flip when it has filled about half the vertical space.
Light leaks during flower. Photoperiods in flower need a true 12 hours of uninterrupted dark. Our guide to finding and fixing light leaks walks through the dark check. A power LED on your exhaust fan, a gap in the tent zipper, or a hallway light bleeding in can confuse the plant into re-vegging or throwing "nanners" - banana-shaped male pollen sacs on a female plant - that pollinate your buds. What a nanner looks like, and what to do the moment you find one, is covered in full separately. Zip the tent, cover stray lights, and check for leaks with the room dark.
Harvest, Dry, and Cure Indoors
The last stage is where an indoor grow is quietly won or lost. You can grow a perfect plant and still ruin it in three days of bad drying, and no curing trick gets that quality back. The advantage indoors is that you already own the environment that makes drying easy: the same tent that grew the plant makes an excellent drying space.

Dry in the dark at 60°F to 68°F (15°C to 20°C) with gentle indirect airflow, stepping the humidity up as the buds lose water: 50% for the first two days so no mold sets in, then 55% from day 3 until the buds are ready. If the room runs above 55% in those first two days, add a fan; above 60%, point it straight at the buds for those two days only, then move it away. Most flower is ready around day 7 and dense colas can take up to 14 days; it is done when a thin stem snaps cleanly instead of bending. A flat rack or a hang line both work indoors.

Then cure in sealed glass jars at 58% to 62% humidity, burping them daily for the first week. The full protocols live in our guides to drying, trimming, and curing. Do this part slowly. Two weeks in the jar is the minimum, and about a month is where it gets good.
Frequently Asked Questions
How much does it cost to grow weed indoors?
Less than most people expect. In our survey of 440 home growers, 43% spent under $250 all-in on their first grow, including gear and seeds. Buying every piece new at once - a small tent, an LED light, a fan, a filter, a pot and a hygrometer - lands between $350 and $750, plus about $200 a year in electricity. The median grower in the same survey spent $250 to $499 across twelve months and produced cannabis for about $0.75 a gram.
How long does it take to grow weed indoors?
About 3 to 6 months from seed to jar. An autoflower finishes fastest: most are ready to cut 9 to 11 weeks from seed (some larger cultivars run to 13), because it flowers on its own clock. A photoperiod takes 3 to 5 months to the cut, depending on how long you keep it in vegetative growth before flipping the light to 12/12. Those figures run to the day you cut; drying and curing add 3 to 6 weeks on the end - 7 to 14 days to dry, then two weeks minimum in the jar and about a month for the good stuff.
What is the best light for growing weed indoors?
A full-spectrum LED is the best choice for most indoor growers. It runs cooler than HPS, uses less electricity, and needs no bulb changes. Size it to your space rather than chasing wattage claims: aim for roughly 30 to 40 watts of real power draw per square foot of canopy (about 320 to 430 watts per square meter), and check the actual draw and PPFD rather than the inflated headline wattage on the box.
What size grow tent do I need?
For one plant, a 2 ft by 2 ft (60 cm by 60 cm) tent is enough if you train it flat. A 3 ft by 3 ft (90 cm by 90 cm) tent suits a bigger single plant or a small rotation, and a 4 ft by 4 ft (120 cm by 120 cm) tent handles one large trained plant or up to four smaller ones. Height matters as much as floor space, since plants stretch after the flip.
What temperature and humidity should I grow weed at indoors?
Seedlings want 72-78°F (22-26°C) and 70-80% humidity for the first two weeks. Veg wants 71-82°F (22-28°C) and 55-65%. Flower wants 70-80°F (21-27°C) and 50-60% humidity, dropping to 45-55% in late flower to prevent bud rot. The pattern is warm and humid for young plants, a touch cooler and drier as they flower. Keep the night temperature within about 10°F (about 6°C) of the day temperature.
Can I grow weed indoors without a tent?
Yes, a closet, cabinet, or spare corner can work, but you take on the jobs a tent does for you: blocking light leaks during flower, holding humidity, reflecting light back onto the plant, and controlling smell. Most beginners find that light-proofing and lining a closet costs about what a tent costs, so a cheap tent is usually the simpler, cleaner starting point.
How many plants can I grow in a 4x4 ft (120 x 120 cm) tent?
A 4 ft by 4 ft (120 cm by 120 cm) tent holds one large trained plant or up to four smaller ones. More plants is not automatically more yield indoors - one well-trained plant with an even canopy can fill the same footprint as four untrained ones. Beginners often do better with fewer plants trained well than with a crowded tent they cannot reach into.
How do I control the smell of an indoor grow?
Run your exhaust air through a carbon filter. An inline fan pulling tent air out through a properly sized carbon filter scrubs the odor before it leaves the tent, which is the standard and most reliable solution. Keep the tent sealed, replace the filter on schedule, and avoid oversizing the fan so the filter has enough contact time to do its job.
How much weed does one indoor plant yield?
It varies enormously with light, pot size, genetics, and training, so treat any single number with suspicion. A well-grown, well-trained indoor plant under an appropriately sized light commonly yields a few ounces. Light intensity and training move this figure far more than the strain name does - an even canopy under strong light is the biggest lever a home grower controls.
Should I grow indoors in soil or hydroponics?
For a first indoor grow, use soil. It is forgiving, buffers your mistakes, and needs no extra equipment beyond a pot. Hydroponics can grow faster and bigger, but it punishes errors quickly and adds pumps, reservoirs, and daily monitoring. Start in a fabric pot of quality soil, learn to read the plant, and move to hydro later if you want to chase speed.
Do autoflowers need a different light schedule indoors?
No, and that is the point of them. Autoflowers flower on their own internal clock regardless of day length, so many growers run them on 18 hours of light for the whole grow, from seedling to harvest. Photoperiods, by contrast, need long days to stay in veg and a switch to 12 hours on and 12 off to trigger flowering. Autoflowers remove that timing decision entirely.
What is the easiest indoor setup for a first grow?
One feminized autoflower, in a 5-gallon (19 L) fabric pot of quality soil, under a right-sized full-spectrum LED in a small tent, with an exhaust fan and carbon filter, a clip fan for circulation, and a thermometer-hygrometer at canopy height. Add low-stress training once the plant shows its 5th node, about 3 to 4 weeks in, while the stem is still flexible. That combination removes the most common failure points and gets you to harvest in about three months.
Can I use a normal LED light to grow weed indoors?
Not well. Household LED bulbs are built for how light looks to your eyes, not for the intensity and spectrum a flowering plant needs, so plants under them stretch and produce thin, airy buds. A purpose-built full-spectrum LED grow light delivers the intensity across the right wavelengths that cannabis needs to flower densely. It is the one component you should not improvise.
Is it legal to grow weed indoors?
It depends entirely on where you live. Home cultivation is legal in some countries, states, and provinces, restricted by plant count in others, and prohibited in many. Rules cover how many plants you may grow and whether they must be out of public view. Check your local law before you start, and note that everything here assumes fully legal cultivation.
Where to Go From Here
Growing weed indoors comes down to two things you control that outdoor growers cannot: the environment and the training. Set the weather steady, size your light to your space, and train the plant flat so more of it sits in strong light. Do those, dry slowly, and a small tent will out-produce and out-quality most of what you can buy.
A full indoor grow runs: choosing seeds → germination → how much light a seedling actually wants → transplanting → topping → low-stress training → defoliating → flowering → harvesting → drying → curing. If you have not settled the big-picture choices yet, the how to grow weed overview covers them, and the outdoor counterpart is growing cannabis outdoors.
When it is time to pick genetics, choose a strain bred for indoor size and a short stretch - it makes the height math in a tent much easier. The indoor-friendly seed options, along with the rest of the kit and rough prices, are in the shopping list above.
The gear that does the heavy lifting indoors is the training system - a fabric pot, LST clips, and tie-downs that turn one plant into a flat, even canopy under your light. If you would rather not assemble it piece by piece, the full BudTrainer kit has the set. Indoors, the plant only knows the environment you build for it, so build a good one.
References
- Rodriguez-Morrison, V., Llewellyn, D., & Zheng, Y. (2021). Cannabis yield, potency, and leaf photosynthesis respond differently to increasing light levels in an indoor environment. Frontiers in Plant Science, 12, 646020. https://www.frontiersin.org/articles/10.3389/fpls.2021.646020/full
- Backer, R., Schwinghamer, T., Rosenbaum, P., McCarty, V., Eichhorn Bilodeau, S., Lyu, D., et al. (2019). Closing the yield gap for cannabis: a meta-analysis of factors determining cannabis yield. Frontiers in Plant Science, 10, 495. https://www.frontiersin.org/articles/10.3389/fpls.2019.00495/full
- Potter, D. J., & Duncombe, P. (2012). The effect of electrical lighting power and irradiance on indoor-grown cannabis potency and yield. Journal of Forensic Sciences, 57(3), 618-622. https://onlinelibrary.wiley.com/doi/10.1111/j.1556-4029.2011.02024.x
- Vanhove, W., Van Damme, P., & Meert, N. (2011). Factors determining yield and quality of illicit indoor cannabis (Cannabis spp.) production. Forensic Science International, 212(1-3), 158-163. https://www.sciencedirect.com/science/article/abs/pii/S0379073811002738
- Chandra, S., Lata, H., Khan, I. A., & ElSohly, M. A. (2008). Photosynthetic response of Cannabis sativa L. to variations in photosynthetic photon flux densities, temperature and CO2 conditions. Physiology and Molecular Biology of Plants, 14(4), 299-306. https://link.springer.com/article/10.1007/s12298-008-0027-x
- Punja, Z. K. (2021). Emerging diseases of Cannabis sativa and sustainable management. Pest Management Science, 77(9), 3857-3870. https://onlinelibrary.wiley.com/doi/10.1002/ps.6307

About the Author
Henrique Dias is the CEO and co-founder of BudTrainer. He is a mechanical engineer who also holds a graduate certificate in Commercial Cannabis Production from Niagara College in Ontario, Canada - the first college-level cannabis cultivation program in North America. Before founding BudTrainer, Henrique worked with Health Canada licensed cannabis producers, where he gained hands-on experience in cultivation, processing, and post-harvest management of cannabis at commercial scale. He started BudTrainer to bring that same level of craft to home growers through better-designed gardening tools and clear, science-backed education.
DISCLAIMER: Everything taught and sold by BudTrainer® is to be used strictly for legal purposes. We do not endorse the production of illegal substances and it is your duty to ensure that you are complying with the law. The words "hemp," "cannabis," "weed," and "marijuana" are used interchangeably to refer to the same plant (legal hemp with less than 0.3% THC) for the purposes of this lesson.