Quick answer: Dry cannabis in a dark room at 60°F to 68°F (15°C to 20°C) with gentle indirect airflow, stepping the humidity up as the buds dry down: 50% RH for the first 2 days, then 55% from day 3 until the stems snap. Most flower is jar-ready around day 7; dense colas can take up to 14 days. Buds are dry when a thin stem snaps cleanly with a "crack" sound instead of bending. Keep the fan off the buds, with one exception: if the room is above 60% RH in the first 2 days, point a fan straight at them for those 2 days, then move it away.
Drying cannabis is the step where most home growers quietly destroy weeks of work without knowing it. Trichomes that took 8 to 12 weeks to develop can lose a large share of their terpene content in a few days of fast drying, and there is no curing trick that gets it back. This guide covers exactly how long drying takes, what humidity and temperature to target, the step-by-step process, the hang-vs-grid decision, the most common mistakes and how to fix them, and the science behind why slow drying produces better flower.
If you have just chopped your plants down, the work is not over. Drying cannabis correctly is what separates flower that smells like the strain it is supposed to be from flower that smells like cut grass. The good news is the rules are simple, the bad news is most of the cannabis content online still publishes outdated humidity targets that produce harsh smoke. This guide sets out the schedule we use on our own harvests and walks through the full drying process.
Drying picks up the moment you finish harvesting your cannabis plants at the end of the 8-to-12 week flowering window, and ends right before dry trimming and curing. If you are not yet at chop, start with the harvest guide first. If you have already cut your plants down, the next week or two matter more than anything you do afterward. Drying is the bridge between the plant you grew and the jar you smoke from, so if you are mapping out how to grow weed from seed to jar, this is where the harvest either keeps or loses its quality.
How Long Does It Take to Dry Cannabis?
Cannabis takes 7 to 14 days to dry on our schedule. Most flower is jar-ready around day 7; dense colas can need up to 14. Anything under 5 days is too fast and degrades quality. Anything over 16 days risks mold.
The wide range exists because three factors change the timeline meaningfully:
- Whether you are drying whole plants, branches, or trimmed buds. Whole plants dry slowest because the main stem holds water and feeds it slowly into the buds. Trimmed buds on a flat rack dry fastest because there is more exposed surface and less plant mass. Branches sit in the middle.
- Humidity in the drying space. Our schedule starts dry, at 50% RH for the first 2 days so nothing molds while the buds are wettest, steps to 55% from day 3, and lands most flower around day 7. A wetter room adds days. A room held below 50% from start to finish can be done in 4 to 6 days, which is too fast.
- Bud density. Dense, well-trained plants with tight, golf-ball-sized buds dry slower than loose, fluffy buds because moisture has to migrate from the inside out.
By the end of drying, plants will lose 75% to 80% of their total weight to water evaporation. A plant that weighs 1,000 grams wet finishes drying at roughly 200 to 250 grams. That weight loss is the most reliable benchmark you have, more reliable than counting days.
The same timeline applies to autoflowers as it does to photoperiod plants. Autoflower drying is not a different process - the genetics affect grow time, not drying time. Treat an autoflower harvest the same way you would treat any other harvest of equivalent bud density.

Why Slow Drying Beats Fast Drying
The longer cannabis takes to dry within reason, the more of the strain's original aroma and flavor it keeps. Terpenes are volatile compounds, which means they evaporate at room temperature. Monoterpenes like myrcene and limonene are the first to go, and heat is what drives them off: drying above roughly 40°C (104°F) measurably reduces terpene concentration while leaving cannabinoid levels largely alone.1 A hot, fast dry strips them out before the bud is even ready to cure.
A bud that dried in 4 days will smell flat compared to the same bud dried in 10. There is no curing technique that recovers what fast drying loses. This is the single most important reason to slow down and aim for the 7 to 14 day window rather than rushing to smoke or sell.
Ideal Humidity and Temperature for Drying Cannabis
Our drying standard is a dark room at 60°F to 68°F (15°C to 20°C) with gentle indirect airflow and a humidity schedule that steps up as the buds dry down: 50% RH for the first 2 days, so no mold gets a start while the buds are wettest, then 55% from day 3 until the stems snap. Most flower is ready for the jar around day 7. Dense colas may need up to 14 days, and you hold them at 55% until they do. Then jar at 58 to 62%.
You will see the "60/60 rule" (60°F, or 16°C, at 60% RH) recommended almost everywhere. It appears in no paper we can find; it is grower folklore. The postharvest reviews put cannabis drying at 18 to 21°C (64 to 70°F) and 50 to 55% RH,1,2 and a 2024 controlled study is the reason we start at the dry end of that range: a traditional 15-day dry at 50 to 55% RH left about 80% of one cultivar's flowers infested with Alternaria and caused more decarboxylation, while a faster 6-day dry in a controlled-atmosphere chamber preserved the terpenes.3 The mold risk is highest in the first two days when the buds are wettest, so that is where we hold the room driest; the terpene risk is highest at the end when they are nearly dry, so that is where we ease up. This is how we dry our own harvests, and it is what the rest of this guide follows.
Why These Specific Numbers
The targets are not arbitrary. They sit inside the narrow window where two things happen at once:
- Water evaporates from the buds slowly enough that monoterpenes do not go with it. The clear, measured terpene losses start around 40°C (104°F), far above the room, but terpenes still evaporate slowly below that, so within the 60°F to 68°F (15°C to 20°C) band the slower, cooler dry is the gentler one. Below 55°F (13°C), drying stalls and risks mold.
- Vapor pressure deficit (VPD), the pull the air exerts on the water in the bud, starts firm and eases off. The dry first two days pull water out while the buds have plenty to give; stepping the humidity up afterwards slows the pull, so the outside never dries so far ahead of the core that the inside stays wet. Moisture moves from the inside out: water in the stem and the core of the bud migrates to the surface and evaporates there, which is why a bud can feel dry to the touch days before its middle is.
VPD is the more accurate way to think about drying than RH or temperature alone, but you do not need to calculate it. Hold the room at 60°F to 68°F (15°C to 20°C), follow the humidity schedule, and the VPD takes care of itself. While the plant is still growing it is a different job, with VPD targets for every growth stage.
Scott Golem runs the cool end. Our reviewer dries at about 15°C (59°F) in commercial rooms and keeps it there the whole way, well away from room temperature. His test for a room that is too warm is smell: if you can smell the terpenes in the air, they are no longer on the plant. A cool drying room that smells of very little is doing its job, even though growers often take that as a sign something is wrong, and in his experience a room that smells strongly of the cultivar is drying too warm. The catch with running cool is humidity. Cooler air holds less water, so the same load of wet buds pushes the relative humidity higher, and a full room may need more dehumidifier capacity, or a couple of degrees more warmth, to hold 50 percent in the first two days.
Drying Environment Targets
| Stage | Days | Temperature | Humidity | Airflow |
|---|---|---|---|---|
| Initial | Day 1 to 2 | 60-68°F (15-20°C) | 50% RH | Light indirect (fan on the buds only if the room is above 60%) |
| Finish | Day 3 until the stems snap (most flower day 7, dense colas to day 14) | 60-68°F (15-20°C) | 55% RH | Light indirect |
The steps are the point, so do not skip them on a small grow: a cheap hygrometer and a dehumidifier with a humidistat are enough to hit them. If you cannot hold the room that dry in the first two days, the fan rule below covers it.
Scott Golem takes the step one further: for the last two or three days of the dry he lets the room come up to 58 to 60 percent, the humidity the jar will hold, so the buds have already started to even out before they go in. It is a sound finish if your room can hold it steadily. Our schedule stays at 55 percent to the snap.
Do not point a fan directly at the buds, with one exception. Direct airflow dries the outside of buds while the inside stays wet, which traps chlorophyll and creates the harsh hay smell that most fast-dried cannabis suffers from. Use indirect airflow: a small fan pointed at a wall, ceiling, or floor is enough to keep air moving without blasting your harvest. The exception is a wet room in the first 2 days. If it is above 55% RH, add a fan. If it is above 60%, point a fan straight at the buds for those 2 days, then move it away. Two days of direct air on wet buds costs you far less than mold does.
For the indirect air itself, Scott Golem uses two fans, one high and one low, aimed so the air travels around the room in a slow circle instead of at any one spot. The loop keeps the whole space moving without a single stream landing on the buds.

Pointing the fan at the wall is the everyday rule; the wet-room exception for the first 2 days is above.


Get the free Drying Cheat Sheet
The room setup, the three drying methods, and the snap-and-scale test that tells you it is done. One page to set the room up, one to finish and jar it. Printable, phone-friendly.
Get the Drying Cheat SheetHow to Dry Cannabis: Step by Step
The drying process has five real steps, from setting up the space to knowing when buds are ready to come down. None of them are technically difficult, but skipping any one of them costs quality.
Step 1 - Set Up the Drying Space
Before chopping anything, get the drying space dialed in. You need:
- A dark room or enclosed space. Light degrades cannabinoids over time, particularly THC, which photo-oxidizes to CBN under UV.4 Tents work, closets work, dedicated drying rooms work.
- Temperature control: 60°F to 68°F (15°C to 20°C). Most basements naturally sit in this range; a dedicated tent in a 75°F (24°C) room will need cooling.
- Humidity control: 50% RH for the first 2 days, then 55%. Put a small dehumidifier in the room with a hygrometer to monitor; a model with a humidistat holds each setpoint for you. The cheapest sensor pack from any hardware store is good enough.
- Indirect airflow. One small fan pointed at a wall, not the buds (unless the room is above 60% RH in the first 2 days - see the fan rule above).
- Hanging hardware. A clothesline, garment rack, drying rack, or repurposed clothes hangers all work. We use plastic clothes hangers with yellow garden ties for branch-by-branch drying.

Run the space empty for 24 hours before chopping to confirm temp and humidity hold steady.
Size the dehumidifier for day one, not day seven: realizing on day 2 that it cannot keep up is the number one preventable failure here, and Scott Golem sees it as the most common drying mistake in commercial rooms: the first two days release far more water than people expect, and a machine that coasts through the rest of the dry cannot keep up at the start. The opposite mistake follows, running it hard long after the load has dropped. If your dehumidifier has a drain port, run a hose from it to a floor drain or sink rather than relying on its tank. The tank fills fast in the first two days, and when it is full the machine switches itself off, so a room you think is at 50 percent climbs overnight. He has seen harvests mold for exactly that reason.
If you are drying a single plant or a small batch, the same setup applies at a smaller scale. A bedroom closet with one fan, one hygrometer, and one or two hangers is enough. The principles do not change with quantity, only the equipment size.
Step 2 - Pick Your Trim Method Before You Hang
Before anything hangs, decide whether you are going to wet trim, dry trim, or do the partial wet trim we recommend. The choice changes the leaf mass on your buds during drying, which changes the drying speed and the mold risk profile. The right pick depends on how dry you can actually hold the room you set up in Step 1:
- Room stuck above 60% RH: wet trim. Less leaf mass dries faster and reduces mold risk.
- Room that sits below 50% RH on its own: dry trim. Leaves stay on to slow moisture loss and preserve terpenes.
- Room that holds the schedule but only just, 50 to 60% RH (most rooms): partial wet trim, the approach we recommend. Strip fan leaves at harvest, leave sugar leaves on through the dry, then manicure the sugar leaves after.
For the full decision framework, the 4-step manicure technique, and what to do with the trim itself, see our complete trimming guide.
Step 3 - Hang Whole Plants, Hang Branches, or Use a Drying Rack
Three options. The right one depends on how much space you have, how high your ambient humidity is, and whether you wet-trimmed.
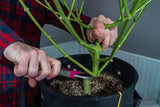
Whole plant. Cut the stem at the base and hang the entire plant upside down using a wire or hook. Slowest, gentlest dry. Requires the most space.
Branches. Cut major branches off the main stem, then hang each branch individually using a clothes hanger or garden ties on a clothesline. Moderate speed. Best balance of space efficiency and quality.

Flat drying rack. Trim individual buds off the branches and lay them flat on a mesh drying rack. Fastest dry in any given room; the 7 to 10 days in the table below is for the humid rooms a rack usually ends up in. Required if you wet-trimmed. Highest space efficiency. Buds resting on mesh dry with one flat side where they lie, so if looks matter, turn each bud once a day, handling it by the stem.

Step 4 - Daily Monitoring
Check the drying space once a day. Three things to confirm:
- Humidity is on schedule. If RH is running above the day's target (50% on days 1 and 2, 55% from day 3), the buds are releasing water faster than the room can absorb it, and you need to bump dehumidifier output - or, in the first 2 days, put the fan on the buds. If RH is running well below the target, drying is moving too fast and you should reduce ventilation.
- No mold visible. Look for white fuzzy patches between buds, particularly inside dense colas where airflow is weakest. Smell test: a faint sweet hay smell is normal, a sour or musty smell is mold and you need to act.
- Buds are dehydrating evenly. The outside of the buds will tighten before the inside; this is normal. By day 5 or 6, the smaller branches should already feel noticeably lighter than they did on day 1.
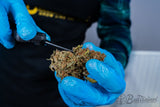
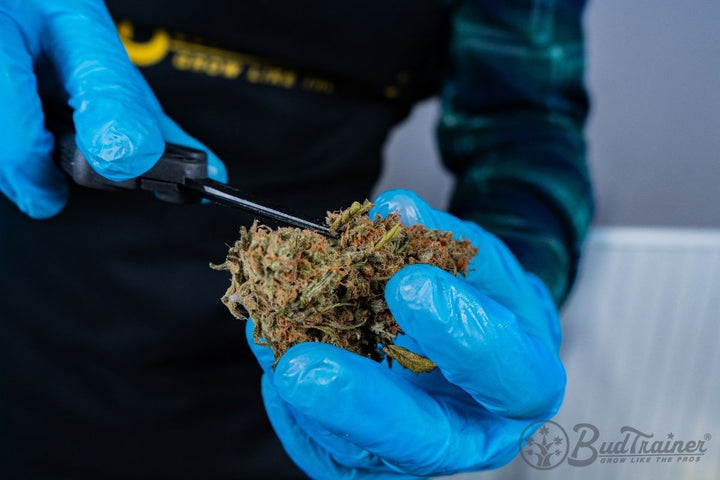
Resist the urge to handle the buds during drying. Each time you squeeze or grab a bud, you knock off trichomes and compromise resin coverage. Look, do not touch. When you do need to check, sniff or turn one, hold it by the stem, never the flower.
Step 5 - Know When Drying Is Finished
The stem snap test is the most reliable readiness check. Pick a thin lateral branch, take it between your fingers, and bend it.
- If it bends without snapping, drying is not finished. Wait 24 to 48 hours.
- If it snaps with a clean "crack" sound, drying is complete. The buds are ready for trim and cure.
- If the buds feel dry and brittle to the touch and crumble easily, drying went too far. Move to curing immediately and use Boveda packs or another rehydration method to recover moisture.

Confirm against the weight loss benchmark too. Weigh a representative branch on day 1, then weigh it again at the snap-test moment. If you have lost 75% to 80% of the original weight, drying is genuinely finished. If only 60%, the snap is misleading you and the inside is still wet.
Hanging Whole Plant vs Branches vs Grid Drying
This is the most-asked question in home cannabis drying, and the answer depends on three variables: ambient humidity, available space, and how much you care about terpene preservation.
| Method | Drying time | Terpene preservation | Space required | Best when |
|---|---|---|---|---|
| Whole plant | Up to 14 days | Best | High | The room holds the schedule with margin and the plant fits the space |
| Branches | About 7 days, dense colas up to 14 | Very good | Medium | The room holds the schedule; the default |
| Flat rack | 7-10 days | Good | Low | Room stuck above 60% RH, wet-trimmed buds, limited space |

If you are stuck between options, default to branch-by-branch hanging. It works in almost any home grow setup, gives you near-best terpene preservation, and uses moderate space. The whole-plant method has small advantages but only if your space is large enough and your room holds the schedule with margin to spare.
Outdoor harvests in humid climates almost always go the flat-rack route, often with light wet trimming first. Indoor harvests in controlled environments default to branch hanging or whole-plant hanging.
Common Drying Mistakes and How to Fix Them
Most failed harvests fail at drying, not growing. Here are the recurring mistakes home growers make, what causes them, and how to fix them mid-dry if you can catch them in time.

Mistake 1: Drying Too Fast
Symptom: Buds are dry to the touch in 4 to 5 days, smell flat or "hay-like," and feel brittle. The grass-clipping smell is the giveaway.
Cause: Humidity held below 50%, or left at 50% past day 2, temperature above 68°F (20°C), a fan left pointed at the buds past day 2, or all of them.
Fix mid-dry: Stop ventilation immediately. Move buds to a smaller, more humid space (a closed Tupperware container with a damp paper towel, opened daily). Cure aggressively with 62% RH Boveda packs. Some terpenes are gone permanently, but you can rescue most of the smoke quality with a patient cure (about a month).
Prevention: Step the humidity up on schedule - 50% is for the first 2 days only, then 55% - and get the fan off the buds after day 2.
Mistake 2: Drying Too Slow (Mold)
Symptom: White fuzzy patches between buds, sour or musty smell, dense colas with discolored centers. Mold is most often Botrytis cinerea (gray mold/bud rot) and it spreads fast.5
Cause: Humidity above 70% for more than 24 hours, no airflow, or dense buds with poor internal ventilation.
Fix mid-dry: Inspect every bud. Do not try to cut the mold out of a bud: discard the whole bud and the buds that were touching it, lifting them out gently so you do not shake spores onto the rest. Mold usually runs further into a bud than the patch you can see. Our reviewer Scott Golem is firm that this is a health call as well as a quality one. The gray fuzz is usually Botrytis, which is not a major toxin producer, but a moldy bud rarely carries only one organism: the fungi found on dried cannabis include Aspergillus, which produces aflatoxins and ochratoxin A and has been linked to lung infections in cannabis users, most often people with weakened immune systems.6 Our complete bud rot guide covers what is safe to keep and what is not. Increase airflow and hold the room at 50% for 24 hours to dry the remaining material faster. If mold has reached more than 20% of the harvest, you are likely going to lose most of it. Mold is a hard fail.

Prevention: Never let humidity sit above 65%, and in the first 2 days never above 60% without a fan on the buds. Use a dehumidifier with a humidistat, not a manual one. Pre-harvest defoliation removes excess plant material and improves airflow inside dense colas.
Mistake 3: Inconsistent Environment
Symptom: Some branches dried in 6 days, others took 12. Final smoke quality is uneven across the harvest.
Cause: Temperature or humidity swings during drying. Drying space near a window with sunlight, near an HVAC vent, or in a basement with day-night humidity changes.
Fix: Stabilize the environment, even if it is not at the perfect target. A steady 55% RH at 65°F (18°C) is better than a swinging 45-70% range at 60°F (16°C). If your space swings both ways, Scott Golem suggests running a humidifier and a dehumidifier together, each on its own humidistat, so one catches the room when it goes dry and the other when it goes wet.
Mistake 4: Direct Airflow on the Buds
Symptom: Outer leaves on buds look crispy and curled inward; inside the bud is still wet and feels spongy.
Cause: Fan pointed at the plants. Even a low setting concentrates airflow on whatever it is aimed at.
Fix: Reposition the fan to circulate room air without hitting the buds directly. Stagnant pockets of air are also bad, but direct flow is much worse.
Mistake 5: Jarring Buds Too Early
Symptom: Stems snap during the test, but buds rehydrate inside the jar after 6-12 hours of curing. The "stem snap" was misleading because of dry exterior, wet interior.
Cause: Drying environment was too aggressive on the outside; inside of dense buds never got the time to release their water.
Fix: Open the jars and let buds breathe for 6 to 12 hours, then re-jar. If they are above 65% RH inside the jar after a day, they need another 24 to 48 hours of hanging time.
Drying Tents, Drying Boxes, and Freeze Drying
If your house ambient does not naturally cooperate, you have three structured options for creating a controlled drying environment.
Drying Tents
A grow tent works as a drying tent without modification. Hang the plants or branches inside, run a small fan for indirect airflow, and add a dehumidifier or humidifier as needed to hold the target range. The advantage is light-tight enclosure and easy environmental control. The disadvantage is sharing space with active plants if you only have one tent. Dedicated drying tents (smaller, designed for the purpose) cost less than full grow tents and work well for harvests of 4 to 8 plants at a time.
Drying Boxes
A drying box is an enclosed unit with internal racks, often with built-in humidity and temperature control. Useful for small batches or for growers who want set-and-forget control. Sizes range from desktop units (a few ounces, around 100 g, capacity) to closet-sized units. A DIY drying box can be built from a foam cooler with a small fan and a hygrometer for under $50 and works fine for small harvests. For something bigger, Scott Golem has seen growers use a wardrobe box, the tall cardboard box moving companies sell for hanging clothes: it is roughly the size of a small grow tent and comes with a rail to hang branches from, so it needs only a small fan and a hygrometer inside.
Freeze Drying
Freeze drying (lyophilization) uses a sealed chamber that freezes the cannabis solid then sublimates the water out under vacuum. The process takes 24 to 48 hours instead of 7 to 14 days and bypasses mold risk entirely. What it does not do is keep more of the aroma. A 2024 comparison found that freeze drying stopped the acid cannabinoids from decarboxylating but lost more of the volatile compounds that carry the smell than conventional tray drying.7 That fits what our reviewer Scott Golem sees: freeze-dried buds look excellent, but some people find they smoke oddly, and a lot of freeze drying in the industry goes to flower destined for extraction rather than the jar. The other catch is cost: a home freeze dryer runs $2,500 to $5,000 USD, which only makes sense for serious enthusiasts or commercial operations.
For most home growers, a tent or a small drying box is the right answer. Freeze drying is a luxury upgrade rather than a necessity, and the conventional method produces excellent flower at a fraction of the cost when done correctly.
After Drying: An Introduction to Curing Cannabis
Drying is the first half of post-harvest. Curing is the second half, and just as important.

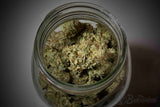
Once your stems snap and the weight loss benchmark is hit, transfer your buds (after dry trimming, if you went that route) into airtight glass jars filled to 75% capacity. The remaining moisture deep inside the buds slowly migrates outward and equilibrates with the air space in the jar. This redistribution is what curing actually does, alongside ongoing chlorophyll degradation and slow cannabinoid maturation.
For the first 7 days, "burp" the jars by opening them for 5 to 10 minutes once a day. This releases the humid air, allows fresh oxygen in, and prevents anaerobic conditions that cause that distinctive ammonia-like off-smell. Use a small hygrometer inside the jar (58 to 62% RH is the target; we run the drier end). In week 2, burp every 2 to 3 days for 2 to 3 minutes, then weekly through weeks 3 and 4. Cure for 14 days at an absolute minimum and about a month to actually be good.
Scott Golem burps differently, and says plainly that it is his own practice rather than a tested method. Opening the lid exchanges the air in a jar almost at once, so he opens it, gives the jar a gentle shake and closes it again rather than leaving it open for minutes; oxygen is one of the things that breaks cannabinoids down, so he keeps the exposure short. When the buds went in at the right moisture with a humidity pack, he has left jars closed for two weeks before the first burp and seen no difference from burping often. Our schedule follows the curing guide, which owns it.
For long-term storage, sealed jars at 62% RH using Boveda packs preserve quality for 6 months or more. Keep them in the dark and at room temperature.
The full curing protocol is its own topic and deserves a dedicated walkthrough. For the complete burping schedule, jar selection, 2-way humidity pack framing, and long-term storage protocol, read our complete guide to curing cannabis.
The Science of Why Slow Drying Matters
The "slow dry is better" rule is not folklore. It is the consequence of three independent biochemical processes that all benefit from a longer drying window.

Terpene volatility. Cannabis terpenes are responsible for strain-specific aroma and flavor, and many of them have low boiling points. Myrcene boils at 167°C (333°F) but evaporates measurably at room temperature, and faster with every degree of heat. Limonene, pinene, and linalool follow similar evaporation curves. Direct comparison of fresh versus air-dried Cannabis sativa buds documents measurable shifts in volatile oil composition between the two states, particularly in the lower-boiling monoterpene fraction.8 A faster dry exposes these compounds to longer cumulative time at higher temperatures, accelerating their loss - the reason postharvest guidance keeps pushing growers toward a low, steady drying temperature.1 A slower dry at lower temperature minimizes the loss.
Chlorophyll degradation. Freshly cut cannabis is full of chlorophyll, which is what produces the harsh, hay-like, "green" taste in fast-dried flower. Chlorophyll breaks down enzymatically over time, and that breakdown happens during the drying and curing process. The dry on its own does not allow enough enzymatic activity to convert most of the chlorophyll into less harsh compounds. A steady 7 to 14 day dry, followed by a cure of about a month, gives those enzymes the time they need.
Cannabinoid stability. Heat and light degrade cannabinoids. THC oxidizes to CBN under prolonged exposure to oxygen, heat, and UV.4 A drying environment held at 60°F to 68°F (15°C to 20°C) in the dark minimizes this oxidation. Fast drying at higher temperatures accelerates THC loss, particularly in already-mature buds harvested at full ripeness.
The trade-off is that slow drying carries higher mold risk if humidity is not controlled. This is why the schedule starts dry: 50% RH in the first two days, when the buds are wettest, keeps the room well clear of the 70%+ range where Botrytis cinerea takes over, and stepping up to 55% from day 3 keeps the rest of the dry slow.5
Frequently Asked Questions
How long does it take to dry cannabis?
Cannabis takes 7 to 14 days to dry on our schedule: most flower is jar-ready around day 7, and dense colas can need up to 14. The exact time depends on humidity (lower RH dries faster), drying method (whole plants are slowest, flat racks are fastest), and bud density. Drying that finishes in under 5 days is too fast and will degrade quality.
What is the ideal humidity for drying cannabis?
We step it: 50% relative humidity for the first 2 days so no mold gets a start, then 55% from day 3 until the stems snap, then jar at 58 to 62%. That is the dry end of the 50 to 55% range the postharvest reviews land on. The popular 60/60 rule appears in no paper we can find, and a 2024 controlled study found that a traditional 15-day dry at 50 to 55% left about 80% of one cultivar's flowers infested with Alternaria, where a faster dry preserved terpenes. Pair the schedule with 60-68°F (15-20°C) and indirect airflow.
Can you dry weed too fast?
Yes, and it is the most common drying mistake. Fast drying at low humidity or high temperature evaporates terpenes before they can be preserved, and traps chlorophyll inside the bud, producing harsh, hay-tasting smoke. If your stems are snapping in under 5 days, your environment is too aggressive. Reduce ventilation, increase humidity, and slow it down.
Should I trim cannabis wet or dry?
Pick based on your drying room humidity. Wet trim above 60% RH because faster drying lowers mold risk. Dry trim below 50% RH because the leaves slow moisture loss and preserve terpenes. For the 50 to 60% RH middle range where most growers sit, partial wet trim is what we recommend - strip fan leaves at harvest, dry-trim the sugar leaves after. See our trimming guide for the full decision framework.
How do you know when cannabis is dry?
Use the stem snap test. Bend a thin branch between your fingers. If it snaps with a clean "crack" sound, drying is complete. If it bends without snapping, give it another 24 to 48 hours. Confirm against the weight loss benchmark: drying is done when buds have lost 75% to 80% of their starting weight.
What is the difference between drying and curing cannabis?
Drying removes 75% to 80% of the moisture from harvested cannabis over 7 to 14 days in open air. Curing happens afterward in sealed glass jars over 3 to 4 weeks, during which remaining moisture redistributes evenly through the bud, chlorophyll continues to break down, and cannabinoids stabilize. Drying is fast and visible; curing is slow and improves quality through patience. Both matter.
Can you freeze dry cannabis at home?
Yes, with a home freeze dryer. The process takes 24 to 48 hours instead of 7 to 14 days and avoids mold risk, but it does not keep more of the aroma: a 2024 comparison found it lost more of the volatile compounds than conventional drying, and some growers find freeze-dried flower smokes oddly. The downside is cost: home freeze dryers run $2,500 to $5,000 USD, which only makes sense for committed enthusiasts. For most growers, a properly controlled tent or drying box produces excellent results at a fraction of the cost.
Can I dry cannabis in a paper bag?
A paper bag works as a finishing tool but not as the main drying method. Once your buds are 70% dry from hanging, you can transfer them to paper bags for the final 1 to 2 days of equilibration before jarring. Do not dry fresh buds in a bag from day one. Scott Golem, who reviewed this guide, has seen people try it: wherever buds touch each other inside the bag they almost always mold, because the paper wicks some moisture away but no air moves inside. Keep the bag to buds that are already mostly dry.
How long does outdoor cannabis take to dry?
Outdoor cannabis takes the same 7 to 14 days to dry as indoor cannabis, assuming you bring it into a controlled drying space immediately after harvest. Outdoor harvests often happen in humid fall climates (above 65% RH outside), so most outdoor growers move plants into a basement, garage, or drying tent rather than attempting to dry them in ambient outdoor conditions.
What humidity is too high for drying cannabis?
Above 70% RH for more than 24 hours significantly increases mold risk, particularly inside dense colas where airflow is poor. Run a dehumidifier to hold the schedule (50% for the first 2 days, then 55%), and in the first 2 days put a fan on the buds if the room is above 60%. If your dehumidifier cannot keep up, switch to flat-rack drying or branch-by-branch with light wet trimming to improve airflow around the buds.
Should I dry whole plants or branches?
Branches are the practical default for most home growers. Whole-plant drying gives slightly better terpene preservation but requires more space and only works if your room holds our schedule with margin to spare. Branch-by-branch hanging works in almost any home setup, takes less space, and produces near-equivalent quality. Flat-rack drying is for high-humidity environments and wet-trimmed buds.
What happens if I dry cannabis too slow?
If drying takes more than 16 days, mold becomes a real risk. Watch for white or gray fuzzy patches between buds and a sour or musty smell. Mid-dry, increase airflow and hold the room at 50% for 24 hours to speed things up. If mold appears, discard the whole affected bud and the buds touching it rather than cutting the patch out. Keep the room on schedule to avoid this scenario in the first place.
Can you dry cannabis in a tent without a fan?
No, you need at least gentle airflow to prevent mold. The fan does not need to point at the buds, just circulate room air. A small fan pointed at a tent wall or floor on its lowest setting is enough. Stagnant air inside a sealed tent at 60%+ RH is the fastest way to grow gray mold on an otherwise good harvest.
Is it safe to smoke uncured cannabis?
Technically yes, but it tastes harsh and feels different. Uncured cannabis still contains residual chlorophyll and uneven moisture distribution, which produces a grassy, scratchy smoke and often a less coherent high than properly cured flower. The same harvest, smoked at week 1 versus week 4 of cure, is noticeably different. Wait at least 2 weeks of curing before judging the final quality of any harvest.
Do autoflowers dry faster than photoperiod plants?
No. Drying time is determined by humidity, temperature, airflow, and bud density, not strain genetics. Autoflowers and photoperiod plants follow the same 7 to 14 day timeline. The genetics affect grow time, not drying time. Use the same drying schedule and stem snap test for both.
Get the free Drying Cheat Sheet
The room setup, the three drying methods, and the snap-and-scale test that tells you it is done. One page to set the room up, one to finish and jar it. Printable, phone-friendly.
Get the Drying Cheat SheetWhere to Go From Here
Drying is one stage of a longer process. A full, high-yield grow runs: types of cannabis seeds → germination → planting → transplanting → topping → low-stress training → defoliating → harvesting → drying (you are here) → curing.
If you have not yet harvested, start with our harvesting guide. For an end-to-end view of how training affects bud density and the cure quality you can expect from your harvest, the canopy light and energy flow article is the deeper read.
Once your jars are sealed and your harvest is officially in cure, the only thing left is planning what you are running next. We use SeedSupreme for our team's seed sourcing. Solid feminized selection, predictable shipping, and enough strain variety that we can match genetics to whatever the next test grow is. Pick something worth drying slowly.
The work that produces buds worth a 14-day dry happens upstream, during training. A plant trained correctly with low stress training clips, grown in a fabric pot like the BudPots, and finished with a level canopy produces denser, more even buds that dry predictably. Drying is the test of everything you did before harvest. Doing all of that right is what makes that test easier to pass.
References
- Das, P. C., Vista, A. R., Tabil, L. G., & Baik, O. D. (2022). Postharvest operations of cannabis and their effect on cannabinoid content: a review. Bioengineering, 9(8), 364. https://doi.org/10.3390/bioengineering9080364
- Challa, S. K. R., Misra, N. N., & Martynenko, A. (2021). Drying of cannabis - state of the practices and future needs. Drying Technology, 39(14), 2055-2064. https://doi.org/10.1080/07373937.2020.1752230
- Birenboim, M., Brikenstein, N., Duanis-Assaf, D., Maurer, D., Chalupowicz, D., Kenigsbuch, D., & Shimshoni, J. A. (2024). In pursuit of optimal quality: cultivar-specific drying approaches for medicinal cannabis. Plants, 13(7), 1049. https://doi.org/10.3390/plants13071049
- Trofin, I. G., Dabija, G., Vaireanu, D. I., & Filipescu, L. (2012). Long-term storage and cannabis oil stability. Revista de Chimie, 63(3), 293-297. https://revistadechimie.ro/Articles.asp?ID=2851
- Punja, Z. K. (2021). Emerging diseases of Cannabis sativa and sustainable management. Pest Management Science, 77(9), 3857-3870. https://doi.org/10.1002/ps.6307
- Gwinn, K. D., Leung, M. C. K., Stephens, A. B., & Punja, Z. K. (2023). Fungal and mycotoxin contaminants in cannabis and hemp flowers: implications for consumer health and directions for further research. Frontiers in Microbiology, 14, 1278189. https://doi.org/10.3389/fmicb.2023.1278189
- Spadafora, N. D., Felletti, S., Chenet, T., Sirangelo, T. M., Cescon, M., Catani, M., De Luca, C., Stevanin, C., Cavazzini, A., & Pasti, L. (2024). The influence of drying and storage conditions on the volatilome and cannabinoid content of Cannabis sativa L. inflorescences. Analytical and Bioanalytical Chemistry, 416(16), 3797-3809. https://doi.org/10.1007/s00216-024-05321-w
- Ross, S. A., & ElSohly, M. A. (1996). The volatile oil composition of fresh and air-dried buds of Cannabis sativa. Journal of Natural Products, 59(1), 49-51. https://pubs.acs.org/doi/10.1021/np960004a

About the Author
Henrique Dias is the CEO and co-founder of BudTrainer. He is a mechanical engineer who also holds a graduate certificate in Commercial Cannabis Production from Niagara College in Ontario, Canada - the first college-level cannabis cultivation program in North America. Before founding BudTrainer, Henrique worked with Health Canada licensed cannabis producers, where he gained hands-on experience in cultivation, processing, and post-harvest management of cannabis at commercial scale. He started BudTrainer to bring that same level of craft to home growers through better-designed gardening tools and clear, science-backed education.

About the Reviewer
Scott Golem, MSc reviewed this guide for technical accuracy in September 2026. Scott is the Associate Director of the Horticultural and Environmental Sciences Innovation Centre at Niagara College in Ontario, Canada, where he runs the college's controlled-environment cannabis research facility and its research greenhouse. He holds a BSc in Forensic Science from Trent University, an MSc in Biotechnology from Brock University and a graduate certificate in Commercial Cannabis Production from Niagara College, and has been teaching and researching in post-secondary education since 2009, at Brock University and Niagara College, across plant science, genetics, and greenhouse cultivation. Before moving into research, Scott was a Master Grower and Plant Scientist for licensed producers, where he led breeding and crop-optimization programs. He reviews these guides personally rather than on behalf of any institution.
DISCLAIMER: Everything taught and sold by BudTrainer® is to be used strictly for legal purposes. We do not endorse the production of illegal substances and it is your duty to ensure that you are complying with the law. The words "hemp," "cannabis," "weed," and "marijuana" are used interchangeably to refer to the same plant (legal hemp with less than 0.3% THC) for the purposes of this lesson.