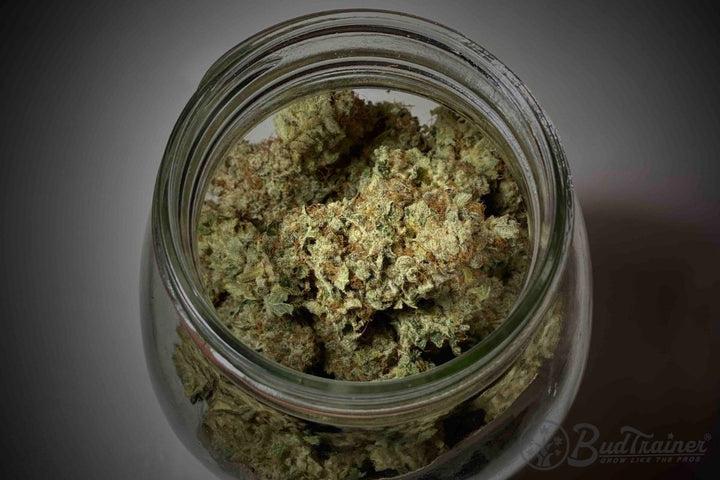
Quick Summary: Trim cannabis after harvest using one of three approaches: wet trim if your drying room is humid (above 60% relative humidity, RH from here on), dry trim if it is dry (below 50% RH), or partial wet trim - our recommended default - for everything in between. Remove fan leaves first, then manicure the sugar leaves with spring-action scissors. Trim in batches to avoid fatigue, save the scissor hash, and avoid the six mistakes that quietly ruin bud quality.
Trimming is the post-harvest step that separates good buds from great ones. It removes water leaves and excess sugar leaves to expose the trichome-rich flower, improve burn quality, and lift bag appeal. The wet versus dry trim debate is real but not as important as picking the right method for your drying environment. This guide walks through tools, technique, our 4-step process, and what to do with the trim itself.
Knowing how to trim cannabis correctly is the difference between bag appeal, which is what the flower looks like to whoever is deciding to buy it or smoke it, and clippings that look like lawn waste. Trimming weed is the post-harvest step where you remove the fan leaves and tight sugar leaves to expose the trichome-dense buds underneath. Done right, your buds smoke smoother, look tighter, and store longer. Done wrong, you lose trichomes to sloppy scissor work, crush terpenes by trimming at the wrong moisture, or grind through trim jail with cramped hands and a wrist that takes a week to recover.
This guide is our trim playbook. It covers when to trim, how to pick between wet trim, dry trim, and the partial wet trim we recommend, what tools actually matter, the four-step method we teach, the six mistakes that quietly ruin bud quality, and what to do with the trim once you have it. It assumes you have already harvested your plant and are deciding what to do next. Trimming is one of the last steps in how to grow cannabis at home, the payoff after months of work, so it is worth doing carefully.

What Is Trimming Cannabis (and Why It Matters)
Trimming is the post-harvest process where you cut away the fan leaves and sugar leaves from cannabis buds to expose the trichome-coated flower underneath. The trim itself is the leafy material you remove. The cannabis trim you collect is not waste - it is concentrated trichome material that growers turn into hash, kief (the loose trichome powder that shakes off the flower), edibles, or tinctures.
There are two kinds of leaves on a plant coming out of the cannabis flowering cycle. Fan leaves are the large iconic seven-pointed leaves that grow from the main stem and side branches. They photosynthesize during growth but carry almost no trichomes. Sugar leaves are the smaller leaves that grow close to the bud itself. They are coated in white trichomes - the "sugar" frost that gives them the name. The decision of how aggressively to trim the sugar leaves is the central skill of trimming weed well.
Trim quality changes everything about the finished flower. Well-trimmed buds smoke smoother because there is less unburnable plant matter in the joint or bowl. They look tighter and more dense because the leafy distractions are removed, exposing the calyx structure underneath, the small teardrop-shaped pods that make up the bud itself and hold most of the trichomes. They store longer without harshness because lower-cannabinoid leaf material does not absorb moisture and turn musty in the jar. And they hit higher market prices because bag appeal is one of the first things any buyer evaluates.

The cost of bad trimming is the inverse. Over-trimming strips trichomes along with the sugar leaves, and you can lose meaningful potency in a sloppy session. Under-trimming leaves harsh-burning leaf material on the bud, which makes for an unpleasant smoke and faster degradation in storage. Skipping the trim entirely produces flower that competitive growers would not give away.
When to Trim Cannabis

The general rule is simple: trim after the plant is harvested and before you cure. The harder question is whether you trim immediately at harvest (wet trim), after a full dry (dry trim), or in two passes (the partial wet trim we recommend for most growers).
The post-harvest workflow follows a consistent order regardless of which trim method you pick. First you cut the plant at the base. Then you remove fan leaves and large stems either at harvest or after drying. Then you dry the buds down to roughly 10 to 12 percent moisture content, which reads as about 58 to 65 percent relative humidity on a hygrometer sealed in with them, and that takes 7 to 14 days in a controlled environment. Finally you transfer the dry buds to glass jars for the cure, where 14 days is the floor and about a month is where it actually gets good.
What changes between methods is where the trimming sits in this sequence. A wet trim happens on day zero, the same day you cut the plant down. A dry trim happens after the 7 to 14 day drying window. A partial wet trim splits the work in two: a fast strip of the fan leaves at harvest, then a full manicure after the dry.
The driver of when to trim is the humidity in your drying environment. If your drying room runs hot and humid, a faster dry helps you avoid mold - which is what wet trim gives you. If your drying room is dry and you want to slow the moisture loss to preserve terpenes, the leaves should stay on - which is what dry trim gives you. Most growers fall somewhere in between, which is where partial wet trim earns its place.
Wet Trim, Dry Trim, or Partial Wet Trim - Pick by Humidity

Three approaches, three valid reasons to pick each. None of them is universally right. The wet versus dry debate is the cannabis equivalent of pineapple on pizza - two camps, neither completely wrong, and the right answer depends on your kitchen.

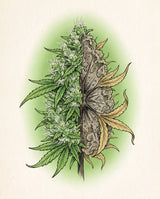
Same plant, same dry, two different trim timings. The bud on the left was trimmed wet and came out tight and round. The one on the right was dried whole and trimmed afterwards, so the sugar leaves curled in against the calyxes and it finished slightly shaggier. Neither one is wrong. That is the whole argument in a single photograph.
Wet trim - the speed and mold-prevention method
A wet trim is what it sounds like. You cut the plant down, immediately remove all the fan leaves and most of the sugar leaves, and then hang the trimmed buds on drying racks to dry. Everything happens in one long shift on harvest day.
Wet trim wins in three specific situations. First, when your drying room runs humid (above 60 percent RH), the smaller surface area of trimmed buds dries faster and reduces the time mold has to take hold. Second, when you are space-limited, you can fit far more trimmed buds on a drying rack than you can fit whole plants hanging from a beam. Third, when bud appearance matters for market sales, wet-trimmed buds puff up more during drying and look tighter and more polished than dry-trimmed buds.
The wet trim tradeoffs are real. The faster drying speed strips terpenes faster - more aroma escapes before the bud is stable enough to cure. Wet trichomes are sticky and gum up scissor blades within minutes, requiring constant cleaning. The work is messier, with resin on every surface within reach. And the buds dry too fast in low-humidity rooms, producing crispy hay-flavored flower.
Dry trim - the quality and terpene-preservation method
A dry trim leaves the whole plant intact through the drying process. You hang the entire plant or large branches in the drying room and wait 7 to 14 days. When the small branches snap cleanly instead of bending, the plant is ready. Then you do all the trim work in one or more sessions on dry material.
Dry trim wins on three specific factors. First, the leaves act as a moisture barrier during drying, slowing water loss from the buds and giving terpenes more time to settle. The result is more aromatic flower with deeper flavor. Second, dried trichomes harden into a more crystalline state - they no longer smear onto scissors the way wet trichomes do. Third, the slower drying creates better moisture distribution inside the bud, which leads to a smoother cure and smoother smoke.
The dry trim tradeoffs are also real. The sugar leaves curl tight around the bud as they dry, making it harder to trim cleanly without removing too much. Dry trichomes are brittle and snap off when handled, so any rough scissor work or rattling around loses material. The drying space requirement is significant - you need room to hang entire plants for two weeks. And the mold risk is higher in humid rooms because the dense leaf mass holds moisture against the bud.
Partial wet trim - the recommended default
This is the approach we recommend for most growers in most rooms. At harvest, you do a fast pass to remove only the fan leaves - the large iconic seven-pointed leaves that grow from the main stem and have almost no trichomes. You leave all the sugar leaves on. Then you hang the partially-trimmed plant or branches to dry for 7 to 14 days. After the dry, you do the final manicure trim on the sugar leaves only.
Cut those fan leaves off, do not pull them. A pulled leaf tears a strip of skin down the stem, and that torn stem is about to spend up to two weeks in a closed room at 50 to 55 percent humidity - the exact wound, in the exact conditions, that rot starts in. Use scissors and take the petiole close to the stem.
You may find there is not much left to do here. If you followed our defoliation guide, the final pre-harvest pass already took the fan leaves without trichomes off a week before the chop, so most of this work is behind you by the time the plant comes down.
The partial wet trim gives you the upsides of both methods and sidesteps the worst downsides of each. Removing fan leaves at harvest reduces the leaf mass that holds moisture against the bud, which lowers mold risk during the dry - the same benefit you get from a full wet trim. But the sugar leaves stay on through the dry, which preserves terpenes - the same benefit you get from a dry trim. You get faster mold-safe drying and better terpene retention in one approach.
The mechanical wins are also real. Fan leaves are large, low-resin, and easy to strip in a fast shift at harvest. The sticky sugar-leaf work happens later, when the trichomes have firmed up but before they have gone brittle - the sweet spot for clean manicuring. Cleanup is also easier because the messiest leaf removal (fan leaves with minimal resin) happens upfront.
The trichome retention question, honestly framed
The cannabis community argues constantly about which method preserves more trichomes. The honest answer is that both have a different failure mode, and the better trimmer wins regardless of method. Wet trichomes are flexible and do not snap off, but they are sticky and smear onto scissor blades and gloves during work. Dry trichomes are firm and do not smear onto blades, but they are brittle and snap off when bumped or handled roughly. Net trichome retention depends more on how careful the trimmer is than which method they choose.
Terpene retention is clearer, and it has now been measured directly. A controlled trial of trim timing found that trimming after the dry produced the highest terpene content, with the effect strongest when the flower was left intact through drying[1]. That favors dry trim and partial wet trim over a full wet trim when aroma is what you are optimizing for.

How to pick - the full decision framework
Here is the practical decision framework, simplified to five factors:
| Decision factor | Wet trim wins | Dry trim wins |
|---|---|---|
| Humid drying room (above 60% RH) | ✓ | |
| Terpene retention and smoke quality | ✓ | |
| Speed of work and bud appearance | ✓ | |
| Trichome retention | Contested - both have failure modes | |
| Mess and scissor cleanup | ✓ | |
Most growers will land on partial wet trim simply because most drying rooms sit in the 50 to 60 percent RH range and most growers want some balance of quality, speed, and mold safety. If you are dialed in to a specific need - commercial volume, market bag appeal, or terpene-maximized smoke quality - the other approaches earn their place.
Tools and Setup

You do not need expensive equipment to trim well. You need the right scissors, a tray that catches what falls, gloves that keep resin off your hands, and a workstation that does not destroy your back. The jar and humidity pack are for curing, which comes right after dry trimming.
Scissors
Spring-action curved trimming shears are the standard. The spring reopens the blades for you so your thumb only has to close them - a small ergonomic detail that determines whether you can trim for four hours straight or have to stop after one. The curved blades let you cut close to the bud surface without pressing the cutting edge into the trichome layer. Stainless steel is mandatory because the blades will need daily isopropyl alcohol cleaning to keep the resin off.
Two pairs are better than one, and the rotation has an order to it. One pair works while the other soaks in isopropyl. When the working pair gums up, take the clean pair out of the alcohol and use it to scrape the dirty one down first, blade against blade, and collect that scrape as scissor hash. Only then does the dirty pair go in to soak. Scrape before you soak: resin that goes into the jar comes back as a lower-grade alcohol wash rather than the hash it would have been. Avoid kitchen scissors at all costs - they cramp your hand within an hour and crush trichomes rather than slicing them.
Trim tray
A two-piece trim tray catches what falls. The upper section is a fine wire mesh that lets trichome dust and kief through while holding back the larger leaf fragments. The lower collection chamber gathers the fine material as you work. By the end of a session there is a layer of pure kief in the bottom, and it is worth more per gram than anything you trimmed off.
Without a trim tray, the kief lands on your work surface and gets either swept up with the leaf or wasted. With one, it goes straight into a glass jar for later.
Gloves and workspace
Black nitrile gloves are the standard. Latex works too but is slightly thicker and reduces fingertip sensitivity. Bare hands are wasteful - the resin coats your fingers within minutes and ends up scrubbed off in the sink instead of collected as scissor hash.
Wear two pairs at once. This is Scott Golem's method and it solves a problem anyone who has trimmed a full day already knows: after a few hours the outer glove is so tacky that buds stick to it and every touch drags. Peel the top pair off, carry on with the clean pair underneath, and pull a fresh top pair over that. With a single pair you have to stop and re-glove, and by then your hands have sweated enough that a new glove will not go on.
Your workspace needs three things: a stable table at the right height, good light directly above your hands, and three sorting bins for finished output. The bins should be labeled A buds (large dense top-shelf flower), B buds (smaller or less dense flower), and trim (everything that comes off the bud during work).

Keep your scissors clean (and save the scissor hash)

Within 10 to 15 minutes of trimming, the blades will be coated in dark sticky resin. The buildup slows your work, drags trichomes off the bud as you cut, and eventually gums the spring action. Clean the blades every 15 to 30 minutes during the session.
Two cleaning methods work. The first is isopropyl alcohol on a cotton cloth - wipe the blades, let dry for a few seconds, and continue. The second, and the one that pays you back, is to scrape the resin off with a small flat tool (a dab tool, a small spatula, or the back of a clean knife). The scraped resin is concentrated cannabis hash that you can ball up and save.

By the end of a multi-hour trim session, a typical grower collects 1 to 3 grams of scissor hash from a pound (450 g) of trim. It is among the most concentrated, full-spectrum hash you will ever produce. The reason: the resin on your blades was scraped directly from trichomes at exactly the right moment - not extracted with solvents, not sieved through screens, just pressure-rolled from the surface of the flower. Store the scissor hash in a small glass jar in the fridge until you are ready to use it.
Keep it in proportion, though. Scissor hash and glove hash are a consolation, not a bonus. Every gram of it is a gram that used to be on a bud and is not on that bud any more, and it is worth less per gram as hash than it was as frost on top-shelf flower. Collect it, absolutely. But the objective is still to move as little of it off the flower as possible in the first place, and that is the whole argument for fewer touches, a lighter grip, and the upside-down cut below.
Setting up to trim for hours without injury

The classic trim injury is wrist tendinitis from repetitive scissor squeezing, followed closely by back pain from hunching over a low table. Both are preventable.
- Set your table at elbow height when seated. Your shoulders should hang relaxed, not raised.
- Use a chair with lumbar support and adjust the height so your feet rest flat on the floor with knees at 90 degrees.
- Work in 50-minute cycles with 10-minute breaks where you stand up, walk around, and stretch your hands and wrists.
- Switch hands periodically if you can trim with both. Do five minutes of hand and forearm stretches before you start and after every break.
- Plan no more than 6 to 8 hours of trimming per day, including breaks. A two-day trim job at a sustainable pace beats a one-day shift that wrecks your wrists for a week.
Hand Trim vs Machine Trim - Which Should You Use?

There are three answers here, not two, and the middle one is the one most home growers have never considered. Hand trim gives the best finish. A bowl trimmer gives you most of that finish in a quarter of the time for about a hundred dollars. A commercial tumble trimmer is for people with payroll.
Hand trim - the benchmark everything else is measured against
A clean hand trim runs about 30 minutes per ounce (28 g), which is 8 hours for a dry pound (450 g), split across two days if you are following the shift rules above. It is slow, and it is still the finish every other method gets compared to.
Bowl trimmer - the home grower's middle option

A bowl trimmer is a deep stainless bowl with a fixed slotted base plate across its mouth, a clear acrylic dome over the top, and a hand crank on top of the dome. The crank turns one shaft that drives two things at once. Above the plate, a spider of six arms hung with curved silicone paddles sweeps the bucked buds around; the paddles only move the buds, they do not cut. Below the plate, a blade spins against its underside. Any leaf that droops through a slot gets sheared off between the two, the same way the moving cutter under the fixed foil of an electric shaver works. The plate itself never moves. Cut trim and kief fall through it into the bowl, which is the same free concentrate a trim tray collects. The usual routine is 25 to 30 turns one way, then the same back the other. Sizes run 16 and 19 inches (41 and 48 cm), prices roughly 100 to 200 dollars, and a bowl holds half a pound to a pound (225 to 450 g) per load.
Here is the part the product pages leave out. A bowl trimmer only replaces step 4. You still cut the branches off the stalk by hand, you still buck every bud off its branch by hand, and you still touch up by hand afterwards, because a blade sweeping blind under a slotted plate only ever cuts what happens to droop through. It will not reach into a tight calyx the way a pair of scissors does. Count all of that and a bowl trimmer takes a pound from 8 hours down to about 2. That is the honest number, not the machine's throughput rating.
Match the blade to the material. Straight blades are for wet trimming; serrated and X-shaped blades are for dry. Running dry buds under a straight blade knocks flower heads off instead of cutting leaf.
Two things decide whether a machine is an option at all, and neither is printed on the box. The first is bud structure. A bowl or a tumbler only ever cuts what droops into it, so it works on dense, tight buds where nothing but leaf tip stands past the surface. Run a loose airy cultivar or a foxtailed one through it and the flower itself hangs out into the cut, so the machine shreds bud instead of leaf. Scott Golem's rule from commercial rooms is that machine trimming is a decision you make per cultivar rather than per harvest: dense goes through, anything ragged gets hand trimmed.

The second is moisture. Wet material gums a machine up far faster than it gums up scissors, and unlike scissors you cannot stop mid-load and wipe a blade you cannot reach. Either budget real cleaning time into the job or run the machine on dry material.
Tumble trimmers - commercial volume only
Commercial machine trimmers come in two styles. Tumble trimmers rotate a drum or basket while internal blades cut leaves off the buds as they tumble. They are gentler and preserve more flower structure. Blade tumblers use rotating cutting blades inside a static drum and process faster but cause more trichome damage and bud bruising. Both produce a more uniform but flatter-looking trim than hand work.
The case for them is straightforward: speed and labor cost. A good tumble trimmer can process 5 to 10 pounds (2.3 to 4.5 kg) per hour. The same volume by hand, trimmed properly, would take 40 to 80 person-hours. For large grows with payroll on the line, the math is obvious. So is the price: these start in the low thousands.
The case against machines is also straightforward: trichome loss and quality dropoff. The mechanical agitation knocks trichome heads off the bud during the tumble and bursts the ones that stay on, even with the gentlest machines. Scott Golem's figure from commercial production is that a tumble costs roughly 1 to 3 percent THC against the same flower hand trimmed. That is his own observation rather than a published number, and we have not found a peer-reviewed one to set beside it. The final bud also looks rounder and more "factory" - which can be a positive for some markets but is generally a negative for craft and connoisseur tiers. Buds destined for high-end dispensaries are nearly always hand-trimmed.

The tell is the shape. A hand-trimmed bud keeps the taper it grew with, like the one on the left. A bud that has been through a tumbler comes out rounder and more barrel-like, the taper rolled off it. Side by side on a shelf, buyers notice.
For most home and craft growers, hand trim with good scissors and accept that the slow path produces the better product. If 8 hours a pound is the thing standing between you and actually finishing the harvest, a bowl trimmer is a reasonable hundred dollars. The commercial tumble trimmer solves a labor problem you almost certainly do not have.

FREE CHEAT SHEET
Which trim does your room allow?
The humidity call, the four cuts in order, and a labeled bud showing what comes off and what stays on. Two pages, free.
Send me the Cheat SheetHow to Trim Cannabis Step-by-Step
This is the four-step process for trimming cannabis. It works for a dry trim and for the final manicure pass of a partial wet trim. For a full wet trim, the steps are the same but performed immediately at harvest instead of after the dry.
Step 1 - Cut branches from the main stalk

Start by cutting individual branches off the main stalk. Use pruning shears or large sharp scissors for this - your trimming scissors are too small for thick stems. Cut close to the stalk so you do not leave long stem stumps on the branch. Work over a clean surface or trim tray to catch any sugar leaves or buds that fall.
If you are dry trimming, this is the moment to start because the plant has already been hanging for 7 to 14 days. If you are doing the partial wet trim, the fan leaves were stripped at harvest, so the branches now have buds and sugar leaves attached but no large fan leaves.
Step 2 - Break the branches down to trimming length

Cut each branch down into working lengths of roughly 8 to 10 inches (20 to 25 cm) and leave the buds attached to them. Bucking - the cannabis term for cutting individual buds off their branches - comes later, at the very end.
That is the reverse of the order most guides teach, including the order this one used to teach, and the reason is handling. A short branch gives you a handle: you turn the branch instead of turning the bud, and the flower gets picked up once, at the end, instead of a dozen times along the way. Scott Golem's rule is that every touch moves trichomes off the bud and onto something else, and bucking first means gripping, rotating and setting down every bud in the harvest before you have even started trimming it.
Work over a clean tray. Sugar leaves will fall as you go and they belong in the trim collection, not on the floor. The bare branches go in the trim bin at the end - the stem material has minimal value, but it is part of the trim.

One exception: a bowl trimmer needs loose bucked buds to work at all. If that is your plan, buck now and skip the branch-length step.
Step 3 - Trim the fan leaves

For a dry trim, this step removes any remaining fan leaves that did not curl off during drying. For a wet trim, this is the first cut. For a partial wet trim, the fan leaves are already gone from harvest day, so this step is mostly inspection.
Hold each bud by its small stem. Snip the fan leaves off where they meet the bud surface. Cut cleanly and quickly - do not saw at the leaf. A clean snip leaves no torn plant material and minimal trichome loss.
Step 4 - Manicure the sugar leaves

This is the precision step, and there is one change to how you hold the bud that matters more than anything else on this page. Turn it upside down.
Hold the bud by its stem with the tip pointing at the floor, the same way it hung in the drying room. Inverted, every sugar leaf falls open and away from the bud under its own weight, and the short stalk where each one enters the flower - the petiole - comes into plain view. You snip that stalk and the whole leaf drops away on its own. The blade never touches the bud.
Held the other way up, tip toward the ceiling, the leaves lie flat and closed against the bud and hide their own stalks. You cannot see where a leaf begins, so you end up running the blade down the face of the bud to catch the parts that stick out, shaving trichomes off the surface as you go. That single difference in grip is the thing Scott Golem rates as the most useful piece of trimming advice he can give a home grower.

Start at the bottom of the bud, nearest the stem you are holding, and work toward the tip.

The bud anatomy diagram above shows what to cut and what to keep. Fan leaves come off entirely. Sugar leaves get the visible-stem test: the ones you can see into come out whole at the stalk, and the ones buried in the flower are tidied flush and no further. The calyx structure - the small teardrop shape that holds the trichomes - stays intact. Trichomes stay on the bud.

Work down the branch bud by bud, turning the branch rather than the flower and keeping each bud inverted as you go around it. When a branch is finished, buck the buds off it and drop them into the appropriate sorting bin - A bin for large dense top-shelf buds, B bin for smaller or less dense buds, trim bin for everything else. That last cut is the first time the finished flower has to be handled.
Crow's feet, and the rule that prevents them
A crow's foot is the stub left behind when a larger sugar leaf gets cut off level with the bud surface instead of at its stalk. The blade takes the part that was sticking out, the base stays buried, and what is left sits proud of the bud with the leaf's ribs splaying out of it like the toes of a bird's foot. It is the most common tell of a rushed trim, and it is exactly what trimming upside down avoids.
The rule is a test you run leaf by leaf. If you can see the stalk going into the bud, the whole leaf comes out - cut it at the stalk, not partway along the blade. If the leaf is buried deep enough that no stalk is visible and only its tip pokes past the surface, leave the base alone and tidy off just the part that protrudes. Visible stem means remove. Buried means tidy.

A clean manicuring pass runs about 30 minutes per ounce (28 g), which is 8 hours for a dry pound (450 g). That is the number for a genuinely well-trimmed bud, not a fast pass. Buds with tight calyx structures and small sugar leaves are faster. Buds with airy structures and long sugar leaves take longer.
The 6 Most Common Trimming Mistakes

Most beginner trim sessions hit at least three of these. Avoid them and your finished flower will already beat most homegrown weed on the market.
Mistake 1 - Over-trimming
Cutting too deep into the sugar leaves removes the trichome layer along with the leaf. The finished bud looks bare and clean but has lost significant potency. Manicure conservatively - you can always come back and trim more, but you cannot put trichomes back on. Conservative means not cutting into the bud, though, not leaving stems behind: a leaf whose stalk you can see still comes out whole, or you have left a crow's foot.
Mistake 2 - Wet trim in a dry room (or dry trim in a humid room)
Method-room mismatch is the single most common moisture-related mistake. Wet trim in a dry room dries the buds too fast and produces crispy hay-flavored flower. Dry trim in a humid room invites mold during the long dry. Match your method to your environment using the humidity guide above.
Mistake 3 - Cheap scissors
Kitchen scissors, garden scissors, and any non-spring-action shear will cramp your hand by hour two. They also crush trichomes rather than slicing them cleanly. The 25 to 40 dollars you save buying cheap scissors is the worst trade in cannabis cultivation.
Mistake 4 - Bare hands
The resin coats your fingers within 15 minutes. By hour four, you have several grams of concentrated cannabis hash distributed across your palms and forearms, which gets washed down the drain in the post-trim shower. Wear nitrile gloves and the same resin ends up on the scissors as collectable scissor hash.
Mistake 5 - Skipping the cure
Trimming is not the final step. Properly trimmed flower still needs a cure to break down chlorophyll, settle terpenes, and reach peak smoke quality. Fourteen days is the floor, the bare minimum that produces smokeable flower, and about a month is where it actually gets good. Skipping the cure produces "fresh" flower that tastes harsh and grassy. See our curing guide for the full process.
Mistake 6 - One long shift
Trimming an entire harvest in one 12-hour shift is how people develop wrist tendinitis, lose focus, and produce sloppy trim by hour 8. Split the work across multiple days. Buds 1 through 100 of a session should look the same as buds 400 through 500. If they do not, you are working too long.
What to Do With Your Trim
The trim itself is concentrated cannabis material. Sugar leaves are coated in trichomes. Even fan leaves carry a small amount of trichome material. Throwing it out is throwing away cannabinoids and terpenes.
Four good uses for trim:

- Cannabutter and edibles. Decarboxylate the trim in the oven at 240°F (116°C) for 40 minutes, then simmer it in butter or coconut oil for 2 to 4 hours. Strain through cheesecloth. The resulting infused fat goes into brownies, cookies, gummies, or any cooking application.
- Hash and dry sift. Use a kief box or a set of bubble bags to mechanically extract the trichomes from the trim. Pure kief can be pressed into hash or used as a topper for joints and bowls.
- Tinctures. Soak decarboxylated trim in high-proof alcohol (Everclear or similar) for 2 to 4 weeks, then strain. The resulting tincture is a fast-acting sublingual product with long shelf life.
- Bubble hash. A more involved process using ice water and screened bags to separate trichome heads from plant material. Produces the highest-quality solventless concentrate.
Store the trim in the freezer until you are ready to process it. Cold storage preserves cannabinoids and slows terpene loss. Vacuum-sealing extends storage life further. A pound of trim in the freezer is worth more processed than thrown out.
After Trimming - The Bridge to Curing

Trimming is the step that hands the flower over to the cure. Once your buds are trimmed, they are not finished - they are ready for the final and longest stage of the post-harvest workflow.
The handoff is simple. For dry-trimmed buds, transfer them directly from the trim tray into glass mason jars. The buds should feel dry on the outside but spring back slightly when squeezed - if they snap instead, they are already overdry and the cure will not bring them back. For wet-trimmed buds, they still need to dry on racks for 7 to 10 days before jarring. Once they hit the right moisture, the cure begins. See our complete curing guide for the burping schedule, the 14-day floor against the one-month target, and how to know when the cure is complete.
Why Trim Quality Matters (The Science)

The trichomes are where every desirable property of cannabis lives. Cannabinoids like THC, CBD, and CBG are synthesized inside the glandular trichome heads[2]. Terpenes - the volatile aromatic compounds that determine flavor and contribute to the entourage effect - are produced in the same structures[3]. The whole point of cannabis cultivation is to grow flower with abundant, intact trichomes and then deliver them to the consumer with the smallest possible degradation.
Trimming is the final step where mechanical damage to the trichomes happens. Each scissor pass that grazes the bud surface knocks off a small fraction of the trichome heads. Each wet bud that smears resin onto a blade loses concentration to the blade rather than the consumer. Each over-aggressive cut removes sugar leaf and the trichomes attached to it. Careful trimming is the moment where a grower preserves what they spent 12 to 20 weeks growing.
The terpene argument for slower drying is also worth understanding. Terpenes are volatile and heat drives them off: drying above roughly 40°C (104°F) measurably reduces terpene concentration in cannabis while leaving cannabinoid levels largely alone[4]. That is why the 60 to 68°F (15 to 20°C) drying room in our drying guide is not a suggestion. The leaves on a cannabis plant also act as a moisture and gas barrier during drying. Removing them speeds the process but also accelerates terpene loss. The compromise - the partial wet trim - removes only the low-trichome fan leaves and leaves the protective sugar-leaf canopy in place during the slow dry.
There is one more compounding factor: trim quality starts at the plant level. Well-trained plants with even canopies produce uniform bud sizes that are dramatically easier to trim cleanly. LST clips like the BudClips solve the inconsistent-canopy problem at the training stage, weeks before the trim shift begins. The trim work you do at harvest is partially a verdict on how well you trained the plant during veg and early flower.
There is now one controlled trial on this. Researchers compared a mild pre-drying trim, an aggressive pre-drying trim, and a full post-drying trim on a medicinal hybrid. The mild pre-drying trim - fan leaves off, sugar leaves largely left on, which is our partial wet trim - produced the highest total cannabinoid content of the three. The post-drying dry trim produced the highest terpene content. The aggressive pre-drying trim, where the sugar leaves came off before the dry, gave up the cannabinoid advantage entirely and finished no better than dry trim[1]. Their conclusion is the honest one: you optimize for potency or for aroma, and getting both at once is hard.
Honest caveat: that is one study, one chemovar, in controlled drying chambers rather than a spare bedroom, and it measured cannabinoid and terpene content rather than trichomes counted off the bud. The authors open by noting the near-total absence of peer-reviewed work on trimming technique. Beyond it, most published cannabis research is on trichome morphology, biosynthesis, and disease management rather than post-harvest mechanical loss[5]. Treat the direction as evidence and the magnitude as provisional.
Frequently Asked Questions
What does trimming weed mean?
Trimming weed is the post-harvest process of cutting away fan leaves, sugar leaves, and other plant matter from cannabis buds to expose the trichome-rich flower. It happens after the plant is cut down and before or after drying, depending on whether you wet trim, dry trim, or use the partial wet trim approach. The goal is to improve appearance, burn quality, and storage stability of the finished flower.
Do trims get you high?
Yes, cannabis trim can get you high, but less so than the buds themselves. Sugar leaves and small bud fragments included in trim still carry trichomes, which contain THC, CBD, and terpenes - just at lower concentrations than flower. Trim is best processed into edibles, hash, kief, or tinctures rather than smoked directly, since the lower potency makes extraction the better use of the material.
Is untrimmed weed better?
Untrimmed weed - flower with all its fan leaves and sugar leaves still attached - is not better. Unprocessed leaves burn harsh, hold moisture that invites mold, and dilute the visible trichome coverage. Some growers prefer a looser trim for slower drying, but no serious cultivator skips trimming entirely. The question is how much to trim and when, not whether to do it at all.
How much should I trim my weed plant?
Trim enough to remove all fan leaves and most of the larger sugar leaves while keeping the smaller, trichome-coated sugar leaves close to the bud surface. Over-trimming strips trichomes along with the leaf. Under-trimming leaves harsh-burning plant matter on the bud. A well-trimmed bud looks tight, mostly green-purple flower with visible white trichome frost and minimal protruding leaf material.
Should you wet trim or dry trim cannabis?
Pick based on your drying room humidity. Wet trim if your room is humid (above 60 percent RH) because less leaf mass speeds drying and reduces mold risk. Dry trim if your room is dry (below 50 percent RH) because the leaves slow moisture loss and preserve terpenes. For most growers in the 50 to 60 percent RH middle range, partial wet trim - our default - gives you the best of both.
How do you properly dry trim a marijuana plant?
After harvest, hang the whole plant or large branches upside down in a room kept at 60 to 68°F (15 to 20°C), starting at 50 percent humidity for the first 2 days and then 55 percent as set out in our drying guide, for about 7 days and up to 14 for dense colas. The plant is ready to trim when small branches snap cleanly instead of bending. Work in small sections to keep the plant from rattling around. Use spring-action scissors and trim carefully - dry trichomes are brittle and pop off easily.
How long does it take to trim a cannabis plant?
For hand trimming, budget about 30 minutes per ounce (28 g), so 8 hours for a dry pound (450 g), if you want a genuinely clean trim. Small dense buds take longer than large airy ones because the trichome geometry is tighter. A first-time trimmer may take twice that. A bowl trimmer brings a pound (450 g) down to roughly 2 hours once you count the bucking and the touch-up. A commercial tumble trimmer is faster still but loses more trichomes and produces a more uniform, lower-quality finish.
Can you trim a cannabis plant during flowering?
That is not trimming - that is defoliation, and it is a different practice with different rules. Trimming refers strictly to post-harvest leaf and flower work. Removing leaves during the flower stage is called defoliation and it is done to improve airflow and light penetration. See our guide to defoliating during flower for the timing, what to remove, and what to leave alone.
What scissors are best for trimming cannabis?
Spring-action curved trimming shears with comfort grip handles are the standard. The spring reduces hand fatigue by reopening the blades for you, so your thumb only has to close them. Curved blades let you cut close to the bud surface without squashing it. Stainless steel is mandatory because the blades need to handle daily isopropyl alcohol cleaning. Avoid kitchen scissors - they will cramp your hand by hour two.
Can you smoke cannabis trim?
Technically yes, but it is harsh and inefficient. Trim has a small fraction of the cannabinoid content of flower, mixed with low-THC plant material that produces lung-burning smoke. Most growers process trim into hash, kief, cannabutter, or tinctures - methods that concentrate the cannabinoids and discard the burnable plant matter. Smoking trim is what you do in a pinch, not by choice.
How long should you dry weed before trimming?
For dry trim, 7 to 14 days in a controlled drying room before you trim. The branches should snap cleanly rather than bending when they are ready. For wet trim, you trim immediately after harvest before any drying. For the partial wet trim approach, strip the fan leaves at harvest and then dry for 7 to 14 days before doing the final manicure trim. See our complete drying guide for full timing.
How long after wet trim before you cure?
After a wet trim, the trimmed buds still need to dry down to about 10 to 12 percent moisture content, roughly 58 to 62 percent relative humidity on a hygrometer, before you start curing. That typically takes 7 to 10 days on drying racks in a controlled room, since less leaf mass means faster moisture loss. Once the buds feel dry on the outside but slightly springy when squeezed, transfer them to glass jars to begin the cure. See our curing guide for the full process.
Should you wear gloves when trimming?
Yes, nitrile or latex gloves are recommended for any trim session longer than 30 minutes. The trichome resin sticks to bare skin and ends up coating your fingers, palms, and forearms - which is both wasteful and uncomfortable. Gloves keep the resin on the scissors and tray where you can collect it as scissor hash. Disposable nitrile is best because resin-saturated gloves can simply be discarded at the end of the session.
Should you trim cannabis buds upside down?
Yes. Hold the bud by its stem with the tip pointing at the floor. Inverted, the sugar leaves fall open and away from the bud under their own weight, which exposes the short stalk where each leaf enters the flower. You snip that stalk and the whole leaf drops away, so the blade never has to scrape down the face of the bud and knock trichomes off it. Held tip-up the leaves lie flat and hide their own stalks, which is what produces crow's feet - the splayed stubs left when a leaf is cut level with the bud instead of at its stem.
Next Steps
The trim is the last hands-on step that determines smoke quality. Once it is done, the only thing left is patience - the cure does the rest. Three articles fill in the surrounding context:
- For when to chop in the first place, read our cannabis harvesting guide.
- For the drying environment that feeds the trim work, read our complete drying guide.
- For the long cure that follows your trim, read our curing guide.
Looking back at your last grow, the inconsistent bud size you saw at trim time was set in motion 8 weeks earlier during the stretch. Better canopy training in the next round means easier trimming and higher A-bud yield. Plant training clips and low stress training are the place to start.
FREE CHEAT SHEET
Which trim does your room allow?
The humidity call, the four cuts in order, and a labeled bud showing what comes off and what stays on. Two pages, free.
Send me the Cheat SheetReferences
- Brikenstein, N., Birenboim, M., Kenigsbuch, D., Shimshoni, J.A. (2024). Optimization of trimming techniques for enhancing cannabinoid and terpene content in medical cannabis inflorescences. Medical Cannabis and Cannabinoids, 7(1), 111-118.
- Livingston, S.J., Quilichini, T.D., Booth, J.K., Wong, D.C.J., Rensing, K.H., Laflamme-Yonkman, J., Castellarin, S.D., Bohlmann, J., Page, J.E., Samuels, A.L. (2020). Cannabis glandular trichomes alter morphology and metabolite content during flower maturation. The Plant Journal, 101(1), 37-56.
- Tanney, C.A.S., Backer, R., Geitmann, A., Smith, D.L. (2021). Cannabis glandular trichomes: a cellular metabolite factory. Frontiers in Plant Science, 12, 721986.
- Das, P.C., Vista, A.R., Tabil, L.G., Baik, O.D. (2022). Postharvest operations of cannabis and their effect on cannabinoid content: a review. Bioengineering, 9(8), 364.
- Punja, Z.K. (2021). Emerging diseases of Cannabis sativa and sustainable management. Pest Management Science, 77(9), 3857-3870.

About the Author
Henrique Dias is the CEO and co-founder of BudTrainer. He is a mechanical engineer who also holds a graduate certificate in Commercial Cannabis Production from Niagara College in Ontario, Canada - the first college-level cannabis cultivation program in North America. Before founding BudTrainer, Henrique worked with Health Canada licensed cannabis producers, where he gained hands-on experience in cultivation, processing, and post-harvest management of cannabis at commercial scale. He started BudTrainer to bring that same level of craft to home growers through better-designed gardening tools and clear, science-backed education.

About the Reviewer
Scott Golem, MSc reviewed this guide for technical accuracy in August 2026. Scott is the Associate Director of the Horticultural and Environmental Sciences Innovation Centre at Niagara College in Ontario, Canada, where he runs the college's controlled-environment cannabis research facility and its research greenhouse. He holds a BSc in Forensic Science from Trent University, an MSc in Biotechnology from Brock University and a graduate certificate in Commercial Cannabis Production from Niagara College, and has been teaching and researching in post-secondary education since 2009, at Brock University and Niagara College, across plant science, genetics, and greenhouse cultivation. Before moving into research, Scott was a Master Grower and Plant Scientist for licensed producers, where he led breeding and crop-optimization programs. He reviews these guides personally rather than on behalf of any institution.
DISCLAIMER: Everything taught and sold by BudTrainer® is to be used strictly for legal purposes. We do not endorse the production of illegal substances and it is your duty to ensure that you are complying with the law. The words "hemp," "cannabis," "weed," and "marijuana" are used interchangeably to refer to the same plant (legal hemp with less than 0.3% THC) for the purposes of this lesson.