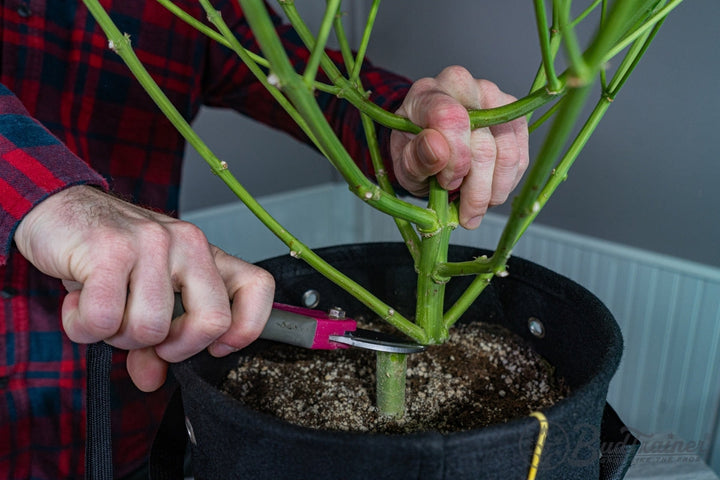
The cannabis flowering stage is the 8-to-12-week period when a photoperiod cannabis plant shifts from building leaves to building buds. Indoors it starts the day you flip your light schedule from 18 hours on to 12 hours on. Outdoors it starts when natural daylight drops past about 14 hours. Expect a 2-to-3-week stretch right after the flip, peak bud bulking in weeks 5 to 7, and ripening from week 8 onward.
Get three things right and most flowering stage problems disappear: keep temperatures between 70 and 80°F (21 to 27°C), drop relative humidity from 65% early down to 45% by harvest, and add branch support before bud weight pulls colas sideways. Stop structural training at the flip; only keep tucking under a trellis net until the stretch ends, around day 21. Confirm trichome readiness under magnification before you chop.
NOTE: This guide focuses on photoperiod cannabis. Autoflowers flower on their own age regardless of light cycle - see the relevant sections for autoflower-specific notes.
The cannabis flowering stage is the 8-to-12-week window when your plant stops building leaves and starts building buds. Indoors it begins the day you switch your photoperiod lights from 18 hours on to 12 hours on. Outdoors it begins when natural daylight drops past about 14 hours. Get the environment right, support the branches before they snap under bud weight, and stop trying to reshape the plant - the cannabis flowering stages reward execution, not improvisation.
This guide covers the flip, week-by-week milestones, the temperature and humidity targets that hold up under modern research, the branch support setup that prevents broken colas, and the five mistakes that quietly cap most home grows. Training decisions get locked in during low-stress training during veg. If you are still in veg and have not done the final transplant before flower, finish that first, then flip. Flowering is the last major stage, so for the full picture of how to grow cannabis start to finish, start with our beginner guide.
When Does the Cannabis Flowering Stage Start?
The cannabis flowering stage starts when the plant detects shortened days. Indoors that is a deliberate decision: you change your timer from 18 hours of light and 6 hours of dark to 12 hours of light and 12 hours of dark. Outdoors it happens on its own as summer turns to autumn and natural daylight drops past roughly 14 hours.

Photoperiod cannabis plants only flip on the light schedule change. Autoflowers ignore the photoperiod entirely - they start flowering on their own age, typically 3 to 5 weeks after germination, regardless of light hours. Most autoflower growers run lights 18/6 or 20/4 through the entire grow.
Pre-flowers vs true flowering
"Pre-flowers" are not the flowering stage. They are small calyx structures (sometimes with a few white pistils) that appear at the internodes during late veg. They tell you the plant is mature enough to sex - but they are not buds. Those first pistils are also the earliest reliable sign of a plant's sex. True flowering begins after the light flip, when you see white pistils popping at branch crotches across most branches, usually within 7 to 14 days of switching to 12/12.
One oddity worth knowing: some cultivars go well past a few pre-flower pistils and throw clusters of white pistils while still in veg, most often on mother plants kept vegetative for months. Scott Golem, who reviewed this guide, has seen it in commercial mother rooms. The plant is not flowering. Whether it happens is largely genetic; either way, pistils on a plant still running 18/6 are not a sign it has started to flip.
How to know you flipped successfully
Within the first two weeks of the flip, you should see three signals: faster vertical growth (the stretch), white pistils emerging at most branch crotches, and longer internode spacing than late veg. If you are 10 days in and seeing none of that, check your timer first. A common failure mode is the schedule reverting after a power cycle, leaving the plant on 18/6 while you think it is on 12/12.
How Long Is the Cannabis Flowering Stage?
Most photoperiod strains finish flowering in 8 to 12 weeks. Indica-dominant strains lean shorter (8 to 9 weeks). Sativa-dominant strains lean longer (10 to 12 weeks), occasionally more for landrace haze genetics. Most autoflowers finish 9 to 11 weeks from seed, some larger cultivars run to 13 - they begin flowering on their own around week 3 to 5 and spend the rest in flower. Flowering is just one stretch of that arc, and the full cannabis growth stages timeline shows how long each stage runs for photoperiods and autoflowers alike.
Treat the strain pack timing as a starting reference, not a finish line. Breeders report flowering duration under their own conditions, usually hotter, brighter, and more controlled than a home tent. If your strain pack says "9 weeks," plan for 10 and use trichome inspection to call the chop, not the calendar.
What changes the timing
Three variables compress or stretch the schedule. Light intensity within plant tolerance speeds ripening; underlit plants drag past their stated finish. Mid-flower temperatures in the 70 to 80°F (21 to 27°C) range support a normal schedule; cooler late-flower temperatures lengthen ripening and can deepen color in genetics that carry it. Genetics matter most: modern polyhybrids can drift 1 to 2 weeks from their pack timing in either direction.
Why calendar harvesting fails
The pack number is an average across the breeder's conditions. Your tent runs cooler or warmer, your light intensity differs, your nutrient timing varies. The only reliable harvest signal is trichome maturation, confirmed under 30x to 60x magnification, not calendar weeks. We cover the magnified inspection process in the trichome inspection workflow.

Get the free Flowering Cheat Sheet
The three dials that decide bud density, the three ways to hold a branch up before the weight arrives, and the week-by-week from the flip to the chop. One page for the setup, one for the schedule. Printable, phone-friendly.
Get the Flowering Cheat SheetCannabis Flowering Stage Week by Week
Here is the full progression at a glance. Each week introduces a milestone - some big enough to show up overnight, others subtle until you compare week-over-week photos. The plant changes most visibly in weeks 2 through 5 and most slowly in weeks 7 through 9, when bulking and ripening happen at the resin level rather than the structural level.

Week 1: Transition
The plant is still acting like late veg. You will not see flowers yet. The biggest changes are internal: the photoperiod shift is triggering hormonal cascades that will drive the stretch and bud initiation over the next two weeks. Keep the environment steady. Maintain veg-like watering and feeding. Do not introduce new training or new nutrient products. This week is about not breaking anything.
Week 2: Pistils appear

Small white pistils start appearing at branch crotches - the V where a side branch meets the main stem. This is your visual confirmation the flip worked. Pistils look like tiny white hairs poking out of small green calyx structures. Scott Golem calls this the snowball stage, because each new bud site reads as a small fuzzy white ball. The plant is also beginning to stretch: expect 10 to 20 percent vertical growth this week.
Week 3: Stretch peaks and slows

The stretch hits its peak this week. Indica-leaning plants finish stretching around day 14 to 21. Sativa-leaning plants can stretch into week 4. Expect 50 to 100 percent total height gain from the flip: the plant ends up one and a half to two times as tall as it was on flip day. That is the rule of thumb Scott Golem gives growers, and he calls the stretch the thing tent growers overlook most. Veg a plant until it fills the tent and it grows straight into the light, so flip when it has filled about half of your usable height. This is the last week of net tucking if you are using a trellis - tuck branches back under the screen as they climb, but do not bend, clip or start any new training. Scott stops tucking a little sooner: once the net is full he lets the tips turn up through the squares for the last of the stretch, so the bud sites stand apart, and a second net higher up catches them. Internode spacing is widening and bud sites are forming at every branch tip.
Week 4: Bud sites form

Vertical growth is essentially done. Bud sites at each branch tip now look like clusters of pistils with small green calyx swellings. The plant is committing energy to bud development rather than structural growth. Defoliation timing matters this week and next: if you plan to do mid-flower defoliation, day 21 to 25 is the window. See the protocol for mid-flower defoliation around days 21 to 25.
Week 5: Fattening begins

Buds noticeably swell this week. Each bud site changes from "cluster of pistils" to "small dense flower" with visible calyx stacking. Sugar leaves start producing trichomes. Nutrient demand peaks as the buds bulk. If your plant is hungry, you will see it now in deeper green color shifts or premature yellowing on lower leaves. The first hints of strain-specific aroma emerge.
Week 6: Mid-flower bulk

This is the bulking week. Buds put on visible weight day over day. Trichome coverage extends from sugar leaves out across the bud surfaces. Pistils start changing from pure white to white-orange at the oldest sites. Branches start bending under bud weight - if you have not installed support yet, install it this week before colas start tipping.
Week 7: Aroma peaks

Terpene production hits its highest concentration this week. Your tent or room smells like the strain at full strength. Buds continue to bulk but more slowly than week 6. Pistils continue darkening - most plants will be 30 to 60 percent orange-amber by end of week. Trichomes are mostly clear-to-cloudy. Begin the trichome inspection routine now, even though you are not at harvest yet, to baseline how fast they are changing. While the loupe is out, turn over a few fan leaves too: spider mites in flower are far easier to deal with before they reach the buds. The same look covers every other pest in flower.
Week 8+: Ripening window
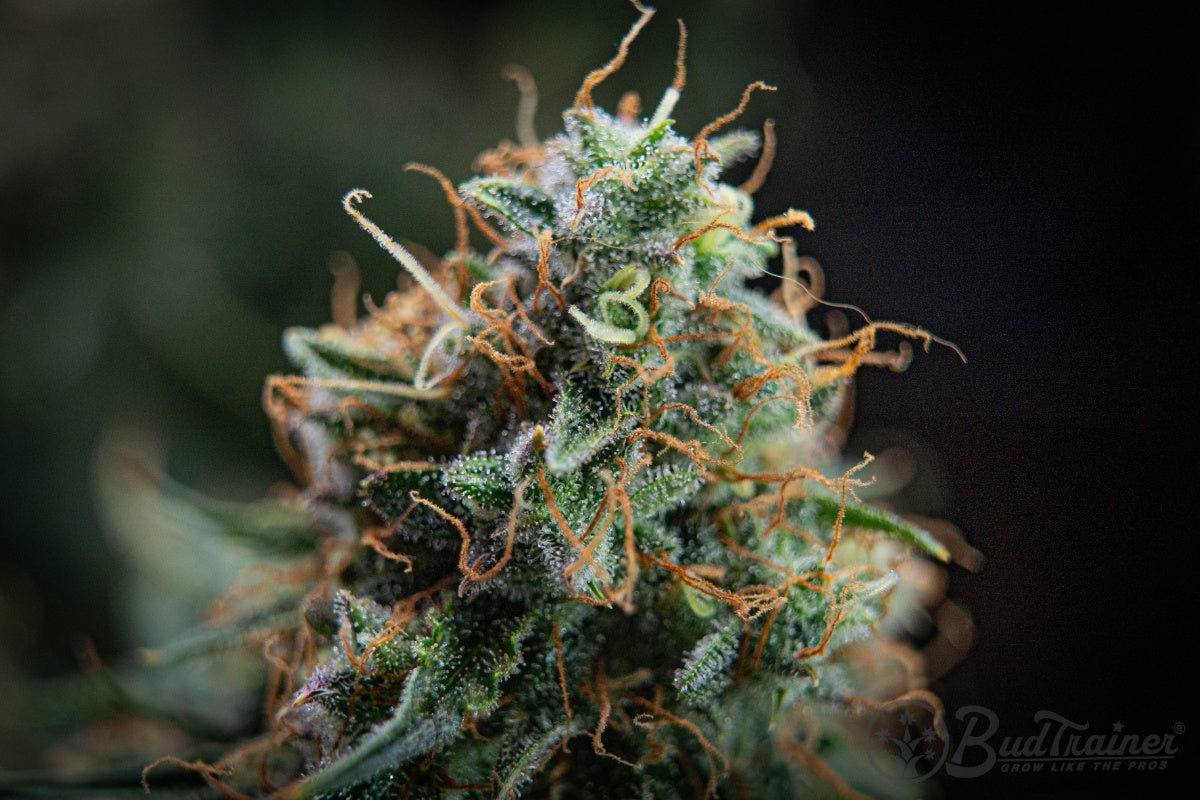
This is the harvest decision window. Most strains finish here or in week 9; some sativa-leaning strains push to week 10 or beyond. Pistils are 90 to 95 percent orange-brown - a supporting cue, not the decision. Trichomes are mostly cloudy with the first amber heads showing. Keep feeding at late-flower strength and stop only a day or two before the cut; we do not flush. Confirm harvest readiness signals with a 30x to 60x loupe before chopping.
Outdoor adjustment note

Outdoor flowering is paced by your latitude and daylight curve, not your timer. Most growers in temperate zones see flowering trigger between mid-August and early September and finish between late September and early November, depending on region and cultivar. See the outdoor flowering timing guide for region-specific timing.
If you want to know when a cultivar will flip where you live before you commit a whole season to it, Scott Golem has a trick from commercial work: run it in a tent on a timer that copies your local daylight. Months ahead of the season, set the timer to your area's midsummer day length, then shorten it each day to follow your local sunrise and sunset from there. You will see roughly when that plant starts flowering at your latitude, usually as the day falls toward 14 hours of light. It is a project for the keen, not a requirement.
Ideal Environment for the Flowering Stage
The flowering environment differs from veg in three meaningful ways: temperature stays in a similar range but with a wider day-night swing, humidity drops progressively as flowering advances, and VPD targets shift up to compensate. Our grow tent humidity guide covers how to get the room there. Get these right and your plant develops dense, resin-heavy buds. Get them wrong and you risk bud rot, fluffy airy buds, or premature ripening.

Temperature: 70 to 80°F (21 to 27°C)
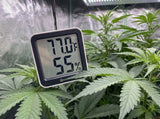
Aim for 75 to 78°F (24 to 26°C) lights-on, dropping 5 to 10°F (3 to 6°C) at lights-off. If your tent will not hold that band, our grow tent temperature guide shows whether the fix is the fan or the room. Above 85°F (29°C), the plant's photosynthesis starts to fall off1. Below 65°F (18°C), bud density suffers and ripening drags. Cooler lights-off temperatures in late flower can deepen color expression in genetics carrying purple traits. Measure at the height of the tallest colas too: a top running hotter than the rest of the tent is where foxtailing tends to start.
The day-night gap is also a stretch control. Growers call it DIF: the day temperature minus the night temperature. A day warmer than the night (a positive DIF, which is what the lights-off drop above gives you) lengthens the internodes, the same temperature day and night gives a middle result, and a night warmer than the day (a negative DIF) keeps the plant compact. The effect is well established in greenhouse crops. In chrysanthemum, internode length rose in a straight line with DIF, though the relationship only held between about 64 and 75°F (18 and 24°C).2 Scott Golem uses it commercially in both directions: closing or reversing the gap to hold back a stretchy sativa, and widening it to open up the internodes on a dense indica. The cannabis evidence is thin. In the one hemp trial we found, flower mass was highest with no gap at all, 75°F (24°C) day and night, and cannabinoids were highest with a day about 11°F (6°C) warmer than the night.3 Treat it as an advanced lever, and one that matters most in the first two to three weeks of flower, while the plant is still stretching.

Humidity: 65% down to 45% RH
The older cannabis literature cites 40 to 55% RH from the flip onward, and running that dry from week 1 is outdated. Modern best-practice from licensed-producer environments starts flower at 55 to 65% RH and tightens progressively as flowering advances. Run 55 to 65% in early flower (weeks 1 to 3), 50 to 60% mid-flower (weeks 4 to 6), and 45 to 55% late flower (weeks 7 to 8) to balance terpene retention against bud rot risk. Late flower is the rot-vulnerable window because dense buds trap moisture inside; that is where the drop matters most.
VPD: 0.9 to 1.3 kPa
Vapor pressure deficit is the actual driver of transpiration. Aim for 0.9 to 1.3 kPa during flowering - 0.9 to 1.1 early flower, 1.1 to 1.3 mid-to-late flower. VPD calculators take your temperature and humidity inputs and tell you the deficit. Our VPD chart for cannabis has every cell worked out in both Fahrenheit and Celsius. Lower VPD (too humid for the temperature) slows transpiration and invites mold. Higher VPD from air that is too dry for the temperature stresses the plant and shrinks buds; a reading a little high because the room is warm while humidity sits in its band is fine.
VPD is the more advanced way to run a room, because it reads the air from the plant's side, as the pull on the water in the leaf, rather than as two separate numbers. You do not need it to grow well. The humidity bands and the VPD figures are rough equivalents, not exact ones: a warm room held at the humidity bands reads above these VPD figures, most of all in late flower. If they disagree, keep humidity inside the band for the phase, at or below 55% in late flower, and let the VPD run high. The chart above gives both for each phase.
Light: 12/12 photoperiod and PPFD targets
Photoperiod plants need a clean 12 hours on / 12 hours off light schedule with no light leaks during the dark period. PPFD targets in flowering sit between 600 and 900 μmol/m²/s mid-canopy under common LED setups, and the plant can use far more than that: in a room with no CO2 enrichment, yield rose in a straight line from 120 all the way to 1,800 μmol/m²/s, with no effect on potency4. The practical ceiling is your fixture and your electricity bill, not the plant. Our canopy development science article has the evidence in full.
Airflow
Strong continuous airflow under the canopy and through the bud zone is the single biggest defense against bud rot, powdery mildew, and stem weakness. For why powdery mildew behaves nothing like bud rot, see what actually causes powdery mildew. The measured effect is larger than most growers expect, and how bud rot actually starts explains why it works. Aim for visible leaf flutter throughout the tent without direct wind blasting any one bud. Use one oscillating clip fan plus one floor or wall fan for a 4x4 ft (120 x 120 cm) tent. Add a second clip fan for 5x5 ft (150 x 150 cm) and larger.
Scott Golem skips oscillating fans. In his experience they are the fans that fail, jamming in one position over time, so he runs fixed fans aimed to push the air around the tent in a circle: one high in a back corner, one low under the canopy blowing the opposite way, so the whole volume keeps turning like a slow vortex. Either setup works. What matters is that no corner of the tent holds still air.
How to Support Cannabis Plants During Flowering
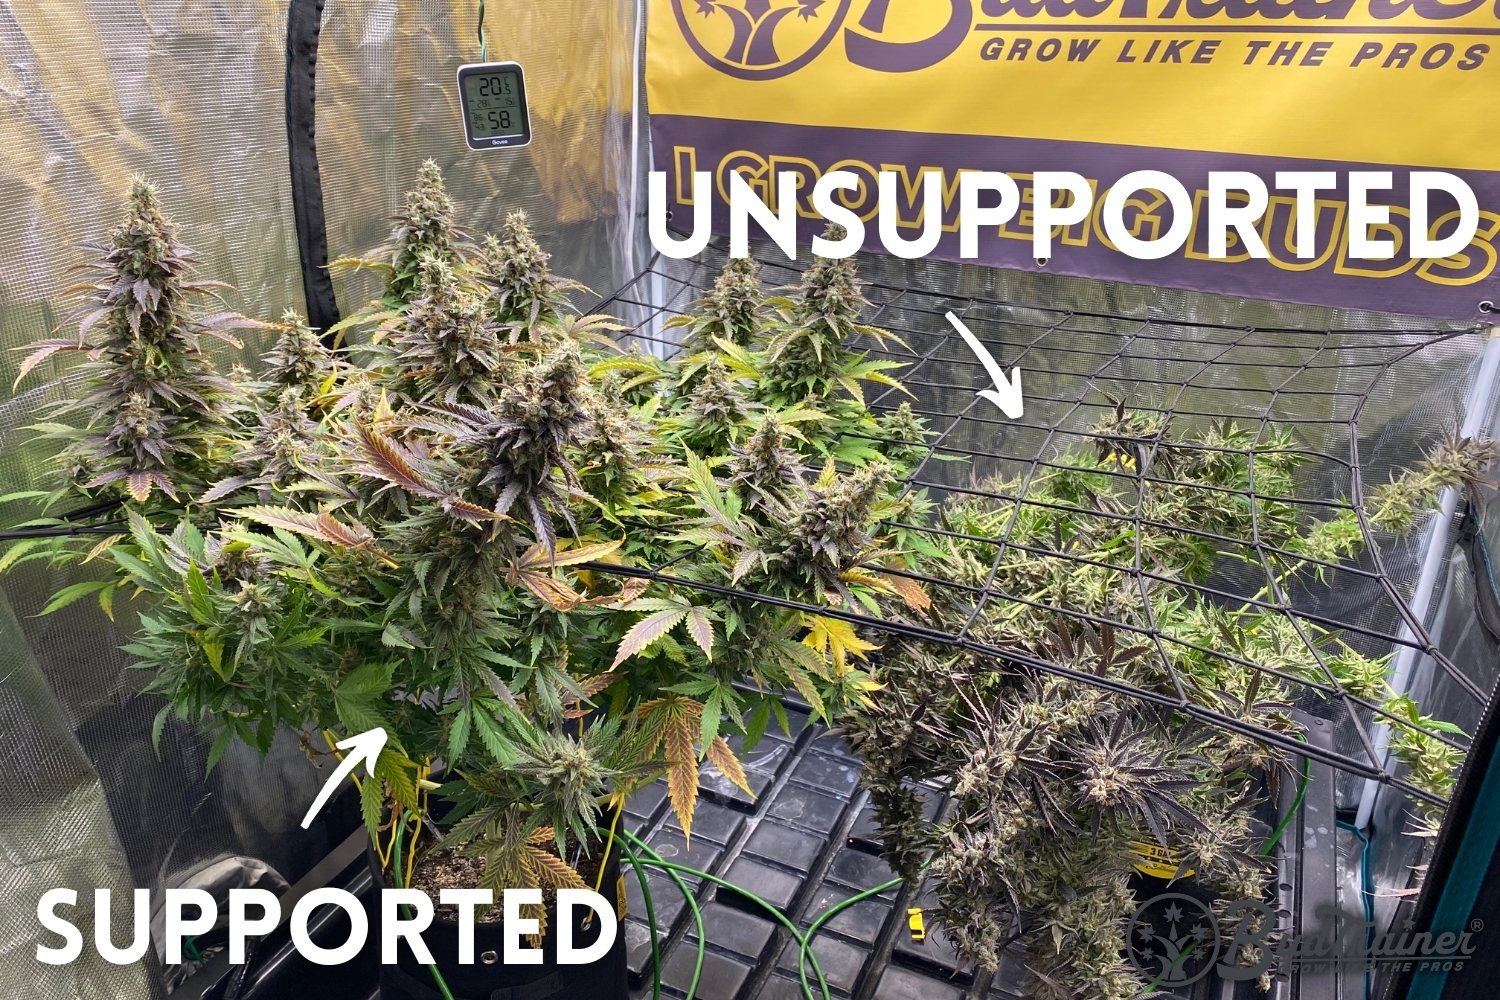
By weeks 4 to 6 of flowering, well-grown plants carry bud weight their branches were not built to hold. The branches that handled this strain at week 1 are now supporting flowers 3 to 5 times heavier. Support is non-negotiable for any decent yield. The goal is to keep branches upright, distribute weight across multiple anchor points, and never have a branch snap because you waited too long.
Why support matters
Cannabis branches taper rapidly. The base is strong, the tip is weak, and the tip is exactly where the heaviest cola lives. Without support, a 100-gram cola at the tip of a pencil-thick branch will bend the branch 30 to 60 degrees by week 6, putting that branch outside the light's even-coverage zone and dragging it into the airflow shadow of the canopy. That cola loses density and increases rot risk.
When to add support
Install branch support no later than the end of week 4. Some growers install support at the flip on plants with a known stretchy structure. If your plant came out of veg with an even, trained canopy or with a mainlined 8-cola structure, your branches will be more uniform and easier to anchor symmetrically.
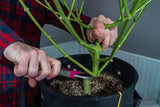
Garden wire branch ties

Soft garden wire like the BudHuggers wraps around the branch about two-thirds of the way to the tip, then runs across to the branch opposite and wraps that one too, as in the photo. Do not tie branches down to the pot: tied to each other, the two hold each other up instead of flopping outward, and the wire holds each one at the angle you set without crushing the cambium. For a whole plant at once, run one hoop of wire around the canopy and tie every branch in to it. This is where the work from veg pays off - BudClips placements from veg set the symmetric branch angles that make these ties cleaner.
Trellis netting (SCROG approach)
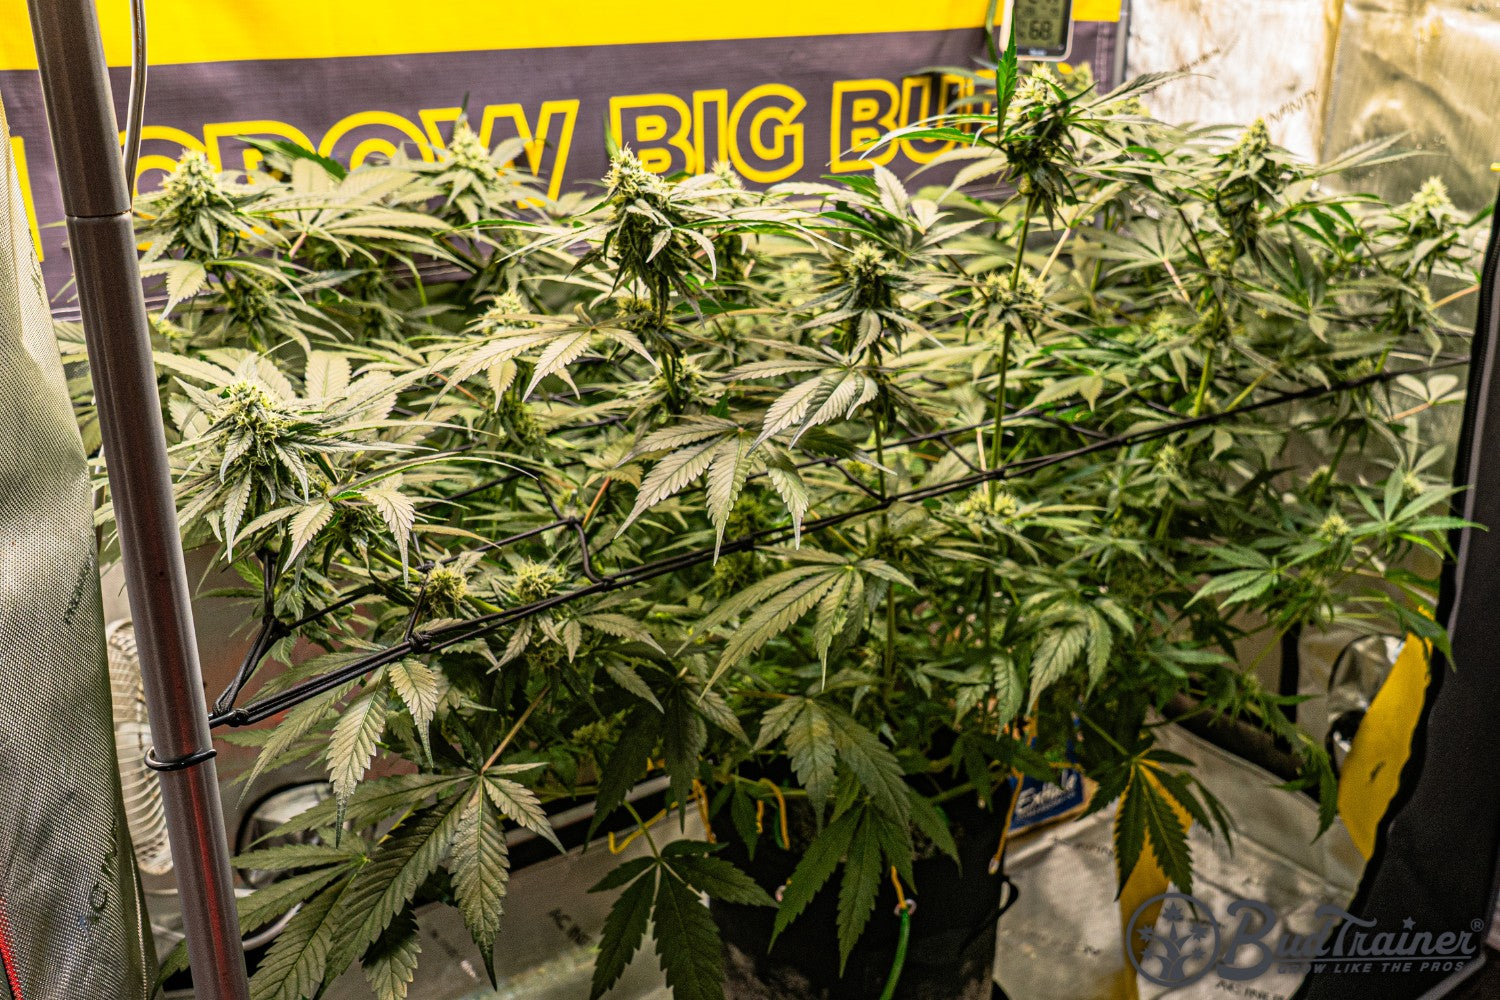
If you are not training into a screen, a horizontal support net set 4 to 8 inches (10 to 20 cm) above the canopy at the flip catches stretching branches and locks them into a flat plane. By week 4 the branches grow through the net squares and the net supports each cola from below. Put it up at the start of flower, not retroactively. It is the easier support method for tents with many plants because it does not require per-branch tie-down. If you are training into a screen, the net goes up earlier and you train under it in veg, as below. For the full screen build, net height, and week-by-week tucking, see our step-by-step SCROG guide.
Two nets beat one. Scott Golem double-trellises almost every plant, and he hangs both nets early, zip-tied up near the top of the tent so they slide down the poles. The lower net comes down first and is the one you train the canopy flat under. The second stays up high until the colas need it, then comes down to catch them as they stretch through the lower net and put on weight, because a single net still lets heavy colas flop over. Our low-stress training guide shows the two-layer setup.

Do not fill the net before you flip. The stretch fills the last of it for you. Our SCROG guide flips at 70 to 80 percent full, and Scott flips at about three-quarters, letting the early stretch fill the rest. Fill the whole net first and the stretch piles a bushy, overgrown canopy on top of it, too dense for light or air to get through.
Stalk guy-wires
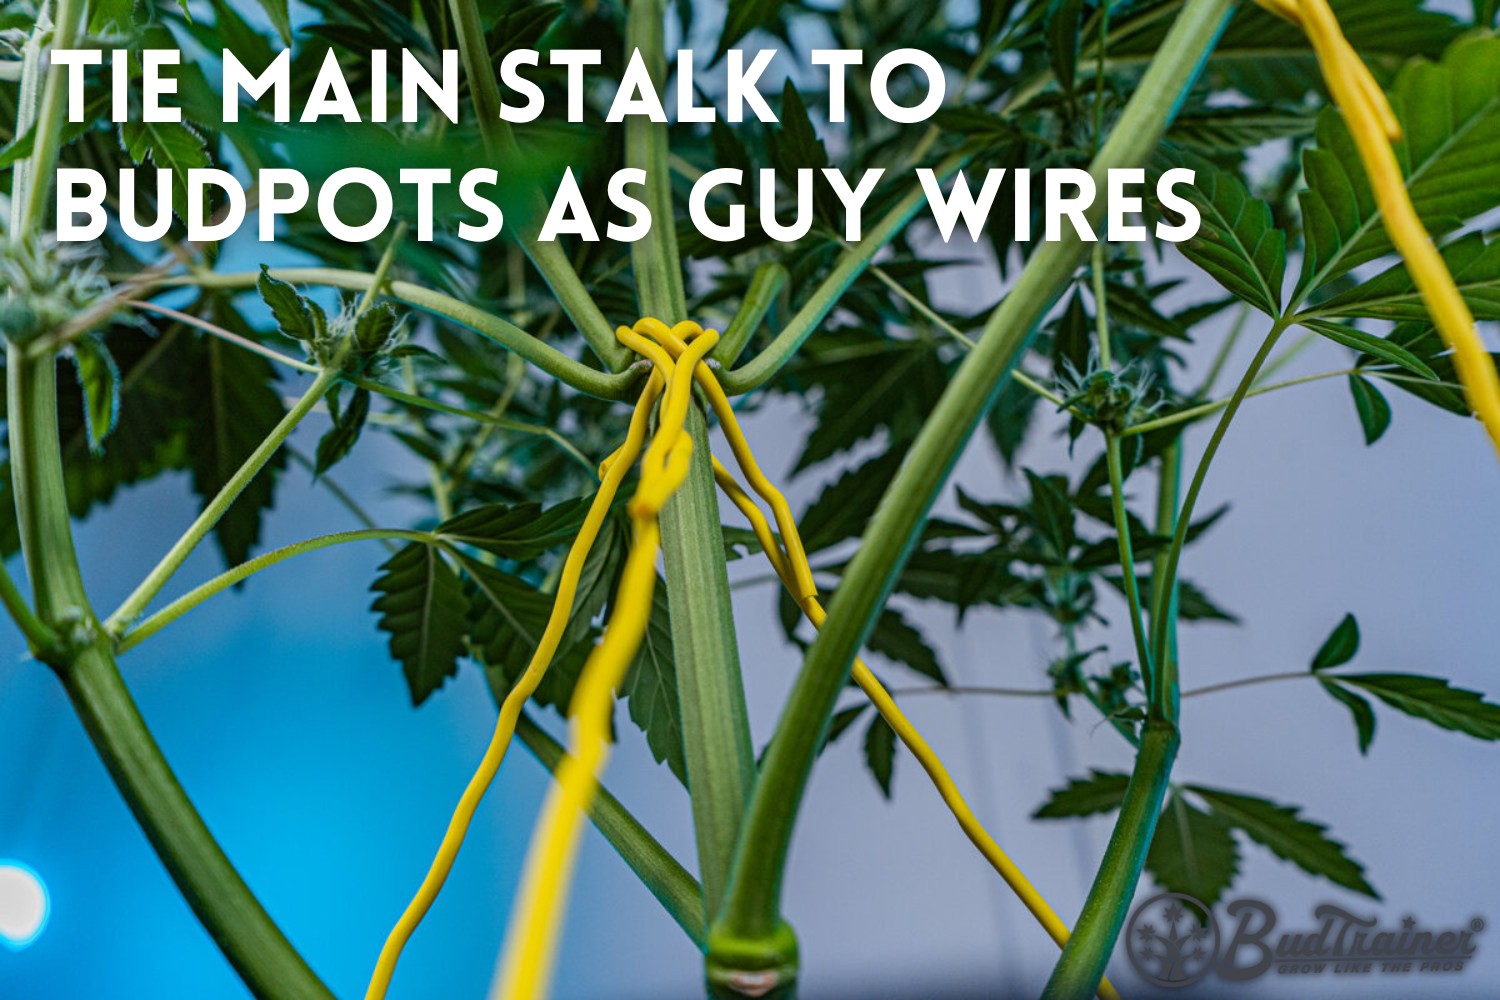
If the entire plant starts leaning - common in tall sativa-dominant strains in late flower - run two BudHuggers from the rim of the pot up to the main stalk, one from each side. A fabric grow pot with grommets like the BudPots gives those two wires their anchor points. This holds the central column upright and keeps the canopy level under the light.
If a branch snaps mid-flower
If a branch breaks mid-flower, do not cut it off - a branch that is still attached can be splinted and saved, even this late. Support the weight, then follow our guide to fixing a broken branch during flowering for the exact splint-and-tape method using plant repair tape like BudSavers.
Watering and Feeding During the Flowering Stage
Flowering shifts nutrient demand. The plant stops building leaves and starts building dense flowers, which changes the ratios of nitrogen, phosphorus, and potassium it needs. Most home-grow problems in flower trace to one of three sources: overwatering as transpiration falls in late flower; running veg-strength nitrogen too deep into flower; or mistaking late-flower nitrogen depletion (which is normal) for a deficiency requiring more food. That last one catches almost everyone, so it is worth knowing why your lower leaves yellow in late flower before you reach for the bottle.

Watering frequency
Watering frequency drops as the plant approaches harvest. In a fabric pot, lift the pot to test weight before each water. Water when the pot is light - typically every 1 to 3 days mid-flower, stretching to every 3 to 5 days late flower as the plant slows transpiration. In coco, rockwool or any bottle-fed medium, water to about 15 to 20 percent runoff each time to clear salt buildup and prevent root-zone pH drift; in a pre-charged, amended or living soil, water until the pot is damp through with little or no runoff. Our watering guide covers how much to pour. Catch saucers should never sit in standing water for more than an hour. Overwatering in mid-to-late flower is the single most common watering mistake - the same schedule that worked in early flower starts saturating the root zone once growth stops and transpiration falls.
NPK ratios for flowering
Most flowering nutrient lines cut nitrogen and push phosphorus and potassium, landing around 5-15-15 to 5-20-20 NPK on the bottle. The research does not back the high-phosphorus half. In a deep water culture trial run by University of Guelph researchers at a licensed production facility in Ontario, Bevan, Jones and Zheng found the flower-yield optimum at 59 mg/L of phosphorus, saw no yield difference anywhere from 60 to 340 mg/L of potassium, and put the nitrogen optimum near 194 mg/L, so a flowering plant still wants a real supply of nitrogen.5 Scott Golem, who reviewed this guide, took part in that trial at HEXO, and the paper thanks him in its acknowledgments. He reads the high-phosphorus habit as a soil hangover: phosphorus barely moves in soil, so growers pushed its concentration up to be sure the roots found it, while in a hydroponic system every root reaches the solution and the extra goes unused. Our nutrients guide sets out the phosphorus evidence.
Switch to the bloom blend as the stretch slows, run it full-strength through week 6, ease the strength back slightly in weeks 7 to 8 as uptake falls, and keep feeding right through to the end - stop only a day or two before the cut. We do not flush. Excess nitrogen in late flower delays ripening and locks chlorophyll into the leaves, and tends to leave a harsher smoke.
Calcium, magnesium, and the epsom salt question
Calcium and magnesium demand stays high through flowering. Calcium deficiency shows as brown-edged sugar leaves; magnesium shows as interveinal yellowing on mid-canopy leaves. Both deficiencies are common with reverse osmosis water or with synthetic salt fertilizers that lack Cal-Mag. Epsom salt (magnesium sulfate, 1 teaspoon per gallon, or 5 ml per 3.8 L) is a quick fix for magnesium only. It does not address calcium. A proper Cal-Mag supplement covers both.
Scott Golem adds a trigger from commercial rooms: he sees calcium and magnesium deficiencies more often under high-intensity LEDs than under high-pressure sodium, and he adds Cal-Mag to the feed on LED grows as a matter of course. That is his experience rather than a tested result. We could not find a trial linking LEDs to calcium deficiency, and the usual explanation, that cooler leaves under LEDs transpire less and so draw in less calcium, is weaker than it sounds: with no water stress, leaves under both LED and HPS stay within about 4°F (2°C) of the air.6 Under LEDs in coco or on RO water, where Cal-Mag is needed anyway, his habit costs little.
Flushing: we do not do it
"Flushing" - feeding only plain water for the last one to two weeks before harvest - is close to universal advice, and the controlled evidence does not support it. Two published trials found no gain in cannabinoids, terpenes or bud quality from flushing, and the second of them measured a real cost: flower weight fell, in one cultivar from the first week of flushing and in the other once the flush ran past two weeks. So this is not a semantic argument about whether to call it flushing or tapering. Keep feeding on your normal schedule through late flower and cut on the trichomes. The yellowing a flush produces is the plant running out of nitrogen, not impurities leaving the buds. Our harvesting guide sets out the evidence and the reviewer's position behind it, and the nutrients guide carries the feed strengths to run instead.
5 Common Cannabis Flowering Stage Mistakes
These are the mistakes I see most often in home grows. None of them ruin a plant alone, but stacked together they take 30 to 50 percent off a grow's potential.

Treating flowering like an extension of veg
Flowering is not "veg plus buds." The plant's hormonal balance, nutrient demand, and structural priorities all change at the flip, but not all at once. For the first two to three weeks the plant is still growing hard: the stretch is new stem, new leaf and new bud sites, and that growth runs on nitrogen. Scott Golem keeps the veg feed going until the stretch slows and switches to a bloom feed then, not at the flip, because switching early starves the stretch of nitrogen and costs yield. The research backs the nitrogen half of that: in a flowering-stage trial, plants given less than 160 mg/L of nitrogen were deficient, and yield climbed up to that level.7 No trial has tested when to make the switch, so the timing is Scott's commercial practice. The old warning still holds at the other end: keep running veg-strength nitrogen deep into bulking and you delay ripening. Keep trying to widen the canopy with new training and you stress the plant during its most committed energy phase. Lock the canopy at the flip (tucking under a net through the stretch is the one exception), switch to a bloom feed as the stretch slows, around week 2 to 3, and let the plant commit. For what a bloom NPK ratio should be and how to feed during flowering, we lay out the numbers.
Adding new LST after the flip
Structural training is finished at the flip. The only shaping that still earns its keep in flower is tucking branches under a trellis net through the stretch, and that stops when the stretch does, around day 21. Clips are a veg tool and we do not recommend them in flower at all: once the bud sites are set, a new bend cannot add one, it can only cost you. If your canopy is uneven at the flip, that is the price of an incomplete veg. Resist the urge to fix it now; topping cannabis and structural training belong to veg, full stop.
Aggressive defoliation late in flower
Mid-flower defoliation at days 21 to 25 is a known technique with research backing. Heavy defoliation at week 6 or 7 is not the same thing. By late flower the plant cannot replace fan leaves before harvest, and removing them deprives the plant of the photosynthesis it needs to finish bud bulking. Light leaf-pruning to open up airflow is fine, and the pre-harvest strip is a separate job: about a week before you cut, take every fan leaf except the top two or three on each branch, then take those the day before you chop, as our harvesting guide sets out. Full schwazzing with two or three weeks still to run is a mistake.
Light leaks during the dark period
Photoperiod cannabis needs an uninterrupted dark period. Even small light leaks - a power LED on a fan controller, a sliver of light under the tent door - can revert the plant to veg-like growth ("re-veg") or trigger hermaphroditism. Test for leaks: stand inside the tent during lights-off, eyes adjusted, and look for any visible light source. If you can see it, fix it.
Know what re-veg looks like, because it is often the first sign of a leak you have not found. Scott Golem's tell is the leaves: new growth comes out deformed, with two or three blades where you would expect five or more. Single, rounded blades are common too. See leaves like that in flower and check the tent and the timer before anything else. A timer that has started switching on during the dark period does the same damage as a leak.

Harvesting too early on calendar alone
The strain pack number is a reference, not a finish line. Plants harvested 1 to 2 weeks early have noticeably lower potency, lighter aroma, and less density. Confirm trichome readiness with a 30x to 60x loupe. The standard call: 80 to 90 percent milky trichomes with 5 to 10 percent amber, read on the calyxes at 30x to 60x across 3 to 5 sites. Sugar-leaf trichomes run about a week ahead and are not the cue.
The Science of Cannabis Flowering
Cannabis is a short-day plant. The cannabis flowering stages are governed by photoperiod signaling, a stretch driven by plant hormones, and resin production by specialized glandular trichomes. Each of these has decades of plant-biology research behind it - cannabis-specific peer-reviewed work has grown rapidly since 2015.
Photoperiodism and phytochrome signaling

Plants sense day length through phytochromes, a family of light-sensitive proteins in leaf cells. Phytochrome exists in two states: Pr (red-light absorbing) and Pfr (far-red absorbing). During the day, light keeps phytochrome in the Pfr form. During darkness, Pfr slowly converts back to Pr. When nights become long enough that conversion finishes before sunrise, the plant interprets it as a short-day signal and begins flowering8. This is why even brief light interruptions during the dark period - the "light leaks" mistake - can prevent or revert flowering: they reset the phytochrome clock.
How much light it takes, and of what color, is less settled than grow forums suggest. Red light is what drives the phytochrome switch, and in cannabis a one-hour night break during the dark period was enough to keep plants vegetative.9 Scott Golem suspects red light is what matters: he has used other LED task lights in flowering rooms during defoliation without seeing flowering disrupted, though he says it needs checking, and some growers work through lights-off under green headlamps, on the reasoning that plants make little use of green light. No cannabis trial has tested either, so the safe rule does not change: keep the dark period dark, and if you have to work in it, keep it brief and dim.
Why plants stretch (auxins and gibberellins)

The 2-to-3-week post-flip stretch is driven by gibberellin accumulation. Gibberellins are plant hormones that promote cell elongation in stems and internodes. The flip releases gibberellin synthesis from the photoperiod-mediated suppression it experienced during veg, producing the rapid internode extension you see in weeks 1 to 3. Auxins, produced primarily at branch tips, control apical dominance and the direction of growth. When apical dominance is intact, the central cola gets most of the auxin priority; topping or LST during veg redirects this hormone distribution10, which is why low-stress training produces an even multi-cola canopy.
Trichome biology and resin production

Cannabis resin is produced by specialized cells called glandular trichomes, which sit on the surface of sugar leaves, calyxes, and bract tissue. These glandular cells synthesize cannabinoids (THC, CBD, CBG, and others) and terpenes inside a sealed bulb at the trichome tip. Trichome maturation follows a predictable color progression: clear (immature, low THC), cloudy/milky (peak THC, dominant target for harvest), and amber (CBN conversion, more sedative profile). A landmark 2020 study11 mapped the morphology and metabolite trajectory of cannabis glandular trichomes through flower maturation, confirming the standard cloudy-trichome harvest call has biochemical support.
Frequently Asked Questions
How long is the cannabis flowering stage?
Most photoperiod strains finish flowering in 8 to 12 weeks from the flip. Indica-dominant strains lean shorter (8 to 9 weeks), sativa-dominant strains lean longer (10 to 12 weeks). Most autoflowers finish 9 to 11 weeks from seed (some larger cultivars run to 13), flowering on their own from around week 3 to 5. Treat strain pack timing as a reference and confirm harvest with trichome inspection.
When does the cannabis flowering stage start?
Indoors, the cannabis flowering stage starts the day you switch your photoperiod lights from 18 hours on to 12 hours on. Visible signs appear 7 to 14 days later - white pistils emerging at branch crotches across the canopy. Outdoors, flowering triggers as natural daylight drops past about 14 hours, usually mid-August to early September in temperate latitudes. Autoflowers flower on age, not light cycle.
What is the ideal temperature for the flowering stage?
70 to 80°F (21 to 27°C) lights-on, with a 5 to 10°F (3 to 6°C) drop at lights-off. Above 85°F (29°C), photosynthesis starts to fall off and heat drives terpenes off faster. Below 65°F (18°C), bud density suffers and ripening drags. Cooler lights-off temperatures in late flower can deepen color expression in genetics carrying purple traits.
What is the ideal humidity for flowering?
Drop humidity progressively. Run 55 to 65% relative humidity in early flower (weeks 1 to 3), 50 to 60% mid-flower (weeks 4 to 6), and 45 to 55% late flower (weeks 7 to 8). Running 40 to 55% from the flip onward is outdated - modern best-practice tolerates higher early-flower humidity for terpene retention and only tightens for the rot-vulnerable late-flower window.
Can I top during flowering?
No. Topping belongs to veg, full stop. Topping a flowering plant cuts off your developing top cola and forces the plant to redirect energy into recovery exactly when it should be committing energy to bud production. If your canopy is uneven at the flip, accept it for this run and plan better topping next time.
Can I do LST during flowering?
Only tucking, and only under a net. If you are running a trellis, keep tucking branches through the stretch and stop when the stretch does, around day 21. Everything else is finished: clips are a veg tool and we do not recommend them in flower at all. The reason is not that the stems have hardened, it is that by then the bud sites are set, so a new bend cannot add one and can only risk the buds already there. After the stretch, support the canopy rather than reshaping it.
What week do trichomes form?
Trichomes start appearing on sugar leaves and around bud sites in week 4 to 5. Coverage expands across bud surfaces through weeks 6 and 7. By week 8 the calyx trichomes are mostly cloudy with the first amber heads showing; sugar-leaf trichomes run about a week ahead, so read the calyxes, not the leaves. Use a 30x to 60x loupe for accurate trichome reading; the naked eye cannot distinguish clear from cloudy reliably.
Why are my fan leaves yellowing in late flower?
Late-flower yellowing on lower and mid-canopy fan leaves is usually normal - the plant is mobilizing nitrogen out of those leaves and into the buds. This is called nitrogen senescence. Do not panic-feed extra nitrogen in late flower; it delays ripening. If yellowing hits sugar leaves or appears with brown spotting, you have a real deficiency. Otherwise, it is the plant finishing on schedule.
Should I flush before harvest?
No. Two published trials found flushing gives no gain in cannabinoids, terpenes or bud quality, and one of them measured a loss of flower weight that grew the longer the flush ran. Keep feeding on your normal schedule and time the cut on trichome color instead. The yellowing a flush produces is nitrogen running out, not impurities leaving the buds.
What is VPD and what is the target for flowering?
Vapor pressure deficit (VPD) is the difference between the amount of water vapor the air is holding and the amount it could hold at saturation. It is the actual driver of plant transpiration. Target 0.9 to 1.3 kPa during flowering - 0.9 to 1.1 early flower, 1.1 to 1.3 mid-to-late. Use a VPD calculator that takes your temperature and humidity inputs.
Can autoflowers be supported the same way as photoperiods?
Autoflowers respond well to LST and branch support. Topping is not off the table, but it is tighter than on a photoperiod: at most one topping in veg, in the same place a photoperiod takes its first, taking very little plant material and only on a visibly vigorous plant, skipped entirely if the timing is unsure or the plant is lagging - autos do not have the runway to recover from a second cut or from aggressive defoliation. Use branch ties (garden wire from branch to branch) and trellis netting freely. Apply support at the first sign of bud weight on branches.
Why are my buds airy instead of dense?
Airy buds usually trace to one of four causes: light intensity below 400 μmol PPFD mid-canopy, temperatures above 85°F (29°C) during mid-flower, low VPD (excessive humidity for the temperature), or premature harvest. Genetics also matter - some sativa-dominant strains produce naturally fluffy buds even under ideal conditions. Fix the environment for the next run; the current run will not redensify.
Where to Go From Here
The day you chop is the start of the post-harvest stage, which is equally consequential for final quality. Three short steps to lock in:
Harvest at confirmed trichome maturity: 80 to 90% cloudy on the calyxes with 5 to 10% amber, read at 30x. Sugar-leaf trichomes ripen about a week early, so do not time the chop off them. The full inspection process is in the harvesting workflow.
Dry in a dark room at 60 to 68°F (15 to 20°C), starting at 50% RH for the first two days and stepping up to 55% from day 3 - about 7 days for most flower, up to 14 for dense colas. The drying guide covers the full schedule including rack vs hang choices, airflow, and how to test for ready-to-cure dryness.
Cure for 14 to 30 days; about a month is the target. Curing your harvest in jars with humidity packs (62% is the home-grow standard) preserves terpene volatility and smooths smoke.
If you want the branch support setup most of our flowering growers use, the BudHuggers are designed specifically for this stage.
Get the free Flowering Cheat Sheet
The three dials that decide bud density, the three ways to hold a branch up before the weight arrives, and the week-by-week from the flip to the chop. One page for the setup, one for the schedule. Printable, phone-friendly.
Get the Flowering Cheat SheetReferences
- Chandra, S., Lata, H., Khan, I. A., & ElSohly, M. A. (2008). Photosynthetic response of Cannabis sativa L. to variations in photosynthetic photon flux densities, temperature and CO2 conditions. Physiology and Molecular Biology of Plants, 14(4), 299-306. https://link.springer.com/article/10.1007/s12298-008-0027-x
- Carvalho, S. M. P., Heuvelink, E., Cascais, R., & van Kooten, O. (2002). Effect of day and night temperature on internode and stem length in chrysanthemum: Is everything explained by DIF? Annals of Botany, 90(1), 111-118. https://doi.org/10.1093/aob/mcf154
- Bok, G., Hahm, S., Shin, J., & Park, J. (2023). Optimizing indoor hemp cultivation efficiency through differential day-night temperature treatment. Agronomy, 13(10), 2636. https://doi.org/10.3390/agronomy13102636
- Rodriguez-Morrison, V., Llewellyn, D., & Zheng, Y. (2021). Cannabis yield, potency, and leaf photosynthesis respond differently to increasing light levels in an indoor environment. Frontiers in Plant Science, 12, 646020. https://www.frontiersin.org/articles/10.3389/fpls.2021.646020/full
- Bevan, L., Jones, M., & Zheng, Y. (2021). Optimisation of nitrogen, phosphorus, and potassium for soilless production of Cannabis sativa in the flowering stage using response surface analysis. Frontiers in Plant Science, 12, 764103. https://doi.org/10.3389/fpls.2021.764103
- Nelson, J. A., & Bugbee, B. (2015). Analysis of environmental effects on leaf temperature under sunlight, high pressure sodium and light emitting diodes. PLoS ONE, 10(10), e0138930. https://doi.org/10.1371/journal.pone.0138930
- Saloner, A., & Bernstein, N. (2021). Nitrogen supply affects cannabinoid and terpenoid profile in medical cannabis (Cannabis sativa L.). Industrial Crops and Products, 167, 113516. https://doi.org/10.1016/j.indcrop.2021.113516
- Potter, D. J. (2014). A review of the cultivation and processing of cannabis (Cannabis sativa L.) for production of prescription medicines in the UK. Drug Testing and Analysis, 6(1-2), 31-38. https://onlinelibrary.wiley.com/doi/10.1002/dta.1531
- Grover, E. F., Haiden, S. R., & Berkowitz, G. A. (2025). Examining the "night break" method in Cannabis sativa horticulture. Plants, 14, 3095. https://doi.org/10.3390/plants14193095
- Beveridge, C. A., Rameau, C., & Wijerathna-Yapa, A. (2023). Lessons from a century of apical dominance research. Journal of Experimental Botany, 74(14), 3903-3922. https://doi.org/10.1093/jxb/erad137
- Livingston, S. J., Quilichini, T. D., Booth, J. K., Wong, D. C. J., Rensing, K. H., Laflamme-Yonkman, J., Castellarin, S. D., Bohlmann, J., Page, J. E., & Samuels, A. L. (2020). Cannabis glandular trichomes alter morphology and metabolite content during flower maturation. The Plant Journal, 101(1), 37-56. https://onlinelibrary.wiley.com/doi/10.1111/tpj.14516

About the Author
Henrique Dias is the CEO and co-founder of BudTrainer. He is a mechanical engineer who also holds a graduate certificate in Commercial Cannabis Production from Niagara College in Ontario, Canada - the first college-level cannabis cultivation program in North America. Before founding BudTrainer, Henrique worked with Health Canada licensed cannabis producers, where he gained hands-on experience in cultivation, processing, and post-harvest management of cannabis at commercial scale. He started BudTrainer to bring that same level of craft to home growers through better-designed gardening tools and clear, science-backed education.

About the Reviewer
Scott Golem, MSc reviewed this guide for technical accuracy in September 2026. Scott is the Associate Director of the Horticultural and Environmental Sciences Innovation Centre at Niagara College in Ontario, Canada, where he runs the college's controlled-environment cannabis research facility and its research greenhouse. He holds a BSc in Forensic Science from Trent University, an MSc in Biotechnology from Brock University and a graduate certificate in Commercial Cannabis Production from Niagara College, and has been teaching and researching in post-secondary education since 2009, at Brock University and Niagara College, across plant science, genetics, and greenhouse cultivation. Before moving into research, Scott was a Master Grower and Plant Scientist for licensed producers, where he led breeding and crop-optimization programs. He reviews these guides personally rather than on behalf of any institution.
DISCLAIMER: Everything taught and sold by BudTrainer® is to be used strictly for legal purposes. We do not endorse the production of illegal substances and it is your duty to ensure that you are complying with the law. The words "hemp," "cannabis," "weed," and "marijuana" are used interchangeably to refer to the same plant (legal hemp with less than 0.3% THC) for the purposes of this lesson.