Late fall is when a lot of growers move indoors for the winter, and it is the best time of year to start a living soil. A batch you mix this week cooks for four to eight weeks, is ready for the winter grow, and gets better with every grow after that. A bag of potting soil gives you one grow. A living soil gives you a root zone that improves each time you use it, as long as you understand what it is doing and why it is slower than a bottle.
This guide is the deep version of the living soil section in our soil guide, which compares every growing medium side by side and owns the numbers on perlite, coco and super soil cooking. Here we cover building one, feeding it on time, and reusing it without ever dumping the pot.
What Living Soil Is (and What It Is Not)
Living soil is a container of soil you run as a permanent system. You keep a population of bacteria, fungi, protozoa, tiny worms called nematodes and often earthworms alive in it. You feed that population with dry organic amendments and compost scattered on the surface, and the population feeds the plant. You do not dump the pot between grows. You cut the plant at the soil line, feed the soil again, and plant the next one into the same pot.

The plant is an active partner in this, not a passenger. Its roots release sugars and other compounds into the soil, called root exudates, and the microbes that gather around the roots trade nutrients they have unlocked for that sugar. Our root science guide covers that exchange in detail. In a bottle-fed pot the grower does the unlocking by mixing nutrients that are already dissolved. In a living soil the biology does it.
Three things get sold under the same name, and they are not the same:
| What it is | What feeds the plant | How long it lasts | Who it suits |
|---|---|---|---|
| Pre-charged bagged soil | A small dose of nutrients mixed in at the factory | About three to four weeks, then you feed | Grow one |
| Super soil | A heavy dose of dry amendments mixed in and cooked | Most or all of one grow | Growers who want to feed once and water |
| Living soil | The soil life, fed by compost, top-dressed amendments, mulch and cover crops | Indefinitely, if you keep feeding the soil | Growers on their fourth grow in the same space |
| Bottle-fed mix | Dissolved mineral nutrients in the water | Every watering | Growers who want full control |
A super soil is usually how a living soil starts. The difference is what happens after harvest: a super soil gets used and dumped, a living soil gets re-fed and kept. The three-to-four-week figure for a pre-charged bag is our reading of the maker's own instructions, which the soil guide explains.

Earthworms are welcome in a large living soil pot, and many growers add a handful of red wigglers, the composting worm, on purpose. They are not required. The bacteria and fungi do most of the work, and a pot with no worms in it can still be a thriving living soil.
What the Research Actually Says About Living Soil
There is no controlled trial of a living soil, run for several grows in a container, on drug-type cannabis. Anyone who tells you the research proves living soil grows more or better flower is selling something. What does exist is a handful of trials that test the pieces, and together they explain both why living soil works and why it frustrates people who treat it like a bottle.
Organic nutrients reach the plant later
Massuela, Munz, Hartung, Nkebiwe and Graeff-Hönninger grew a CBD-rich cultivar indoors in 4 liter pots of a peat and coco mix, and fed it through flowering at three strengths, 80, 160 and 240 mg of nitrogen per liter, using either a liquid organic fertilizer or mineral fertilizers.1 Averaged across the three strengths, the organic plants finished with 19.6 g of dried flower each and the mineral plants with 23.7 g. CBD yield followed the same direction, 1,197 mg per plant against 1,319.

The interesting part is why. The organic plants took up only about 24 percent of the phosphorus they were given, against 30 to 39 percent on mineral feed, and the gap only showed up at the final harvest. The authors put it down to the form the nutrients came in: organic nitrogen and phosphorus have to be broken down before a root can use them, and in their pots that happened too late for the last weeks of flowering, when demand peaks. Their own recommendation was that organic fertilizer "should be applied earlier at a higher rate."
That trial used a liquid organic feed in small pots of ordinary mix, not a living soil, so read it as a lesson about timing, not a verdict on living soil. But the lesson transfers directly. Every amendment you put on a living soil is in that same slow form. Whatever you feed today, the plant gets in a couple of weeks.
Compost alone is the least predictable feed
Bruce, Connelly and Ellison at the University of Wisconsin-Madison grew organic hemp outdoors for two years under four fertility programs: nothing, a manure-based compost, an industry-standard organic fertilizer blend, and an intensive cannabis-specific program.2 More fertility meant more flower, and none of the programs changed the ratio of CBD to THC. The standard organic blend gave the most consistent yields across both years. The compost was the least predictable.
That matches what living soil growers see. Compost is the biology and the structure of a living soil, and it is not a complete or a dependable feed by itself. A living soil that runs on compost alone has good years and bad years. One that gets a known set of dry amendments, on a schedule, behaves the same way grow after grow.
The right fungi can stand in for fertilizer
Seemakram and colleagues at Khon Kaen University in Thailand grew hemp cuttings for 60 days in 7.5 liter pots of sterilized sandy soil, and compared plants given nothing, plants given a standard 15-15-15 fertilizer, and plants inoculated with one of two species of mycorrhizal fungi, the root-partner fungi that extend a plant's reach into the soil.3 With no fertilizer at all, plants inoculated with Rhizophagus prolifer grew about as much flower as the fertilized plants, 9.3 g against 8.8 g, and plants inoculated with Rhizophagus aggregatus grew 11.8 g. The untreated plants grew 5.8 g. CBD concentration was highest in the inoculated plants too.

Two cautions keep this honest. It was one hemp cultivar, one soil and one short trial. And the soil was sterilized first, so the fungi had no competition, which is about as far from a living soil as you can get. What it does show is that the soil's own biology can deliver the nutrition a plant needs. That is the claim living soil rests on, and here is a cannabis trial that measured it.
The soil decides most of who lives around the roots
Winston and colleagues sequenced the bacteria in and around the roots of five cannabis cultivars grown in different soils.4 The soil mainly decided which bacteria lived in the soil around the roots, and the cultivar mainly decided which ones lived inside the roots. In plain words: what you build the soil from, and what you keep feeding it, decides the population your plant gets to work with.

Put the four together and you have the honest case for living soil. The biology is real and it can feed a cannabis plant. It does so more slowly than a bottle, and less predictably if you leave it to compost alone. Feed it earlier, feed it something consistent, and the slowness stops costing you anything.
Should You Run Living Soil?
Our honest read, the same one the soil guide gives: a self-built living soil is an excellent upgrade and not a first-grow project, the way a sourdough starter is not how you bake your first loaf. A new living soil is not a living soil yet. It is a tub of amendments that becomes one over a few months and at least one grow.
That does not mean a first-time grower should stay away from the idea. A good amended bagged soil that you mostly just water is one of the most forgiving ways to grow a first plant, which is why our nutrients guide recommends it. The living soil part, keeping that soil and re-feeding it grow after grow, is what pays off later. Run living soil if most of these are true:
- You will grow in the same space for at least three grows.
- You can fit a pot of 15 gallons (57 L) or more per plant, or a fabric bed.
- You would rather do a little work between grows than mix nutrients every watering.
- You are fine giving up some control in flowering, because you cannot change a living soil overnight.
If you need to correct problems fast, or you want every watering to be a precise recipe, stay with a bottle-fed mix. Neither is the wrong choice; they are different chore lists.
Buy it or build it
Several companies sell living soil, among them BuildASoil, KIS Organics, Gaia Green and Nature's Living Soil. Most sell two kinds of product, and it matters which one you pick up. A ready-to-plant bag is a finished amended soil; plant into it after checking it with the sprout test below. A concentrate is the amendment and compost part only, meant to be blended with your own peat and aeration, which is cheaper per gallon and puts you back into building. Either way, a bag of soil labeled "living" is a super soil until it has carried a crop. It becomes a living soil when you start re-feeding it instead of throwing it out.
A pre-charged potting soil such as FoxFarm Ocean Forest is not a living soil. It is a good bagged soil with a few weeks of food in it. You can turn one into the base of a living soil by blending it with compost and amendments, but on its own it will need feeding by the second month.
Container Size: Why 15 Gallons Is the Floor
Most living soil growers run 15 gallons (57 L) per plant or more, and that is the size the soil guide uses as the floor. The reason is stability. A soil population needs enough volume to ride out the swings: a small pot dries out between waterings, heats up under a light, and can tip from wet to dry in a day. A large one changes slowly, which is exactly what keeps the biology working.

Fabric is the usual choice because it lets the soil breathe, and it has a cost. Million and Yeager grew nursery plants in fabric and plastic containers of the same size and found the fabric ones needed 66 percent more irrigation, because water evaporates through the walls.5 That was holly outdoors, not cannabis in a tent, but the physics travels, and it is one of the reasons living soil growers cover the surface with mulch. Our BudPots fabric pots come in 15 and 25 gallon (57 and 95 L) sizes for this. A low fabric raised bed is the other common option: two or more plants share one big soil, which is even more stable than a pot each.
Plan for the weight. A 15 gallon pot of wet soil is far too heavy to lift, so put it where it will stay for the whole grow, on a saucer or a low stand that lets air under it, before you fill it.
How to Build Living Soil, Step by Step
Build it a month or two before you need it. Everything below assumes the soil guide's air target for a container mix: about 20 to 25 percent of the volume as air, which in practice means about 30 percent aeration in the mix.
Step 1 - Choose the container and work out the volume
Pick the pot or bed first, then build enough soil to fill it plus about 20 percent extra for settling and for top-dressing later. One cubic foot is about 28 liters, so a 15 gallon (57 L) pot takes about 2 cubic feet of mix, and a 25 gallon (95 L) pot about 3.5. Put the empty pot in its final position now.
Step 2 - Mix the base in equal thirds
The base is equal parts by volume of three things, which is the same structure most living soil recipes share:
- One part peat moss (or coco coir, buffered as the soil guide describes). This holds water and gives the soil its body. Peat is naturally acidic, which the next step corrects.
- One part aeration: perlite, pumice or rice hulls. This is what keeps air in the soil for the roots and the biology. It lands on the same 30 percent the soil guide asks for, and it is the part people cut when the tub gets full. Do not.
- One part compost and worm castings. This is the biology and much of the slow food. Use the best compost you can find, and worm castings for at least half of this part if you can. Castings are the dark, fine, earthy material earthworms leave behind.

Mix it on a tarp or in a large tub, dry or barely damp, turning it until the color is even and you can see the white aeration spread all the way through. Lumps of peat or compost will dry out and repel water later, so break them up now.

Step 3 - Add the dry amendments, at the low end
The amendments are the long-term food. Here is a starting set per cubic foot (28 L) of base mix. It is modeled on the community recipes most living soil growers start from, and no trial has tested these rates, so treat them as a careful starting point rather than a formula:
| Amendment | Per cubic foot (28 L) | What it is for |
|---|---|---|
| Kelp meal | 1/2 cup (120 ml) | Potassium and trace minerals |
| Neem seed meal or karanja meal | 1/2 cup (120 ml) | Slow nitrogen |
| Crab or crustacean meal | 1/2 cup (120 ml) | Nitrogen and calcium |
| Rock dust (basalt or glacial) | 2 to 4 cups (475 to 950 ml) | A broad mix of minerals, released slowly |
| Gypsum | 1/2 cup (120 ml) | Calcium and sulfur without moving pH |
| Oyster shell flour or dolomite lime | 1/2 cup (120 ml) | Lifting peat's acidity toward the soil target |
Notice what is missing: bat guano, bone meal and the other "big bud" phosphorus sources. The research on phosphorus in cannabis says the plant is satisfied at modest levels and that more costs you potency, and in a soil you cannot take it back out. The phosphorus trap section of the soil guide walks through all three trials. The amendment rates printed on bags are written for garden beds, which have far more soil underneath to buffer them, so stay at or below the low end of every bag rate. You can top-dress more in a month. You cannot dig it back out.

Step 4 - Wet it and let it cook for four to eight weeks
Water the finished mix until it is evenly damp, like a wrung-out sponge: a squeezed handful holds together and drips only a drop or two. Then leave it in covered tubs or a covered pile, somewhere warm, and turn it once a week. This is the cook. Microbes are breaking the dry meals down into forms roots can use, and turning ammonium, the form of nitrogen that burns roots, into nitrate, which does not.

How long it takes depends on what went in. The soil guide's position, which we keep here, is four to eight weeks kept moist and warm and turned weekly, then a test rather than a date. A mix built on worm castings and gentle meals like the ones above is usually ready at the fast end.
Step 5 - Run the sprout test
Fill one cup with the cooked soil and one with plain unamended potting mix. Sow a few radish, lettuce or cress seeds in each, keep them at room temperature, and compare after three to five days. If the seeds in your soil come up as fast as the control, with roots as long and no burnt tips, it is ready. If they are slow, short, patchy or scorched, give it more time and test again.

Step 6 - Fill the pot and plant into it
Fill the pot loosely to about an inch (2.5 cm) below the rim, without packing it down. Do not start seeds in it. A rich soil is a transplant destination, not a seedling medium, so start seeds or clones in a plain mix in a small container such as a BudCup and move the seedling across once it has a real root system. Our transplanting guide covers when the root ball is ready. An autoflower gets one transplant, straight from its starter cup into the living soil pot.

Dig a hole the size of the root ball, put a handful of worm castings in the bottom, and set the plant in at the same depth it was growing. If you use a mycorrhizal inoculant, dust the root ball with it now, where the roots will touch it. Water the whole pot in once, the way our transplanting guide describes, then leave it to dry back.

Step 7 - Mulch the surface and sow a cover crop
Scatter a pinch of cover crop seed over the bare soil: clover on its own, or a mix of clover with a few grains such as barley and peas. Rake it in lightly with your fingers, then cover the surface with an inch or two (2.5 to 5 cm) of loose straw or shredded leaves, thin enough that the seedlings can push through. Within a week the surface should look like the photo below. The next section explains why this is worth doing.

Mulch and Cover Crops: Why the Surface Matters
A bare soil surface under a grow light is a desert. It dries out first, heats up most and crusts over, and the top inch or two of the pot, which is the richest part of a living soil, becomes the least alive. Mulch and a cover crop fix that. They are not decoration.

Mulch shades the surface, slows the evaporation that fabric walls already speed up, and gives fungi and small soil animals a damp, sheltered layer to live in. As it breaks down it becomes food. Straw is the usual choice; shredded leaves, rice hulls and the trimmed leaves of your own plants all work.
A cover crop does the same job with roots. Clover is the most common pick because it stays low, tolerates the shade under a cannabis canopy, and, like other legumes, partners with bacteria that pull nitrogen from the air. A living carpet of clover also tells you something: when it wilts, the top of the soil is dry, so it doubles as a watering gauge. No trial has measured what a cover crop does for cannabis in a container. This is grower practice, and we include it because the reasons are sound and it costs a few cents of seed.

Keep the cover crop short so it does not compete for light or water with the plant. When it gets tall, trim it with scissors and leave the cuttings where they fall, a habit growers call chop and drop. The trimmings become mulch, and the roots stay in the soil to feed the biology. If the clover ever starts to look like a lawn competing with the plant for water, cut it hard.
Watering Living Soil
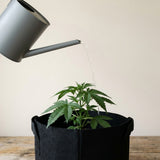
Water a living soil the way our watering guide says to water any pre-charged, amended or living soil: until it is damp all the way through with little or no runoff. In a bottle-fed pot runoff carries away old salts. In a living soil, what runs out of the bottom is the food you paid for, so you want the water to stay in the pot.

The trigger is the same as for every pot: water when it has lost about half the weight it gained at the last watering, which in practice means it feels clearly lighter. You cannot lift a 15 gallon pot, so tip it slightly by the rim and feel how heavy it is, or push a finger through the mulch into the top two inches (5 cm) of soil. A wilting clover cover is your earliest sign. Pour slowly, in several passes around the pot, so the water soaks in instead of running down the walls. A big pot with mulch on top dries slowly, so it usually needs water less often than you would guess.

Tap water is fine for most cannabis, and letting it stand overnight does not help, as our planting guide explains: most utilities treat water with chloramine, which does not escape from standing water. Living soil is the one case where it can matter, because you are deliberately keeping a microbial population. If your water report says chloramine, a carbon filter or a water conditioner is the only thing that removes it.
You do not need to adjust the pH of plain water going into a mature living soil. The soil buffers it, and the soil target is the same 6.0 to 7.0, aiming for 6.5, that every soil grow uses. If something looks wrong, test the soil, not the water: stir one part soil into two parts distilled water, let it settle and read that liquid. That is called a slurry test.

Feeding Living Soil: Top-Dress on the Biology's Clock
This is where most living soil grows go wrong, and the Hohenheim trial explains why. A top-dress of meal and castings is not available the day you put it down. The soil life has to break it down first, and in practice that takes a couple of weeks. So we feed a living soil on the plant's future needs, not its current ones: top-dress two to three weeks before the plant will need the food. That is our rule, built on the timing lesson from Massuela's trial and on how organic amendments behave; no trial has tested a top-dressing schedule on cannabis.

To top-dress, push the mulch aside in a ring around the plant, scatter the amendments and a handful or two of worm castings on the soil, scratch them into the top inch (2.5 cm) at most, put the mulch back and water as normal. Use about half the build rates for the pot's volume: a 15 gallon (57 L) pot holds about 2 cubic feet, so it gets about 1/2 cup (120 ml) of each meal. In a grow that runs from transplant to harvest, three top-dresses cover it:
- About three to four weeks after transplant, in veg: castings and a nitrogen meal such as neem or crab meal, for the rest of veg and the stretch.
- At the flip to 12/12: castings, kelp and gypsum, with a lighter hand on the nitrogen meal than in veg; flowering plants still need nitrogen. This is the bloom feed. Bottle-fed plants switch to a bloom feed as the stretch slows, around weeks two to three of flower, and a top-dress put down at the flip arrives at about that time.
- Around weeks three to four of flower: castings only, if the plant looks hungry. Anything put down much later than this arrives after the plant has stopped using it.

The lower leaves of a cannabis plant yellowing in the last two or three weeks of flower is normal, in living soil as in any other medium; the plant is moving nutrients out of old leaves and into the flowers. Yellowing that starts in mid flower, or on the newest leaves, is a different story, and our deficiency guide diagnoses it by where it starts. In a living soil the fix is the same idea as always, scaled to the medium: a quick-acting top-dress such as worm castings and a liquid kelp, and patience.

Can you add bottled nutrients?
You can, and it will work for the plant, but it defeats the point. A plant fed dissolved mineral nutrients has less reason to trade sugar with the soil life, and you are back to steering a recipe every watering. If a living soil grow needs rescuing in late flower, a gentle bottled organic feed is a reasonable patch. If it needs rescuing every grow, the soil needs more amendments at the build, not more bottles.
Do you need compost teas?
Compost teas, brewed by bubbling air through compost in water, are popular in living soil circles. We know of no controlled trial showing they improve a cannabis crop grown in a healthy living soil. They are not harmful, and some growers enjoy them, but a top-dress of good worm castings delivers the same biology and food with less fuss. If your soil is alive, it does not need a tea to stay alive.
Do you need mycorrhizal inoculants?
The Seemakram trial shows what the right fungi can do, but it ran in sterilized soil. A living soil built on good compost and castings, and never sterilized, will usually develop a fungal population of its own. An inoculant is cheap insurance on the first grow, applied to the root ball at transplant, which is when the roots are ready to partner. After that, the soil carries it forward. Our planting guide shows how to apply it.

Reusing Living Soil: The No-Till Cycle
This is the part that makes living soil worth the trouble. Instead of dumping the pot after harvest, you leave the soil in place and never dig it over. Growers call this no-till. The soil's structure, its fungal networks and the channels the old roots leave behind stay intact, and every grow starts on a soil that is better established than the last.

At harvest, cut the main stem at the soil line. Leave the root ball in the pot. The fine roots break down within weeks and feed the soil life; the thick woody base breaks down more slowly, and you plant beside it rather than digging it out. This is the opposite of what our soil guide tells you to do with an ordinary mix, where thick roots come out, and the difference is the biology: a living soil has the population to break them down.

Then run the cycle:
- Re-amend the day you harvest. Push the mulch aside and top-dress with about half the build rates for the pot's volume and a generous layer of worm castings.
- Sow a fresh cover crop and put the mulch back.
- Keep it damp and lit. A light on a normal schedule keeps the cover crop growing and the biology fed.
- Plant the next one two to three weeks later, beside the old stump, with a handful of castings in the hole. The wait is our rule, for the same reason as the top-dress timing: it gives the new amendments time to start breaking down before the next plant needs them.

One exception overrides everything here: never reuse a soil that carried root rot, fusarium or a serious pest problem. Root aphids and fungus gnat larvae are the usual stowaways in reused soil, and nothing you can do in a pot is worth restarting an infestation. Our root rot guide covers what to do with the plant, and the soil goes in the outdoor garden or the trash, not into the next grow.
How long can a living soil last? Indefinitely, in principle, as long as you keep feeding it and it stays healthy. Peat breaks down over time, so after a few grows the soil may hold less air; a top-up of compost and a little aeration mixed into the top few inches when you re-amend keeps the structure open without turning the whole pot over.
Living Soil Problems and What They Mean
A living soil looks busier than a bag of potting mix, and much of what new growers worry about is the soil working as it should. Here is how to tell the difference.
White threads are good; fuzzy colored mold is not
Fine white threads spreading through the mulch and across the top of the soil are fungal hyphae, the working body of soil fungi, and they are a sign of a healthy living soil. Flat, fuzzy blue-green or gray mold growing in round patches on bare, shiny-wet soil is a different thing, and it means the surface is staying too wet with too little air.


The fix for surface mold is to water less often and keep the mulch loose, not to spray anything. Let the pot dry back to the watering trigger before you water again.
Springtails and soil mites are not pests
Tiny pale insects that jump when you water are springtails. They live on decaying matter, do very little if any damage to potted plants, and in a living soil they are part of the population that breaks the mulch down. Our pest guide lists them with soil mites and other harmless soil life. A very large number of springtails means the pot is staying wet, which is worth fixing for the plant's sake, not theirs.

Fungus gnats are a watering problem
Small dark flies hovering over the soil are fungus gnats, and in a living soil they are almost always a sign the top of the pot is staying wet. Water by weight so the surface dries between waterings, hang yellow sticky cards for the adults, and use soil predators such as Stratiolaelaps scimitus mites for the larvae, as the pest guide describes. Sand or diatomaceous earth on the surface does not work.
A slow first grow
A first grow in a brand-new living soil is often a little slower and a little paler than a bottle-fed grow, especially late in flower. That is the Hohenheim result in your own tent: the food is there, and some of it arrives late. Top-dress earlier next time, keep the cover crop going between grows, and expect the second and third grows to run smoother.
Common Living Soil Mistakes

- Too small a pot. Under 15 gallons (57 L) per plant, the soil swings too fast for the biology to keep up.
- Piling on phosphorus. Guano and bone meal are the classic "big bud" additions, and the research says past a modest level they cost potency. You cannot take them back out.
- Leaving the surface bare. The richest inch of the pot dries out and goes dead. Mulch it and sow a cover crop.
- Top-dressing on the day the plant is hungry. It arrives two to three weeks too late. Feed ahead.
- Adding bottled nutrients every watering. It works, and you have paid for a living soil and are running a bottle-fed grow.
- Digging it over between grows. Turning the soil breaks up the fungal networks and root channels you spent a grow building. Cut, re-amend on top and replant.
- Watering to runoff. What runs out is the food. Water until the pot is damp through and stop.
- Starting seeds in it. Start seeds in a plain mix and transplant into the living soil.
Frequently Asked Questions
What is living soil for cannabis?
Living soil is a container of soil run as a permanent system. It holds a population of bacteria, fungi and other soil life that breaks down compost and dry amendments and feeds the plant, so you add water and occasional top-dressings instead of bottled nutrients. You never dump it: after harvest you cut the plant at the soil line, re-feed the soil and plant the next one in the same pot.
Is living soil better than bottled nutrients?
Better at forgiveness, not at yield. In the closest head-to-head cannabis trial, plants on organic fertilizer made 19.6 g of flower against 23.7 g on mineral feed, because organic nutrients reach the roots later. A mature living soil buffers pH and feeding mistakes very well, but it needs a big pot, time to establish and feeding weeks ahead. It is an excellent grow-four upgrade and a poor grow-one choice.
What is the difference between living soil and super soil?
A super soil is a soil heavily mixed with dry amendments and cooked, meant to feed a plant for most of one grow, and then it is usually thrown out. A living soil usually starts as a super soil, but after harvest you keep it: you cut the plant, top-dress fresh amendments, sow a cover crop and plant again. The soil life is what you are keeping.
How big a pot do I need for living soil?
Plan on 15 gallons (57 L) per plant or more, or a fabric raised bed shared by several plants. A soil population needs volume to stay stable: small pots dry out, heat up and swing too fast for the biology to keep working. Put the pot in its final spot before you fill it, because a 15 gallon pot of wet soil is far too heavy to move.
Can you grow autoflowers in living soil?
Yes. Start the seed in a small cup of plain mix, then give it its one transplant straight into the living soil pot as soon as the root ball holds together. Autoflowers run short, so the living soil should be cooked, tested and top-dressed before the transplant, not during the grow. A top-dress put down late in an autoflower's life arrives after the plant has finished using it.
Do you need to pH water for living soil?
Not for plain water going into a mature living soil. The soil buffers it, and the target for the soil itself is the same 6.0 to 7.0, aiming for 6.5, as any soil grow. If something looks wrong, test the soil rather than the water: stir one part soil into two parts distilled water, let it settle and read the liquid. That is called a slurry test.
Can I use tap water in living soil?
Usually, yes. Letting tap water stand overnight does not help, because most utilities use chloramine, which does not escape from standing water. Living soil is the one case where it can matter, since you are deliberately keeping a microbial population alive. If your water report lists chloramine, a carbon filter or a water conditioner is the only thing that removes it.
How often should I water living soil?
When the pot has lost about half the weight it gained at the last watering, not on a schedule. A big mulched pot dries slowly, so it often needs water less often than you expect. Tip the pot by the rim to feel its weight or push a finger through the mulch into the top two inches (5 cm). Water until it is damp all the way through, with little or no runoff.
Can you reuse living soil forever?
In principle, yes, as long as you keep feeding it and it stays healthy. Cut the plant at the soil line, leave the roots in, top-dress with castings and amendments, sow a cover crop and plant again two to three weeks later. Never reuse a soil that carried root rot, fusarium or a serious pest problem; that soil leaves the grow.
Do I need a cover crop in living soil?
It is not required, but it is cheap and it helps. Clover keeps the top of the soil shaded and alive, partners with bacteria that pull nitrogen from the air, and wilts first when the pot needs water, so it doubles as a watering gauge. No trial has measured a cover crop's effect on cannabis in a container; this is grower practice. Keep it trimmed short.
Is FoxFarm Ocean Forest a living soil?
No. Ocean Forest is a good pre-charged potting soil with a few weeks of food mixed in, and it will need feeding by about the second month. You can use it as part of the base for a living soil by blending it with compost, aeration and dry amendments, cooking it and keeping it going between grows, but on its own it is a bagged soil.
Should I buy bagged living soil or build my own?
Buying is faster and building is cheaper per gallon. Brands such as BuildASoil, KIS Organics, Gaia Green and Nature's Living Soil sell ready-to-plant bags and concentrates you blend with your own peat and aeration. Either way, run the sprout test before you plant, and remember that a bag labeled living is a super soil until it has carried a crop and you start re-feeding it.
Can I add bottled nutrients to living soil?
You can, and the plant will use them, but it defeats the point. A plant fed dissolved nutrients has less reason to trade sugar with the soil life, and you are back to steering a recipe every watering. A gentle bottled organic feed is a reasonable rescue in late flower. If you need rescuing every grow, add more amendments when you build or re-amend instead.
Where to Go From Here
If you are still choosing a medium, start with the soil guide, which compares living soil with bagged soil, peat mixes and coco. For what happens below the surface, our root science guide explains how roots and microbes work together. And for the full grow from seed to harvest, our indoor growing guide puts the soil in context with the tent, the light and the climate.
References
- Massuela, D. C., Munz, S., Hartung, J., Nkebiwe, P. M., & Graeff-Hönninger, S. (2023). Cannabis Hunger Games: nutrient stress induction in flowering stage - impact of organic and mineral fertilizer levels on biomass, cannabidiol (CBD) yield and nutrient use efficiency. Frontiers in Plant Science, 14, 1233232. doi:10.3389/fpls.2023.1233232
- Bruce, D., Connelly, G., & Ellison, S. (2022). Different fertility approaches in organic hemp (Cannabis sativa L.) production alter floral biomass yield but not CBD:THC ratio. Sustainability, 14(10), 6222. doi:10.3390/su14106222
- Seemakram, W., Paluka, J., Suebrasri, T., Lapjit, C., Kanokmedhakul, S., Kuyper, T. W., Ekprasert, J., & Boonlue, S. (2022). Enhancement of growth and cannabinoids content of hemp (Cannabis sativa) using arbuscular mycorrhizal fungi. Frontiers in Plant Science, 13, 845794. doi:10.3389/fpls.2022.845794
- Winston, M. E., Hampton-Marcell, J., Zarraonaindia, I., Owens, S. M., Moreau, C. S., Gilbert, J. A., Hartsel, J., Kennedy, S. J., & Gibbons, S. M. (2014). Understanding cultivar-specificity and soil determinants of the Cannabis microbiome. PLoS ONE, 9(6), e99641. doi:10.1371/journal.pone.0099641
- Million, J. B., & Yeager, T. H. (2022). Fabric containers increased irrigation demand but decreased leachate loss of nitrogen and phosphorus compared with conventional plastic containers. HortScience, 57(7), 743-749. doi:10.21273/hortsci16570-22

About the Author
Henrique Dias is the CEO and co-founder of BudTrainer. He is a mechanical engineer who also holds a graduate certificate in Commercial Cannabis Production from Niagara College in Ontario, Canada - the first college-level cannabis cultivation program in North America. Before founding BudTrainer, Henrique worked with Health Canada licensed cannabis producers, where he gained hands-on experience in cultivation, processing, and post-harvest management of cannabis at commercial scale. He started BudTrainer to bring that same level of craft to home growers through better-designed gardening tools and clear, science-backed education.
DISCLAIMER: Everything taught and sold by BudTrainer® is to be used strictly for legal purposes. We do not endorse the production of illegal substances and it is your duty to ensure that you are complying with the law. The words "hemp," "cannabis," "weed," and "marijuana" are used interchangeably to refer to the same plant (legal hemp with less than 0.3% THC) for the purposes of this lesson.