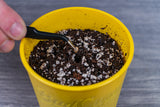
Die kurze Antwort: Was man kaufen sollte
Du willst wissen, was in den Topf kommt. Hier sind drei Wege. Wähle den, der dich ehrlich beschreibt, und nicht den, der den Züchter beschreibt, der du gerne werden möchtest.
| Kauf dies | Wenn du das bist | Gießrhythmus | Wann du mit dem Düngen beginnst |
|---|---|---|---|
| Hochwertige Blumenerde (Sackware) | Erster Anbau, oder du bist viel unterwegs, oder du denkst lieber an die Pflanze als an den Zeitplan | Alle 2 bis 4 Tage | Woche 3 bis 4, sobald die Nährstoffe im Sack verbraucht sind |
| PRO-MIX HP (Torf und Perlit) | Du möchtest schnelleres Wachstum als bei Blumenerde aus dem Sack und bist die meisten Tage zu Hause. Unser Standard. | Alle 1 bis 3 Tage | Fast sofort, leicht |
| Gepuffertes Kokossubstrat | Du möchtest das schnellste verfügbare Wachstum im Topf und bist bereit, einen Düngeplan zu lernen | Täglich, sobald etabliert | Bei jedem Gießen, mit Cal-Mag |
Das ist die ganze Entscheidung. Alles Folgende erklärt das Warum und was passiert, wenn man eines der Details falsch macht.
Zwei Dinge deckt dieser Leitfaden absichtlich nicht ab, da andere Ratgeber hier diese besser behandeln. Sämlinge sind ein eigenes Thema mit eigenem Medium und eigenem pH-Wert; unser Pflanz-Ratgeber deckt das Medium für die Sämlingsphase ab. Das Einpflanzen in den eigentlichen Boden im Freien ist eine andere Aufgabe, die im Outdoor-Ratgeber im Bereich Boden- und Standortwahl behandelt wird. Diese Seite beginnt in dem Moment, in dem eine bewurzelte Pflanze in den Topf kommt, in dem sie wachsen wird.

Was die Forschung tatsächlich über das "Beste" sagt
Jeder Artikel über Erde im Internet bewertet verschiedene Säcke. Fast keiner erwähnt die einzigen kontrollierten Vergleiche, die je mit Cannabis durchgeführt wurden, und diese Vergleiche sagen etwas Nützlicheres aus als eine Rangliste.
Im Jahr 2023 baute ein Team an der Universität Hohenheim Cannabis (CBD-Typ) in drei Medien gleichzeitig an: Steinwolle, Kokossubstrat und eine Torf-Perlit-Mischung. Entscheidend war, dass jedes Medium seinen eigenen Bewässerungs- und Düngeplan erhielt, anstatt eines gemeinsamen – die einzige faire Art, Medien zu vergleichen, die unterschiedlich viel Wasser speichern. Ihr Fazit für den Punkt, der dich interessiert: Trockenblütenertrag, CBD-Ertrag und CBD-Konzentration zeigten keinen statistischen Unterschied zwischen den drei Medien. Das vegetative Wachstum unterschied sich zwar, und die Autoren führten diese Unterschiede auf die Wasserhaltekapazität und das Bewässerungsmanagement zurück, nicht auf chemische Eigenschaften der Medien selbst.1
Sechs Jahre zuvor führte Youbin Zhengs Gruppe in Guelph einen Cannabis-Versuch mit zwei auf Kokosfasern basierenden Substraten durch, die sich speziell in ihrer Wasserhaltekapazität unterschieden: eines trockener und mit freiem Abfluss, eines feuchter. Die Bewässerung wurde durch den Feuchtigkeitsgehalt im Topf ausgelöst, nicht durch den Kalender. Ergebnis: kein Unterschied im Wachstum, kein Unterschied im Ertrag. Die trockenere Mischung musste einfach öfter gegossen und gedüngt werden, um dasselbe Ergebnis zu erzielen.2

Liest man diese beiden Punkte zusammen, verändert sich die Fragestellung. Das Medium ist kein Hebel für den Ertrag. Es ist ein Hebel für die Rate und ein Hebel für den Spielraum. Es legt fest, wie oft du dich kümmern musst und wie weit du daneben liegen darfst, bevor die Pflanze es merkt. Wie man diesen Rhythmus an seinem eigenen Topf abliest, ist ein eigenes Thema – siehe wie oft man Cannabis gießen sollte.
Diese Umdeutung ist mehr wert als jede Markenempfehlung, denn sie sagt dir, welchen Fehler du kaufst. Eine dichte, wasserhaltende Blumenerde verzeiht ein vergessenes Gießen und bestraft Überwässerung. Kokossubstrat verzeiht Überwässerung und bestraft ein vergessenes Gießen. Keines ist besser. Sie versagen in entgegengesetzte Richtungen, und du solltest das Versagen wählen, das dir am wenigsten wahrscheinlich unterläuft.
Es erklärt auch, warum Forendiskussionen über Medien niemals enden. Zwei Züchter erhalten identische Ergebnisse mit unterschiedlichen Säcken und beide schließen daraus, dass ihre Marke der Grund sei. Der Sack war nie der Grund. Ihre Art zu gießen war es.
Die fünf Medien im Vergleich
Fünf Dinge werden als "Cannabiserde" verkauft, und nur zwei davon sind tatsächlich Erde. Hier sind sie mit den Zahlen, die sich bei ihnen tatsächlich unterscheiden.

| Medium | Was es wirklich ist | pH-Zielwert | Gießhäufigkeit | Wer düngt die Pflanze | Spielraum für Fehler |
|---|---|---|---|---|---|
| Blumenerde (Sackware) | Basis aus Torf oder kompostierter Rinde, plus Kompost und langsam freisetzende organische Zusätze | 6,0 bis 7,0, Ziel 6,5 | Alle 2 bis 4 Tage | Der Sack, für die ersten Wochen. Dann du. | Hoch |
| Torf-Perlit-Mischung (PRO-MIX HP) | Torfmoos mit grobem Perlit und Kalk. Praktisch keine Nährstoffladung. | 5,8 bis 6,2 | Alle 1 bis 3 Tage | Du, von Anfang an | Mittel-hoch |
| Kokossubstrat | Zerkleinerte Kokosnussfaser. Ein Schwamm mit Chemie, nicht inert. | 5,8 bis 6,2 | Täglich, sobald etabliert | Du, bei jedem Gießen | Mittel. Braucht Cal-Mag und Pufferung. |
| Angereicherte oder "Super-Erde" | Eine Basismischung, die du mit trockenen Zusätzen geladen und ruhen gelassen hast | 6,2 bis 7,0 | Alle 2 bis 4 Tage | Die Mischung, für den Großteil des Anbaus | Hoch, wenn "gekocht". Sehr niedrig, wenn nicht. |
| Living Soil (Lebende Erde) | Ein permanenter, nie umgegrabener Container mit einer festen Population von Mikroben, Pilzen und oft Würmern | 6,2 bis 7,0, Biologie puffert den Rest | Alle 3 bis 5 Tage | Die Biologie | Sehr hoch, sobald etabliert |
Steinwolle ist die sechste Option und wir lassen sie bewusst weg. Es ist ein wirklich gutes kommerzielles Substrat, es hat keinerlei Nährstoffpufferung und ist ein schlechtes erstes Medium für einen Heimgärtner. Wenn du es verwenden möchtest, deckt unser Pflanz-Ratgeber auch Steinwolle ab, einschließlich des Einweichens, das aufgrund des nativen pH-Werts von etwa 8,0 zwingend erforderlich ist.

Blumenerde aus dem Sack
Ein Sack, auf dem "Blumenerde" steht, ist eine Basis aus Torf oder Rinde, die mit Kompost und einer Handvoll trockener organischer Zusätze versetzt ist. Die guten Produkte für Cannabis sind vorgedüngt, was bedeutet, dass bereits genug Nahrung für mehrere Wochen im Sack ist, ohne dass du etwas hinzufügen musst.
Diese Vordüngung macht das Wesen des Produkts aus. FoxFarm verkauft z. B. Ocean Forest, die wohl bekannteste Erde für den Cannabis-Heimanbau, mit dem Hinweis, dass anfangs kein Stickstoffdünger benötigt wird. Lies das so, wie es gemeint ist: Du hast bereits ein Düngeprogramm gekauft, es ist schon im Topf und beginnt am Tag, an dem du ihn füllst. Wenn du in der ersten Woche zusätzlich einen flüssigen Dünger verwendest, düngst du die Pflanze doppelt.
Unsere Einschätzung dieses Hinweises – und es ist eine Einschätzung, keine Messung – ist, dass eine vorgedüngte Erde eine Pflanze etwa drei bis vier Wochen lang versorgt, bevor sie etwas von dir benötigt. Danach bist du in einem normalen Düngezyklus und unser Ratgeber für Nährstoffe deckt die entsprechenden Werte ab.
Torf-Perlit-Mischungen
PRO-MIX HP ist bei BudTrainer seit Jahren unser Standard. Die veröffentlichte Spezifikation ist lesenswert, da sie am klarsten beschreibt, was eine gute Container-Mischung sein soll: 65 bis 75 Prozent kanadisches Torfmoos nach Volumen, grobes Perlit für den Rest, dolomitischer und kalzitischer Kalk, um den pH-Wert stabil zu halten, pH 5,5 bis 6,5 und eine Luftporenkapazität von 20 bis 25 Prozent nach Volumen, gemessen in einem 15-cm-Topf.
Beachte, was nicht auf dieser Liste steht: Nahrung. Eine Torf-Mischung hat eine winzige Starterdüngung und sonst nichts. Du düngst von Anfang an. Im Gegenzug erhältst du eine Wurzelzone, deren Fünftel aus Luft besteht – weshalb Pflanzen bei uns darin schneller wachsen als in schwererer Blumenerde und weshalb du häufiger gießen musst.
Torf ist zudem ein echtes Umweltproblem, und wir werden nicht so tun, als sei das nicht der Fall. Torfabbau zerstört Moore, deren Bildung Jahrtausende dauerte, und deshalb sucht die Gartenbauindustrie aktiv nach Ersatz. Kokossubstrat ist die führende Alternative.
Kokossubstrat
Kokossubstrat ist die gemahlene Schale der Kokosnuss, ein Nebenprodukt der Faserindustrie. Es wird als gepresste Ziegel verkauft, die sich beim Hydrieren etwa das Acht- bis Neunfache ausdehnen – weshalb ein Ziegel in Größe eines Taschenbuchs fast einen ganzen Topf füllt.
Kokos wird oft als "inert" beschrieben, aber dieses Wort ist in diesem Zusammenhang irreführend. Kokos ist nicht inert. Es hat eine echte Chemie, es speichert und tauscht Nährstoffe aus, und es gibt einen Vorbereitungsschritt, den Blumenerde nicht benötigt. Dieser Schritt bekommt unten einen eigenen Abschnitt, denn ihn zu überspringen ist der häufigste Grund, warum ein erster Kokos-Anbau scheitert.

Angereicherte und "Super"-Erde
Super-Erde ist eine Basismischung, die du mit trockenen organischen Zusätzen – Seetang, Alfalfa, Knochenmehl, Fledermaus-Guano, Wurmhumus, Gesteinsmehl – geladen und vor dem Einpflanzen in einem Haufen hast reifen lassen. Wenn man es richtig macht, versorgt sich die Pflanze den Großteil des Anbaus selbst und du musst nur gießen. Wenn man es falsch macht, hat man einen teuren Weg gebaut, die Pflanze zu verbrennen. Unter selbst mischen findest du das Rezept, die Falle und den Test.
Living Soil (Lebende Erde)
Living Soil ist die gleiche Idee, nur konsequenter und dauerhaft: ein großer Container Erde mit einer stabilen Population von Bakterien, Pilzen, Protozoen und oft Würmern, die du von oben fütterst und nie austauschst. Die Biologie übernimmt die Arbeit, die sonst ein Düngerfläschchen machen würde. Es ist das fehlerverzeihendste Medium überhaupt und das schlechteste Preis-Leistungs-Verhältnis für einen einmaligen Anbau (siehe Living Soil).
Wie man einen Sack Erde liest
Im Gartenmarkt entscheiden vier Angaben auf der Tüte, ob sie im Topf funktionieren wird. Keine davon ist das Bild auf der Vorderseite.

1. Ist es Blumenerde (Potting Soil) oder Pflanzerde (Planting Mix)? Das sind unterschiedliche Produkte. Blumenerde ist für Container formuliert, wo die Wurzeln nicht wegkönnen und die Drainage aus der Mischung selbst kommen muss. Ein "Pflanzerde"-Produkt oder "Gartenerde" ist dafür gedacht, in den Boden eingearbeitet zu werden, wo der Untergrund für die Drainage sorgt. Gibst du Pflanzerde in einen Topf, verdichtet sie sich zu einem Ziegel. FoxFarms eigene Anleitung sagt dasselbe, und sie verkaufen beides.

2. Was ist die Basis? Achte auf Torfmoos, Kokosfaser, kompostierte Waldprodukte oder kompostierte Rinde weit oben in der Inhaltsliste. Das sind Grundlagen für Container. Wenn dort Mutterboden, Sand oder "Lehm" an erster Stelle stehen, leg es zurück – das ist ein Bodenprodukt.
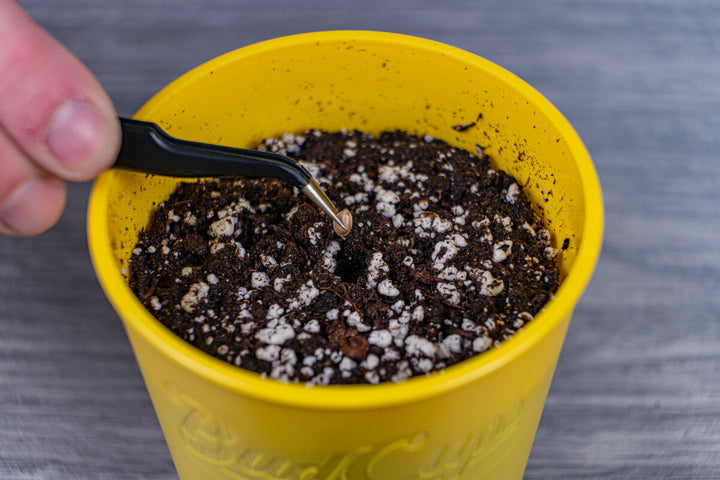
3. Ist sichtbares Perlit enthalten? Diese weißen, nach Styropor aussehenden Kügelchen sind expandiertes Vulkanglas und sie sorgen für die Luft in der Mischung. Manche Säcke haben genug davon. Viele haben nur eine geringe Menge, und du wirst mehr hinzufügen müssen. Luft ist die halbe Mischung erklärt wie viel.
4. Ist sie vorgedüngt und wie stark? Wenn auf dem Sack mit Fledermaus-Guano, Wurmhumus, Federmehl, Knochenmehl oder Fisch-Emulsion geworben wird, ist sie vorgedüngt. Das ist in Ordnung für eine Pflanze mit etabliertem Wurzelsystem. Es ist nicht in Ordnung für einen Sämling.
Das Problem der "scharfen" Erde und die Regel, die es löst
"Scharf" ist Grower-Slang für eine Mischung mit vielen löslichen Salzen. "Salze" bedeutet hier nicht Kochsalz, sondern gelöste mineralische Nährstoffe, die Elektrizität leiten – was ein billiges Messgerät nutzt. Dieser Messwert heißt EC (elektrische Leitfähigkeit) in Einheiten von Millisiemens pro Zentimeter (mS/cm). Mehr gelöste Nahrung bedeutet einen höheren EC-Wert.
Der Grund, warum eine „scharfe“ Erde einer kleinen Pflanze schadet, ist Osmose, keine Vergiftung. Wasser bewegt sich von Orten mit geringer Konzentration gelöster Stoffe zu Orten mit hoher Konzentration. Wenn Sie die Wurzeln eines Sämlings in eine Bodenlösung setzen, die salzhaltiger ist als der Pflanzensaft im Inneren, beginnt Wasser aus der Pflanze auszutreten, anstatt einzudringen. Die Pflanze lässt in feuchter Erde die Blätter hängen, was genau wie Unterbewässerung aussieht, weshalb man sie erneut gießt und das Problem verschlimmert.
Die Studie aus Guelph liefert uns hierfür einen echten Grenzwert. Ihr Fazit lautet, dass Cannabis ein Anbausubstrat mit einem EC-Wert von bis zu 3,0 mS/cm ohne Ertragseinbußen vertrug – und die beiden höchsten Düngeraten, die das Substrat auf 3,0 bzw. 3,8 mS/cm brachten, führten auch zu Erträgen unter dem Optimum.2 Dieser Wert wurde mit der „Pour-Through“-Methode gemessen, die Sie auch zu Hause anwenden können: Gießen Sie den Topf normal, fangen Sie das Wasser auf, das unten herausläuft, und messen Sie den Abfluss mit einem günstigen EC-Messgerät.

Die Regel, nach der wir arbeiten und die wir gerne als Standard sehen würden: Vorgedüngte Erde aus dem Sack ist ein Zielort für das Umtopfen, kein Medium für Sämlinge. Starten Sie Sämlinge in einer ungedüngten Mischung – unser Pflanzleitfaden beschreibt genau wie – und setzen Sie sie erst in die „scharfe“ Erde, wenn sie ein echtes Wurzelsystem haben. Wenn Sie einen Sack prüfen wollen, bevor Sie eine Pflanze hineinsetzen, befeuchten Sie einen Topf voll, gießen Sie einmal kräftig durch und messen Sie den Abfluss. Alles, was sich 3,0 mS/cm nähert, ist nur für eine bereits etablierte Pflanze geeignet.
Wenn die Pflanze bereits eingepflanzt ist und nicht gut aussieht, ist der Symptom-Ratgeber die richtige Anlaufstelle: Nährstoffverbrennungen sehen spezifisch aus und sind behebbar.
Luft ist die halbe Mischung: Perlit, Porosität und der „Squeeze-Test“
Wurzeln atmen. Nicht metaphorisch – Wurzelzellen betreiben aerobe Zellatmung und verbrauchen Sauerstoff genau wie Sie, und sie beziehen ihn aus der Luft in den Hohlräumen zwischen den Bodenpartikeln. Füllen Sie diese Hohlräume mit Wasser, ersticken die Wurzeln; genau das bedeutet „Überwässerung“ eigentlich. Es liegt nicht daran, dass die Pflanze zu viel getrunken hat. Es liegt daran, dass sie nicht atmen konnte.
Die Eigenschaft, die dies beschreibt, ist die luftgefüllte Porosität: der Anteil des Topfvolumens, der direkt nach dem Gießen und Abtropfen noch Luft enthält. Es ist die mit Abstand nützlichste Kennzahl für ein Anbaumedium, die auf fast keinem Sack im Handel steht.

Hier ist ein Referenzpunkt, den Sie tatsächlich nutzen können. PRO-MIX HP, unser Standard und eine speziell als „hochporös“ formulierte Mischung, erreicht 20 bis 25 Prozent Luftvolumen in einem 15-cm-Topf (6 Zoll). Das ist das Ziel. Allgemeine Blumenerde aus dem Sack liegt meist weit darunter.
Perlit ist der Schlüssel, um das zu erreichen. Es ist vulkanisches Glas, das bei etwa 1.000 °C (1.830 °F) „aufgepoppt“ wurde, wodurch ein leichtes Teilchen voller versiegelter Poren entsteht. Es hält ein wenig Wasser an der Oberfläche, bindet keinerlei Nährstoffe und nimmt vor allem Raum ein, der nicht in sich zusammenfällt. Eine Übersicht zu substratlosen Medien für Cannabis aus dem Jahr 2025 gibt den Arbeitsbereich für Perlit mit 10 bis 50 Prozent bei Mischungen auf Kokos-, Torf- oder Erdbasis an sowie ein Verhältnis von 70:30 bis 50:50 für Kokos zu inertem Material.3
Die Verhältnisse, die wir verwenden:
- Gekaufte Blumenerde: Fügen Sie Perlit bis zu etwa 30 Prozent des Endvolumens hinzu. Zwei Teile Erde auf einen Teil Perlit, trocken in einer Wanne gemischt, bevor die Mischung in den Topf kommt.
- Kokosfaser: 70:30 Kokos zu Perlit. Dieses Verhältnis ist so gebräuchlich, dass es fertig gemischt unter Bezeichnungen verkauft wird, die das Verhältnis direkt nennen.
- PRO-MIX HP: nichts. Die Porosität ist bereits vorhanden.
- Lebendige Erde (Living Soil): Folgen Sie dem Rezept, nach dem Sie sie aufbauen, und tendieren Sie eher zu mehr als zu weniger Belüftung, da Sie dies später nicht mehr korrigieren können, ohne das Bodenleben zu stören.

Perlit schwimmt auf und staubt. Befeuchten Sie es vor dem Mischen – zum einen, weil trockener Perlitstaub beim Einatmen unangenehm ist, und zum anderen, weil feuchtes Perlit dort bleibt, wo Sie es hinmischen, anstatt bei jedem Gießen an die Oberfläche zu wandern.

Der Squeeze-Test (Drucktest)
Sie brauchen kein Labor, um zu wissen, ob eine Mischung stimmt. Befeuchten Sie eine Handvoll, bis sie gleichmäßig feucht ist, drücken Sie sie fest in der Faust zusammen und öffnen Sie die Hand.
- Sie behält die Form der Faust und ein oder zwei Tropfen Wasser kommen heraus: perfekt.
- Wasser rinnt zwischen den Fingern heraus: zu nass im Moment. Kein Mischungsproblem, sondern ein Gießproblem.
- Sie behält die Form wie Modelliermasse und bleibt ein dichter Klumpen, wenn man hineinpiekst: zu wenig Luft. Perlit hinzufügen.
- Sie zerfällt sofort in lockere Krümel: entweder zu trocken oder so viel Belüftung, dass sie zwischen den Gießvorgängen kein Wasser halten kann.

Machen Sie das bei jeder Charge, die Sie mischen. Es dauert vier Sekunden und hat bei uns schon mehr schlechte Mischungen entlarvt als jedes Messgerät. Derselbe Test zeigt Ihnen, ob ein Medium vor dem Einpflanzen korrekt vorbefeuchtet ist, was wichtiger ist, als viele denken – trockener Torf und trockener Kokos stoßen Wasser ab. Ein trocken gefüllter und dann gegossener Topf leitet das Wasser direkt an einer Seite nach unten und lässt den Rest des Wurzelbereichs staubtrocken zurück.
Kokosfaser: Der Puffer-Schritt, den niemand erwähnt
Wenn Sie einen Sack Kokosfaser kaufen und ihn wie normale Erde behandeln, bekommen Sie in etwa zehn Tagen einen Kalzium- und Magnesiummangel und werden nicht wissen, warum. Dieser Abschnitt erklärt das „Warum“. Es lohnt sich, den Mechanismus zu verstehen, anstatt ihn nur auswendig zu lernen, da er gleichzeitig drei andere Dinge über Kokos erklärt.
Kokos hat eine hohe Kationenaustauschkapazität (KAK). Zerlegen Sie diesen Begriff. Ein Kation ist ein positiv geladenes Nährstoff-Ion – Kalzium, Magnesium, Kalium, Natrium, Ammonium. Die Kationenaustauschkapazität gibt an, wie viele dieser Ionen ein Medium festhalten und austauschen kann. Stellen Sie es sich wie Parkplätze auf der Oberfläche des Materials vor. Ein Medium mit hoher KAK hält ein Nährstoffreservoir und gibt es allmählich ab. Ein Medium mit einer KAK von Null, wie Perlit oder Steinwolle, hält nichts fest: Was Sie zuführen, ist genau das, was die Wurzeln bekommen, und wenn Sie mit dem Düngen aufhören, ist es sofort weg.

Die Parkplätze der Kokosfaser sind bereits besetzt, und zwar mit den falschen Fahrzeugen. Kokosnussschalen werden vor dem Mahlen häufig in Brackwasser eingeweicht, wodurch die fertige Faser mit Natrium und Kalium beladen ist. Diese beiden sitzen auf den Austauschplätzen. Wenn Sie dann mit einer normalen Nährlösung gießen, werden Kalzium und Magnesium aus Ihrer Lösung auf die Plätze getauscht, während Natrium und Kalium in Ihren Wurzelbereich freigesetzt werden. Ihrer Pflanze fehlt nun Kalzium und Magnesium, die sie benötigt hätte, und sie schwimmt in Kalium und Natrium, die sie nicht braucht – zudem konkurrieren beide Gruppen aktiv um die Aufnahme an der Wurzel.3
Die Lösung ist die Pufferung: Die Austauschplätze werden gezielt mit Kalzium und Magnesium belegt, bevor eine Pflanze auch nur in der Nähe ist, damit beim ersten Düngen nichts gestohlen wird. Das gängige Protokoll lautet, die Kokosfaser zuerst gründlich mit klarem Wasser zu spülen, um das lose Natrium und Kalium auszuwaschen, und sie dann für sechs bis acht Stunden in einer Cal-Mag-Lösung mit einer Konzentration von 1,3 bis 2,0 ml/l (ca. EC 2,0) einzuweichen.3

In der Praxis zu Hause:
- Lassen Sie den Ziegel in klarem Wasser aufquellen, bis er vollständig gequollen ist.
- Spülen Sie ihn. Lassen Sie klares Wasser durchlaufen, bis es nicht mehr braun ist und der EC-Wert des Abflusses nahe dem Ihres Leitungswassers liegt.
- Weichen Sie ihn für sechs bis acht Stunden in einer Cal-Mag-Lösung mit einem EC von ca. 2,0 ein. Über Nacht ist auch in Ordnung.
- Ablaufen lassen. Nicht erneut spülen. Der Sinn war ja, Kalzium und Magnesium in der Faser zu lassen.
- Auf pH 5,8 bis 6,2 einstellen und pflanzen.

Mancher Kokos wird bereits gepuffert verkauft, meist gekennzeichnet als „vor-gepuffert“ (pre-buffered) oder „RHP-zertifiziert“ – er kostet aus genau diesem Grund mehr. Wenn auf dem Sack nicht explizit „gepuffert“ steht, gehen Sie davon aus, dass er es nicht ist.
Zwei weitere Konsequenzen derselben Chemie: Kokos benötigt während des gesamten Anbaus Cal-Mag, nicht nur zu Beginn. Das gilt doppelt, wenn Sie Umkehrosmose-Wasser oder sehr weiches Wasser verwenden, das von Natur aus kein Kalzium oder Magnesium enthält – unser Nährstoff-Ratgeber enthält eine Entscheidungshilfe, ob Sie tatsächlich Cal-Mag benötigen. Zudem schwankt der pH-Wert bei Kokos: während der Wachstumsphase nach unten, wenn die Pflanze Ammonium aufnimmt und Wasserstoff-Ionen an die Wurzeln abgibt, und während der Blüte nach oben, wenn die Stickstoffaufnahme auf Nitrat umstellt. Prüfen Sie den pH-Wert. Stellen Sie ihn nicht einmal ein und verlassen sich darauf.
Selber Mischen: Angereicherte Erde und Super Soil
Selber Mischen lohnt sich, wenn Sie mehr als nur ein paar Pflanzen haben, wenn Sie nur einmal düngen und danach nur noch gießen wollen oder wenn Sie einfach Spaß daran haben. Für eine einzelne Pflanze im Zelt lohnt es sich nicht, da ein Sack Erde weniger kostet als die ganzen Zusätze.
Ein Basisrezept
Jedes „Super-Soil“-Rezept im Internet ist eine Variation derselben dreiteiligen Struktur, und diese Struktur ist nützlicher als jedes einzelne Rezept:
- Eine Basis, etwa 50 bis 60 Prozent: Torfmoos oder Kokosfaser. Dies dient der Masse und Wasserspeicherung und trägt kaum zur Ernährung bei.
- Belüftung, etwa 30 Prozent: Perlit, Bimsstein oder Reisschalen. Dies ist die luftgefüllte Porosität von vorhin; der Teil, den Leute weglassen, wenn die Wanne voll ist. Tun Sie das nicht.
- Kompost und Zusätze, etwa 10 bis 20 Prozent: Guter Kompost oder Wurmhumus als biologischer Kern, plus trockene Zusätze für die eigentliche Nährstoffversorgung – Seetangmehl, Luzernemehl, Krabben- oder Krebstierschalenmehl, Gesteinsmehl für Spurenelemente und etwas für Kalzium, wie Gips oder Austernschalenmehl. Wenn Ihre Basis Torf ist, fügen Sie Dolomitkalk hinzu, um den pH-Wert aus der natürlichen Säure des Torfs anzuheben.

Die Dosierungsangaben auf den Säcken sind für Gartenbeete geschrieben. In einem Container arbeiten Sie mit einem Bruchteil des Bodenvolumens und ohne die Pufferung, die ein ganzer Garten bietet. Beginnen Sie daher bei jeder Dosierung am unteren Ende. Nachdüngen können Sie in sechs Wochen immer noch. Rausnehmen können Sie es nicht mehr.
Die Phosphorfalle
Hier gehen hausgemachte Mischungen regelmäßig schief, und es lohnt sich ein eigener Abschnitt, weil das „Gärtnerwissen“ oft hartnäckig in die falsche Richtung weist.
Jedes „Big Bud“-Super-Soil-Rezept ist schwer an Phosphor – Fledermausguano, Knochenmehl, Seevogelguano, Rohphosphat. Die Überlegung ist, dass Phosphor das „P“ in NPK ist und die mittlere Zahl für die „Blüte“ steht, also muss mehr davon mehr Blüten bedeuten. Die Forschung sagt das Gegenteil – und das gleich dreimal.
Bevan, Jones und Zheng beziffern das Phosphor-Optimum für den Blütenertrag auf 59 mg/l und merken in ihrer Einleitung an, dass Gärtner üblicherweise bis zu 200 mg/l zuführen.4 Scott Golem, der einige unserer Anbaurichtlinien prüft, nahm an dieser Studie bei HEXO teil, und das Paper dankt ihm in der Danksagung. Westmoreland, Kusuma und Bugbee verglichen 25, 50 und 75 mg/l und fanden keinen signifikanten Unterschied beim Blütenertrag oder der Cannabinoidkonzentration über diesen gesamten Bereich, während der Phosphorgehalt im Abfluss der Töpfe bei einer Verdreifachung der Eingabe um das Zwölffache anstieg.5 Und Shiponi und Bernstein fanden heraus, dass eine Anhebung von Phosphor über 5 mg/l die THCA- und CBDA-Konzentration um bis zu 25 Prozent senkte, wobei 30 mg/l bereits 80 Prozent des maximalen Ertrags lieferten.6

Einfach gesagt: Die Pflanze ist bei moderaten Phosphorspiegeln zufrieden, und nach dem Optimum ist mehr Phosphor nicht neutral – es kostet Sie Geld und Qualität. Bei flüssiger Düngung können Sie in der nächsten Woche gegensteuern. Bei „Super Soil“ haben Sie den Phosphor vor acht Wochen hineingemischt, und der geht nirgendwo hin. Das ist das stärkste Argument für Zurückhaltung beim Anmischen und der Grund, warum wir sagen: Starten Sie mit jedem Zusatz niedrig. Das vollständige Bild zur Nährstoffversorgung finden Sie im Nährstoff-Ratgeber, der das Thema NPK und Düngeplan behandelt.
Das „Kochen“ von Erde und wie man erkennt, wann sie fertig ist
Das „Kochen“ von Super Soil bedeutet, die gemischte, befeuchtete Erde wochenlang in einem abgedeckten Haufen oder Behälter warm zu lagern, bevor man hineinpflanzt. Was dabei physikalisch geschieht: Mikroben zersetzen die trockenen Zusatzstoffe in eine Form, die von Wurzeln aufgenommen werden kann, und wandeln dabei Ammonium in Nitrat um. Ammonium ist die Form, die Wurzeln verbrennen kann. Genau diese Umwandlung ist der Grund für die Wartezeit.
Fragt man das Internet nach der Dauer, erhält man mit absoluter Sicherheit die Antwort „30 Tage“. Es gibt jedoch keine kontrollierte Studie zu Cannabis-Super-Soil, die das belegt, und die Fachliteratur zur Kompostierung besagt ehrlich: Es hängt vollständig davon ab, was Sie hineingeben.

Die deutlichste Demonstration, die wir gefunden haben, ist eine Studie aus dem Jahr 2017, die drei tierische Dünger während des Kompostierungsprozesses anhand gängiger Reifekriterien untersuchte: Ammoniumstickstoff unter 400 mg/kg, ein Ammonium-Nitrat-Verhältnis unter 0,16 und einen Keimungsindex von über 50 Prozent. Rinderdung-Kompost war nach 36 Tagen strukturell stabil. Hühnermist brauchte bis zu Tag 56. Schweinemist hatte nach 70 Tagen noch keine Reife erreicht.7 Gleicher Prozess, gleiche Bedingungen, gleiche Grenzwerte – und die Ziellinie verschob sich je nach Ausgangsmaterial um mehr als einen Monat.

Hier ist also unsere Position, die von der Zahl abweicht, die jeder wiederholt: Planen Sie vier bis acht Wochen ein, halten Sie die Erde feucht und warm, wenden Sie sie einmal wöchentlich – und machen Sie dann einen Test, statt blind dem Kalender zu vertrauen. Eine Mischung auf Basis von Wurmhumus und milden Mehlzusätzen ist eher am schnellen Ende fertig. Eine Mischung mit frischem Mist oder schwerem Guano braucht länger, als Ihnen lieb sein wird.
Der Keimtest
Der Test ist kostenlos und Sie wissen bereits, wie er funktioniert, denn es ist derselbe Keimungstest, den auch Kompostforscher verwenden – nur ohne Petrischalen.
- Füllen Sie einen Becher mit Ihrer gekochten Mischung und einen zweiten Becher mit einfacher, ungedüngter Blumenerde als Kontrollprobe.
- Säen Sie in beide ein paar schnell wachsende, günstige Samen – Radieschen, Salat und Kresse funktionieren alle und kosten fast nichts.
- Gießen Sie beide, halten Sie sie bei Zimmertemperatur und warten Sie drei bis fünf Tage.
- Vergleichen Sie. Wenn die Samen in Ihrer Mischung etwa so schnell wie in der Kontrollprobe aufgehen, mit Wurzeln gleicher Länge und ohne verbrannte Spitzen, ist die Mischung fertig. Wenn sie langsamer, kürzer, lückenhaft oder versengt sind, ist sie noch nicht bereit und braucht mehr Zeit.

Kosten: etwa einen Euro für Saatgut. Was es ersetzt: Raten und möglicherweise eine Pflanze. Wir würden lieber ein Glas Radieschen aussortieren als einen abgestorbenen Sämling sehen, und dies ist die einzelne Praxis aus diesem Artikel, die jeder Heimgärtner übernehmen sollte.
Living Soil: Was Sie tatsächlich kaufen
Living Soil ist ein als dauerhaftes System betriebenes Erdvolumen. Sie werfen die Erde zwischen den Anbauzyklen nicht weg. Sie halten darin eine Population aus Bakterien, Pilzen, Protozoen, Nematoden und oft Regenwürmern am Leben, düngen über die Oberfläche („Top-Dressing“), das heißt, Sie streuen frische Zusätze und Gründüngungssaat auf die Oberfläche, anstatt etwas einzuarbeiten, und lassen die Biologie die Nährstoffe freisetzen, die sonst eine Flasche liefern würde. Die Pflanze tauscht Zucker aus ihren Wurzeln gegen Nährstoffe, die die Mikroben freigeben – derselbe Austausch, den unser Wurzelkunde-Leitfaden ausführlich behandelt.

Was Sie erhalten, ist die fehlerverzeihendste Wurzelzone, die es gibt. Die Biologie puffert den pH-Wert, puffert die Nährstoffverfügbarkeit und macht die meisten Düngefehler unmöglich, da Sie nicht wirklich „düngen“ – Sie unterhalten ein System, das sich selbst ernährt. Die Gärtner, die wir kennen und die dies erfolgreich betreiben, machen sich kaum noch Gedanken über den pH-Wert.
Die Kosten sind real, und ehrliche Leitfäden weisen darauf hin:
- Volumen. Ein Living-Soil-Behälter benötigt genug Erde, um eine stabile biologische Population über einen vollen Zyklus hinweg aufrechtzuerhalten. Kleine Töpfe trocknen aus, unterliegen Temperaturschwankungen und können dies nicht unterstützen. Die meisten Living-Soil-Gärtner verwenden 57 Liter (15 Gallonen) oder mehr.
- Zeit. Eine neue Living Soil ist noch keine Living Soil. Es ist ein Haufen Zusätze, der im Laufe einiger Monate und mindestens einer Ernte zu einer solchen wird.
- Anfangsinvestition. Sie kaufen das gesamte System einmalig, was für einen einzigen Anbau ein schlechtes Geschäft ist, aber ab dem vierten Anbau ein sehr gutes.
- Sie geben die Kontrolle aus der Hand. Sie können eine Living Soil nicht mitten in der Blüte „umsteuern“, so wie Sie die Nährlösung in einem Tank ändern könnten. Korrekturen bedeuten hier: Top-Dressing und Warten.

Unsere ehrliche Einschätzung: Living Soil ist exzellent, aber keine Empfehlung für Anfänger – aus demselben Grund, warum ein Sauerteigstarter kein guter Weg ist, um seinen ersten Laib Brot zu backen. Wenn Sie beim ersten Anbau sind, kaufen Sie Erde im Sack. Wenn Sie beim vierten Anbau im selben Zelt mit der gleichen Genetik sind und das Mischen von Flaschen leid sind, ist dies das Upgrade, das sich lohnt.
pH und EC nach Medium: Die Zahlen
Zwei Messwerte entscheiden darüber, ob die Nahrung in Ihrem Medium der Pflanze überhaupt zur Verfügung steht. Beide sind kostengünstig zu prüfen, und beide werden von fast niemandem kontrolliert, bis etwas schiefgeht.
pH ist der Wert für Säure oder Alkalität Ihres Wassers und der Wurzelzone auf einer Skala von 0 bis 14, wobei 7 neutral ist. Er „nährt“ die Pflanze nicht direkt. Er entscheidet jedoch, welche Nährstoffe die Pflanze überhaupt aufnehmen kann. Eine Wurzelzone mit falschem pH-Wert lässt eine Pflanze verhungern, obwohl reichlich Futter vorhanden ist. Dieser Ausfall wird als „Lockout“ bezeichnet; der Mangelerscheinungs-Leitfaden enthält eine Tabelle, welche Nährstoffe bei welchem pH-Wert ausfallen.
EC, die elektrische Leitfähigkeit, misst, wie viele gelöste Mineralien sich in Ihrem Wasser befinden, basierend darauf, wie gut es Strom leitet (in Millisiemens pro Zentimeter, mS/cm). Ein EC von 1,2 ist überall auf der Welt ein EC von 1,2. PPM (parts per million) versucht dasselbe auszudrücken, aber es gibt zwei unterschiedliche Umrechnungsskalen, wodurch identisches Wasser unterschiedlich gelesen wird. Alles in diesem Artikel und auf dieser gesamten Website verwendet die 500er-Skala, die vor allem in Nordamerika gebräuchlich ist. Wenn Ihr Messgerät EC anzeigt, arbeiten Sie mit EC und vermeiden Sie das Problem vollständig. Der Nährstoff-Leitfaden behandelt EC und PPM ausführlich.
| Medium | Laufender pH-Wert | pH bei Umtopfen | EC bei Umtopfen |
|---|---|---|---|
| Erde und gekaufte Blumenerde | 6,0 bis 7,0, Ziel 6,5 | 6,2 bis 6,6 | 0,4 bis 0,8 (200 bis 400 PPM, 500er-Skala) |
| PRO-MIX HP und Torfmischungen | 5,8 bis 6,2 | 5,8 bis 6,2 | 0,4 bis 0,8 (200 bis 400 PPM, 500er-Skala) |
| Kokosfaser | 5,5 bis 6,5, Ziel 5,8 bis 6,0 | 5,8 bis 6,2 | 0,8 bis 1,2 (400 bis 600 PPM, 500er-Skala) |
| Steinwolle und DWC-Hydroponik | 5,5 bis 6,5, Ziel 5,8 bis 6,0 | 5,5 bis 6,0 | 0,8 bis 1,2 (400 bis 600 PPM, 500er-Skala) |
| Lebende organische Erde | 6,2 bis 7,0, die Biologie puffert den Rest | 6,2 bis 7,0 | Reines Wasser; die Erde hält die Nährstoffe |

Drei praktische Hinweise, die mehr Pflanzen retten als die Tabelle: Stellen Sie den pH-Wert Ihres Wassers immer nach dem Mischen der Nährstoffe ein, niemals davor – die Nährstoffe verändern ihn. Kalibrieren Sie ein pH-Messgerät wöchentlich; billige Messgeräte driften, und ein unkalibriertes Gerät ist schlimmer als gar keines, da es Ihnen falsche Sicherheit gibt. Und jagen Sie nicht einem einzelnen Wert hinterher: Messen, anpassen und beim nächsten Gießen erneut messen, anstatt überreagiert auf eine einzige Zahl zu reagieren.
Eine Beruhigung aus der Forschung, da Gärtner oft sehr angespannt beim pH-Wert sind: Der Cannabis-Versuch in Guelph betrieb den Substrat-pH-Wert während des vegetativen Wachstums zwischen 6,2 und 7,1 und während der Blüte zwischen 6,7 und 7,2 – es wurden keinerlei sichtbare Anzeichen für eine pH-bedingte Störung gemeldet.2 Die obigen Bereiche sind Zielwerte, die man erreichen sollte. Sie sind keine Klippe, von der man bei 6,8 sofort in den Abgrund stürzt.
Wasser: Leitungswasser ist in Ordnung, und Stehenlassen hilft nicht
Leitungswasser ist völlig in Ordnung für den Cannabis-Anbau in Containern. Sie brauchen keine Umkehrosmose, kein Flaschenwasser und Sie müssen keinen Eimer über Nacht stehen lassen.
Letzteres verdient eine Erklärung statt eines simplen Widerspruchs, da es überall wiederholt wird und einen realen Hintergrund hat. Stehendes, offen gelagertes Wasser gast tatsächlich freies Chlor aus. Das Problem ist, dass freies Chlor in den Konzentrationen kommunaler Leitungswasserversorger ohnehin nicht das ist, was Ihrer Pflanze schadet, und die meisten Versorger desinfizieren mittlerweile mit Chloramin – das ist Chlor, das an Ammoniak gebunden ist und überhaupt nicht ausgast. Das Ritual entfernt also etwas Harmloses und lässt das, worauf es eigentlich abzielte, völlig unberührt.

Wenn Sie einen spezifischen Grund haben, Chloramin zu entfernen – und in einer ausgereiften Living Soil, wo Sie bewusst eine mikrobielle Population pflegen, könnte das sinnvoll sein –, dann sind die einzigen Dinge, die tatsächlich wirken, ein Kohlefilter oder ein chemischer Wasseraufbereiter. Für den Anbau in Erde, Torf oder Kokos ist all das nicht nötig. Unser Pflanz-Leitfaden deckt die Wasserchemie ab und bietet die vollständige Version.
Was bei Ihrem Leitungswasser wirklich zählt, ist der Ausgangs-EC-Wert und die Härte. Messen Sie Ihr Wasser mit demselben Gerät, das Sie für alles andere verwenden, bevor Sie etwas hinzufügen. Wenn es bereits einen EC-Wert von 0,4 oder 0,5 hat, sind das gelöste Mineralien, die Ihre Pflanze gratis bekommt; Sie sollten dies als Teil der Düngung mitzählen, statt so zu tun, als hätten Sie bei null angefangen.
Den Topf befüllen und die ersten zwei Wochen
Schritt 1 – Den Behälter auf das Medium abstimmen
Medium und Behälter bilden ein System, und der Behälter bestimmt, wie das Medium abfließt. Ein Stofftopf sorgt für eine Luftbeschneidung der Wurzeln („Air-Pruning“) und trocknet sowohl von den Seiten als auch von oben ab. Daher muss die gleiche Mischung in Stoff schneller gegossen werden als in Kunststoff – unser Topf-Vergleich behandelt Stoff versus Kunststoff ausführlich. Wenn Sie Kunststoff verwenden, neigen Sie eher zu mehr Perlit.
Schritt 2 – Die Topfgröße wählen
Die Größenbestimmung ist nicht unsere Erfindung. Unser Umtopf-Leitfaden enthält die „Topf-Leiter“: Diese führt über BudCups oder andere Anzuchttöpfe, dann 4 bis 19 Liter (1 bis 5 Gallonen), dann 26 bis 57 Liter (7 bis 15 Gallonen), bis hin zu 95 bis 380+ Litern (25 bis 100+ Gallonen). Sie hören bei der Stufe auf, die Ihr Endtopf ist. Das alte 3-bis-5-fache Volumenverhältnis ist nur noch eine Notlösung für Leute, die einen Wurzelballen noch nicht lesen können, keine Hauptregel. Die meisten Indoor-Grows beenden ihren Zyklus in einem 19-Liter-Stofftopf (5 Gallonen).
Schritt 3 – Vorbefeuchten, dann locker einfüllen
Befeuchten Sie die Mischung in einem Behälter vor, bevor sie in den Topf kommt – bis zum „Squeeze-Test“. Füllen Sie die Erde bis etwa 2,5 cm unter den Rand, damit Sie Platz zum Gießen haben. Nicht verdichten! Klopfen Sie den Topf zweimal auf den Boden, damit sich die Erde setzt, und hören Sie dann auf – jedes bisschen Druck, das Sie ausüben, ist luftgefüllte Porosität, für die Sie bezahlt haben und die Sie gerade entfernt haben.

Schritt 4 – Den Topf einmal wässern, dann vor dem nächsten Mal trocknen lassen
Dies ist der Teil, der oft vergessen wird und wertvolles Wachstum kostet. Direkt nach dem Umtopfen: Tränken Sie den ganzen Topf einmal langsam, bis unten Wasser herausläuft. Das Wässern setzt das neue Medium um den Wurzelballen herum fest und schließt Luftlöcher, sodass die neuen Wurzeln auf keine trockenen Stellen treffen. Gießen Sie danach nicht wieder, bis der Topf auf etwa die Hälfte seines Wassergewichts abgetrocknet ist, meist 4 bis 7 Tage: Heben Sie ihn an; er sollte etwa die Hälfte des Gewichts verloren haben, das durch das erste Wässern hinzugekommen ist – dasselbe Signal, das unsere Gewichtsmethode für den Rest des Anbaus nutzt. Was ein Umtopfen zum Stillstand bringt, ist das zu frühe Gießen. Die Wurzeln befinden sich immer noch nur im Volumen des alten Wurzelballens; niemand trinkt den Rest des Topfes, der noch vom ersten Wässern nass ist. Der Sauerstoffgehalt in der Wurzelzone sinkt, und die Pflanze stoppt ihr Wachstum – genau das, was Leute oft fälschlicherweise als „Umtopf-Schock“ bezeichnen. Sobald der Topf abgetrocknet ist, gießen Sie nur in einem Ring außen herum, nahe der Wand und weg vom Stamm, sodass die Wurzeln nach außen wachsen, um das Wasser zu erreichen. Behalten Sie das für die nächsten paar Gießvorgänge bei, bis die Wurzeln die Wände erreichen und die Pflanze kräftig wächst, dann gießen Sie die gesamte Oberfläche normal. Unser Umtopf-Leitfaden enthält die vollständige Routine.

Dieselbe Routine gilt, wenn man aus einem Anzuchttopf kommt, bei dem der Wurzelballen so klein ist, dass die Versuchung am größten ist, erneut zu gießen, bevor der Topf wieder abgetrocknet ist.
Erde zwischen den Anbauzyklen wiederverwenden
Sie können eine Substratmischung wiederverwenden, aber für alles andere als lebende Erde (Living Soil) haben sich bis zur Ernte drei Dinge verändert, und jedes benötigt eine andere Lösung.
- Die Struktur ist kollabiert. Torf und Kokos zersetzen sich beide, und die Mischung hält zum Zeitpunkt der Ernte weniger Luft als die Mischung, mit der Sie den Topf gefüllt haben. Lösung: Fügen Sie frisches Perlit hinzu, etwa 10 bis 20 Prozent des Volumens, und lockern Sie das Ganze auf.
- Die Nährstoffe sind aufgebraucht und Salze könnten vorhanden sein. Die verfügbare Nahrung ist verbraucht, aber Salzrückstände von Flüssigdüngern können sich angesammelt haben. Lösung: Spülen Sie die alte Mischung mit klarem Wasser durch und messen Sie den EC-Wert des Drainagewassers. Wenn er hoch ist, spülen Sie weiter. Wenn er niedrig ist, düngen Sie nach – und wenn Sie mit trockenen organischen Zusätzen nachdüngen, bauen Sie eine Super-Erde auf, was bedeutet, dass sie das Reifen und den Keimtest benötigt.
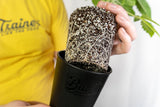
- Der alte Wurzelballen ist noch drin. Zerkleinern Sie den Wurzelballen und ziehen Sie die dicken, holzigen Wurzeln heraus. Feine Wurzeln können bleiben – sie zersetzen sich und ernähren das Bodenleben. Dicke Wurzeln zersetzen sich nicht rechtzeitig und bilden Luftpolster, die austrocknen.
Verwenden Sie keine Mischung von einer Pflanze wieder, die Wurzelfäule, Fusarium oder ein ernstes Schädlingsproblem hatte. Wurzelläuse und Trauermückenlarven sind die üblichen blinden Passagiere in wiederverwendeter Erde. Reinigen Sie nach Spinnmilben das Zelt selbst sowie die Töpfe. Nichts, was Sie in einer Wanne tun können, ist das Risiko eines erneuten Befalls wert.

Die häufigsten Fehler

- Einen Sämling in einen „heißen“ (vorgedüngten) Sack setzen. Der häufigste Einzelfehler. Der Sämling lässt in nasser Erde die Blätter hängen, wird erneut gegossen und stirbt, weil er übergossen aussieht. Starten Sie Sämlinge in einer ungedüngten Mischung und pflanzen Sie sie in den vorgedüngten Sack um.
- Garten- oder Pflanzerde in einem Topf verwenden. Sie verdichtet sich, entwässert nicht und keine Disziplin beim Gießen kann sie retten. Auf dem Sack muss „Blumenerde“ stehen.
- Perlit weglassen, weil im Sack schon welches ist. Die meisten Säcke enthalten nur eine geringe Menge. Überprüfen Sie es mit dem Drucktest, statt sich auf das Bild auf der Vorderseite zu verlassen.
- Kokos wie Erde behandeln. Ungepuffertes Kokos ohne Cal-Mag führt zuverlässig nach etwa zehn Tagen zu einem Kalzium- und Magnesiummangel.
- Einen vorgedüngten Sack in der ersten Woche düngen. Sie haben das Futter doppelt bezahlt, aber die Pflanze wollte es nur einmal.
- Eine hausgemachte Mischung mit Phosphor überladen. Mehr ist nicht besser, wenn das Optimum überschritten ist, und bei einer Super-Erde können Sie es nicht mehr herausholen.
- In eine nicht gereifte Super-Erde pflanzen. Vier bis acht Wochen Wartezeit und ein Keimtest sind nötig. Es gibt keine Abkürzung und der Samen-Test kostet kaum etwas.
- Die Mischung beim Befüllen verdichten. Sie drücken die Luft heraus, für die Sie beim Perlit bezahlt haben.
- Erneut gießen, bevor ein umgepflanzter Topf wieder abgetrocknet ist. Wässern Sie ihn einmal durch, warten Sie, bis er etwa die Hälfte des Gewichts verloren hat, das durch das Wässern hinzugekommen ist (normalerweise 4 bis 7 Tage), und gießen Sie dann einen Ring nahe der Topfwand.
- Einem einzelnen pH-Wert hinterherjagen. Messen, anpassen und beim nächsten Gießen erneut prüfen. Und kalibrieren Sie das Messgerät.
Wie es weitergeht
Das Medium ist eine Entscheidung in einer Abfolge, und die Anleitungen, die davor und danach kommen, sind diese. Vor dieser Seite: Einen gekeimten Samen pflanzen, was das Sämlingsmedium und den Sämlings-pH-Wert abdeckt. Unmittelbar danach: Umpflanzen ohne Schock für das Stufen-System der Töpfe und den Vorgang selbst, sowie der Topfvergleich, um zu wissen, worin Sie das Medium geben. Sobald die Pflanze wächst: Düngen und Mangeldiagnose, wenn etwas falsch aussieht. Für den gesamten Ablauf auf einer Seite starten Sie mit Indoor-Anbau oder der Grundlagen-Anleitung.
Häufig gestellte Fragen
Welche Erde ist für einen ersten Cannabis-Anbau am besten?
Eine hochwertige Blumenerde aus dem Sack, angereichert mit Perlit zu etwa 30 Prozent des Endvolumens. Es ist das fehlerverzeihendste Medium, das es gibt: Es hält den pH-Wert stabil, speichert Nährstoffe und ermöglicht es Ihnen, alle zwei bis vier Tage statt täglich zu gießen. Starten Sie Ihren Sämling in einer ungedüngten Mischung und pflanzen Sie ihn in die Blumenerde um, sobald er ein echtes Wurzelsystem hat.
Kann ich normale Blumenerde für Cannabis verwenden?
Ja, solange darauf „Blumenerde“ steht und nicht „Gartenerde“, „Pflanzerde“ oder „Bodenverbesserer“, die für den Boden im Freien gedacht sind und im Topf verklumpen. Fügen Sie Perlit bis zu etwa 30 Prozent des Endvolumens hinzu und rechnen Sie damit, ab der dritten oder vierten Woche mit dem Düngen zu beginnen, falls der Sack keine eigenen Nährstoffe enthält.
Ist FoxFarm Ocean Forest gut für Cannabis?
Ja, für eine Pflanze mit einem echten Wurzelsystem – es ist aus gutem Grund der am häufigsten verwendete Sack beim Cannabis-Anbau zu Hause. Ocean Forest ist vorgedüngt, betrachten Sie es also als ein Düngerprogramm, für das Sie bereits bezahlt haben: Geben Sie in den ersten drei bis vier Wochen nur Wasser, anstatt zusätzlich Flüssigdünger zu verwenden. Für einen Sämling ist es zu „heiß“, starten Sie also in einer ungedüngten Mischung und pflanzen Sie dann um. Prüfen Sie den Sack auf sichtbares Perlit und fügen Sie mehr hinzu, bis es etwa 30 Prozent des Endvolumens entspricht, falls die Erde fest aussieht.
Ist Miracle-Gro-Erde schlecht für Cannabis?
Das Problem ist nicht die Marke, sondern die Düngerpellets mit Zeitfreisetzung in den meisten ihrer Mischungen. Diese geben Nährstoffe nach einem Temperaturplan ab, den Sie nicht kontrollieren können. Das bedeutet, Sie können nicht gegensteuern, wenn die Pflanze Verbrennungen zeigt, und Sie können die Nährstoffzufuhr nicht an das Wachstumsstadium anpassen. Wenn Sie eine Version ohne Zeitfreisetzung finden, ist es eine gewöhnliche torfbasierte Blumenerde und sie funktioniert.
Kokosfasern oder Erde für Cannabis?
Kokos lässt Pflanzen schneller wachsen und gibt Ihnen eine bessere Kontrolle, auf Kosten von täglichem Gießen, Cal-Mag bei jeder Düngung und einem Puffer-Schritt vor dem ersten Gebrauch. Erde ist langsamer und weitaus fehlerverzeihender. Die kontrollierten Versuche ergaben keinen Ertragsunterschied zwischen den Medien, sobald jedes einen angemessenen Gießplan erhielt. Wählen Sie also nach der Routine, die Sie tatsächlich einhalten können, nicht nach der Ernte.
Muss ich der Blumenerde Perlit hinzufügen?
Fast immer ja. Die meisten Säcke enthalten nur eine geringe Menge. Zielen Sie bei Blumenerde auf etwa 30 Prozent Perlit am Endvolumen ab und bei Kokos auf 70:30 Kokos zu Perlit, gemischt im trockenen Zustand in einer Wanne vor dem Befüllen. Das Ziel sind etwa 20 bis 25 Prozent luftgefülltes Porenvolumen, was dem entspricht, was PRO-MIX HP, eine für hohe Porosität entwickelte Mischung, aufweist.
Welchen pH-Wert sollte Cannabis-Erde haben?
In Erde 6,0 bis 7,0, angestrebt wird 6,5. In Kokos oder Hydrokultur 5,5 bis 6,5, angestrebt wird 5,8 bis 6,0. Speziell beim Umpflanzen: Erde 6,2 bis 6,6, PRO-MIX HP und Kokos 5,8 bis 6,2, Steinwolle und DWC 5,5 bis 6,0. Passen Sie den pH-Wert immer erst an, nachdem Sie die Nährstoffe in das Wasser gemischt haben, niemals davor, und kalibrieren Sie Ihr Messgerät wöchentlich.
Wie lange muss „Super Soil“ reifen?
Planen Sie vier bis acht Wochen ein, während die Erde feucht und warm gehalten und einmal pro Woche gewendet wird. Testen Sie dann lieber, statt dem Datum zu vertrauen. In Kompostierungsstudien war der gleiche Prozess bei Rinderdung nach 36 Tagen abgeschlossen, bei Hühnermist nach 56 Tagen und bei Schweinedung nach 70 Tagen noch nicht beendet. Eine Mischung auf Basis von Wurmhumus und sanften Zutaten ist schnell fertig. Eine mit viel Mist oder Guano ist es nicht.
Wie weiß ich, ob meine Super-Erde bereit zum Bepflanzen ist?
Machen Sie einen Keimtest. Füllen Sie einen Becher mit Ihrer Mischung und einen mit normaler, ungedüngter Blumenerde als Kontrolle. Säen Sie jeweils ein paar Radieschen- oder Salatsamen, gießen Sie beide und warten Sie drei bis fünf Tage. Wenn Ihre Mischung genauso gut keimt wie die Kontrolle, mit Wurzeln ähnlicher Länge und ohne verbrannte Spitzen, ist sie fertig. Wenn es langsamer, fleckiger oder verbrannt ist, geben Sie ihr mehr Zeit.
Welche Erde ist am besten für Autoflowers?
Eine leichte, gut durchlüftete Mischung mit einer moderaten Nährstoffladung. Autoflowers wachsen nach einem festen Zeitplan und können eine durch Düngerverbrennungen verlorene Woche nicht aufholen, daher ist die fehlerverzeihende Option hier wichtiger als bei photoperiodischen Pflanzen. Blumenerde mit Perlit oder leicht gedüngtes PRO-MIX HP funktionieren beide gut. Vermeiden Sie es, eine Autoflower direkt in einen stark vorgedüngten Sack zu pflanzen.
Kann ich Cannabis-Erde für den nächsten Anbau wiederverwenden?
Ja, es sei denn, die vorherige Pflanze hatte Wurzelfäule, Fusarium oder ein ernstes Schädlingsproblem. Zerkleinern Sie den Wurzelballen und entfernen Sie die dicken, holzigen Wurzeln, fügen Sie frisches Perlit (10 bis 20 Prozent des Volumens) hinzu, um die kollabierte Struktur zu ersetzen, spülen Sie die Erde und messen Sie den EC-Wert des Abflusses auf Salzrückstände, dann düngen Sie nach. Wenn Sie mit trockenen organischen Zusätzen nachdüngen, muss die Erde wieder reifen und einen Keimtest bestehen.
Ist Living Soil besser als Flüssigdünger?
Besser in Bezug auf Fehlerverzeihung, nicht beim Ertrag. Eine ausgereifte Living Soil puffert den pH-Wert und die Nährstoffverfügbarkeit so gut ab, dass die meisten Düngerfehler unmöglich werden. Aber sie benötigt 57 Liter oder mehr pro Pflanze, einige Monate und mindestens einen Durchgang, um sich zu etablieren, und man kann sie während der Blüte nicht mehr steuern. Es ist ein hervorragendes Upgrade für den vierten Anbau und eine schlechte Wahl für den ersten.
Wie viel Erde brauche ich für eine Cannabispflanze?
Ein 19-Liter-Topf, die übliche Endgröße für den Innenbereich, benötigt etwa 20 Liter Substrat. Ein Standard-42-Liter-Sack füllt also zwei davon, mit etwas Rest. Kaufen Sie etwa 20 Prozent mehr, als die Rechnung ergibt: Das Einmischen von Perlit fügt Volumen hinzu, das man dann verdichtet, und Sie werden etwas für das Top-Dressing übrig haben wollen.
Verändert das Anbaumedium den Geschmack oder die Potenz der Blüte?
Nicht messbar, in den Studien, die das untersucht haben. Der Drei-Medien-Vergleich von 2023 fand keinen Unterschied in der CBD-Konzentration zwischen Steinwolle, Kokos und einer Torfmischung, und auch die Substrat-Arbeiten aus Guelph zeigten keinen Ertragsunterschied. Der Cannabinoidgehalt wird weit mehr durch die Genetik und die Art und Weise, wie Sie trocknen und aushärten, bestimmt als dadurch, womit der Topf gefüllt wurde.
Referenzen
- Schober, T., Präger, A., Hartung, J., Hensmann, F., & Graeff-Hönninger, S. (2023). Growth dynamics and yield formation of Cannabis (Cannabis sativa) cultivated in differing growing media under semi-controlled greenhouse conditions. Industrial Crops and Products, 203, 117172. https://doi.org/10.1016/j.indcrop.2023.117172
- Caplan, D., Dixon, M., & Zheng, Y. (2017). Optimal Rate of Organic Fertilizer during the Vegetative-stage for Cannabis Grown in Two Coir-based Substrates. HortScience, 52(9), 1307-1312. https://journals.ashs.org/hortsci/view/journals/hortsci/52/9/article-p1307.xml
- Malík, M., & Tlustoš, P. (2025). Soilless Growing Media for Cannabis Cultivation. Agriculture, 15(18), 1955. https://www.mdpi.com/2077-0472/15/18/1955
- Bevan, L., Jones, M., & Zheng, Y. (2021). Optimisation of nitrogen, phosphorus, and potassium for soilless production of Cannabis sativa in the flowering stage using response surface analysis. Frontiers in Plant Science, 12, 764103. https://www.frontiersin.org/journals/plant-science/articles/10.3389/fpls.2021.764103/full
- Westmoreland, F. M., Kusuma, P., & Bugbee, B. (2022). Sustainable cannabis nutrition: Elevated root-zone phosphorus significantly increases leachate P and does not improve yield or quality. Frontiers in Plant Science, 13, 1015652. https://www.frontiersin.org/journals/plant-science/articles/10.3389/fpls.2022.1015652/full
- Shiponi, S., & Bernstein, N. (2021). The highs and lows of P supply in medical cannabis: Effects on cannabinoids, the ionome, and morpho-physiology. Frontiers in Plant Science, 12, 657323. https://www.frontiersin.org/journals/plant-science/articles/10.3389/fpls.2021.657323/full
- Huang, J., Yu, Z., Gao, H., Yan, X., Chang, J., Wang, C., Hu, J., & Zhang, L. (2017). Chemical structures and characteristics of animal manures and composts during composting and assessment of maturity indices. PLoS ONE, 12(6), e0178110. https://journals.plos.org/plosone/article?id=10.1371/journal.pone.0178110

Über den Autor
Henrique Dias ist der CEO und Mitbegründer von BudTrainer. Er ist Maschinenbauingenieur und besitzt zudem ein Hochschulzertifikat in „Commercial Cannabis Production“ vom Niagara College in Ontario, Kanada – dem ersten Cannabis-Anbauprogramm auf College-Ebene in Nordamerika. Vor der Gründung von BudTrainer arbeitete Henrique mit lizenzierten Cannabis-Produzenten von Health Canada zusammen, wo er praktische Erfahrung in Anbau, Verarbeitung und Nachernte-Management von Cannabis im kommerziellen Maßstab sammelte. Er gründete BudTrainer, um Homegrowern dieselbe Qualität durch besser designte Gartenwerkzeuge und klare, wissenschaftlich fundierte Bildung näherzubringen.
HAFTUNGSAUSSCHLUSS: Alles, was von BudTrainer® gelehrt und verkauft wird, ist ausschließlich für legale Zwecke zu verwenden. Wir befürworten nicht die Herstellung illegaler Substanzen und es liegt in Ihrer Verantwortung, sicherzustellen, dass Sie die geltenden Gesetze einhalten. Die Begriffe „Hanf“, „Cannabis“, „Gras“ und „Marihuana“ werden in dieser Lektion synonym verwendet, um sich auf dieselbe Pflanze (legaler Hanf mit weniger als 0,3 % THC) zu beziehen.