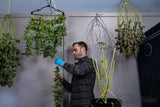
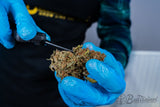
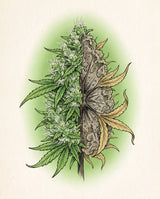
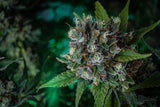
Most growers spend 12 to 16 weeks dialing in the grow, another week or two on the dry, and then jam their flower into a jar and call it done. The cure is where rushed harvests get punished. It is also where patient harvests get rewarded with smoke that actually tastes like the strain it came from.
This guide covers how to cure cannabis in jars, when 2-way humidity packs earn their keep and when they do not, how to read a cure in real time instead of by the calendar, and how to store cannabis long-term so a year-old harvest still hits like the day you sealed it. We assume you have already harvested your plant and finished the dry. If you are following our guide to growing weed for beginners, the cure is the final step that decides how all that work actually smokes.
When to Start Curing: The Handoff From Drying
The cure starts when the dry ends. The clearest physical signal: small stems snap cleanly instead of bending, but larger main stems still have a slight give. The flower feels dry to the touch on the outside but still has a faint cushion when you squeeze a bud. This is the right moisture content to jar: approximately 10 to 12 percent moisture, which reads as roughly 58 to 62 percent equilibrium relative humidity inside a sealed jar.
Jarring too wet creates anaerobic pockets where mold grows. Jarring too dry skips the cure entirely and locks in hay flavor that will not go away. Both failures are unfixable. A 2-way humidity pack will not save buds that were jarred at the wrong moisture, and re-drying or re-hydrating after jarring is almost always a quality downgrade.
Once the buds pass the snap test, trim them if you have not already. Our trimming guide covers wet, dry, and partial-wet methods and when each one wins. Then you are ready for the jar.
Mason Jars vs Grove Bags: The Cure Container Decision

Three common container choices, and they are not equal.
Glass Mason Jars (The Default)
Wide-mouth quart jars (32 ounce / 950 ml) are the workhorse. Glass is inert. It does not off-gas, does not absorb terpenes into its walls, and lets you see the cure progress at a glance. Mason jars are cheap, reusable, and forgiving. If you are curing for the first time or curing for less than 3 months, use mason jars.
The downside: jars require burping. Daily burps in week 1, less frequent through weeks 2 to 4. Skip a burp and you risk anaerobic stink, an off-smell that does not always recover.
Barrier Bags (TerpLoc-Style)
Grove Bags and similar TerpLoc-style barrier bags use a multi-layer film that allows water vapor to escape slowly while blocking oxygen ingress. The marketing claim is "no burping required." That is partially true. Once buds are at the right moisture, the bag self-regulates to roughly 62 percent RH without daily intervention, and the oxygen barrier slows the THC-to-CBN conversion.
The honest verdict: barrier bags are a real upgrade for storage of 3 months or longer. They are not necessarily better than jars for a first-time cure where you are still learning to read your flower. The visual and aroma feedback loop is faster in a clear glass jar than inside an opaque bag.
Plastic Containers (Avoid)
Tupperware, freezer bags, and any other plastic container loses every comparison. Plastic off-gases over time, even food-grade plastic. The static charge pulls trichomes off the bud surface and onto the container walls. And no plastic container provides real humidity control.
The only situation where a freezer bag earns its keep is as a vacuum-sealed long-term storage method, which we cover later in this guide.

FREE CHEAT SHEET
How long do you actually leave it shut?
The burp schedule week by week, the 62% number everything hangs on, and where to keep it after. Two pages, free.
Send me the Cheat SheetHow to Cure Cannabis: The Jar Method (Step-by-Step)
What You Need

- Wide-mouth glass mason jars, 32 ounce (quart, 950 ml) preferred, or 16 ounce (pint, 475 ml) for small batches
- Mini hygrometers, one per jar
- 2-way humidity packs (Boveda 62, Integra Boost, or generic equivalents). Optional.
- A dark cool storage spot. A cupboard at 60 to 70°F (16 to 21°C), away from direct sun.
Step 1: Pick the Right Jar
Wide-mouth over narrow-mouth. The narrow-mouth jars look elegant but they damage buds every time you reach in. The wide opening of a quart jar lets you slide buds in and out without tearing trichomes off on the rim.
Glass over plastic, always. Metal lids over plastic lids. The two-piece canning lid system used on standard mason jars is the cleanest sealing option.
Size matters: 32 ounce (950 ml) quart jars hold about 1 ounce (28 g) of cured flower at the proper fill level. 16 ounce (475 ml) pint jars are useful for sampling or small harvests. Larger jars (half-gallon, 1.9 L, and up) are workable but reduce surface area exchange during burps and slow the cure.
Step 2: Fill the Jar to 75 Percent
Buds should fill roughly three-quarters of the jar's volume. Less than that and you have too much air space, which dries the flower further instead of curing it. More than that and you have no air gap for moisture equilibration, and burping cannot do its job.
Pack lightly. Do not compress the buds. They should settle naturally with some space between them.
Step 3: Drop in a Hygrometer
One small digital hygrometer per jar. Mini round hygrometers with adhesive backing fit on the inside of the lid. Some growers prefer the stick-style hygrometers that sit on top of the buds. Either works.
Eyeballing the cure does not work. Hygrometer readings are the only objective way to know what is happening inside the jar. The numbers below decide every action you take in step 5.
Step 4: The Burping Schedule

Burping is opening the jar to allow gas exchange. It is not just a humidity dump. During the cure, anaerobic compounds (the hay-smell precursors) build up inside the jar and need to vent. Fresh oxygen also drives the enzymatic processes that break down chlorophyll.
- Week 1 (days 1 to 7): Burp daily for 5 to 10 minutes. Open the jar fully, give it a gentle shake to redistribute the buds, leave the lid off, walk away. Come back, close the jar.
- Week 2 (days 8 to 14): Burp every 2 to 3 days for 2 to 3 minutes.
- Weeks 3 to 4 (days 15 to 30): Burp weekly for 1 to 2 minutes.
- Day 30 onward: Burp as needed based on hygrometer readings.
Pro tip: burp in the morning when room humidity is naturally lower, especially in a humid climate. If your room humidity is above 65 percent, burping in those conditions actually pulls moisture into the jar instead of out.
Step 5: Read the Hygrometer, Adjust
Open a jar that has been sealed for at least 24 hours and read the hygrometer immediately. The reading tells you what to do:
- Above 70 percent RH: Buds were jarred too wet. Re-dry them on a tray for 12 to 24 hours, then re-jar. Mold risk is high if you leave this uncorrected.
- 65 to 70 percent RH: Slightly wet. Leave the lid off for 1 to 2 hours, then reseal. Burp more frequently this week.
- 58 to 62 percent RH: The sweet spot. Leave the jar alone except for scheduled burps.
- 55 to 58 percent RH: On the dry side, and still fine - this is where we run ours. Shorter burps; a 2-way humidity pack at 62 percent will pull it back up over a few days if you want it wetter.
- Below 55 percent RH: Too dry. Add a 62 percent humidity pack and seal the jar. Check again in 48 hours.
Curing in Grove Bags: The Honest Walkthrough
TerpLoc film is a multi-layer barrier that lets water vapor escape while blocking oxygen, light, and external contaminants. Grove Bags is the most-recognized brand. The setup is simple: fill the bag, fold the top, press the seal closed. The bag does the rest.
The buds must be at the right moisture before the bag goes airtight. If you fill a bag at 70 percent RH the barrier film will not save you, just like a 2-way humidity pack will not save you. The "no burping required" claim is true for the first 2 to 3 weeks if (and only if) you started at 58 to 62 percent RH.
Where barrier bags genuinely win: storage of 3 months or longer. The oxygen barrier slows the conversion of THC into CBN, which keeps the flower in its prime potency window for roughly twice as long as a mason jar in the same conditions. For someone curing a large harvest who will not finish it for a year, a barrier bag is the smarter container.
Where barrier bags do not win: first-time growers learning to read a cure. The bag is opaque (except for a small viewing window), and you lose the daily visual and aroma feedback that a glass jar provides. Learn the cure in jars first, then graduate to bags once you trust your eye and nose.
The 62% RH Standard, Explained

Why 62 percent, specifically? The number is not arbitrary, and it is not industry tradition. It is the result of three constraints lining up.
Below 55 percent RH: The flower starts to go brittle; 55 to 58 is drier than we target but still fine. Trichomes shatter under handling. The smoke is harsh because there is not enough moisture to slow combustion. Terpenes that should still be re-equilibrating instead evaporate off the bud surface.
Above 65 percent RH: Water activity climbs into the range where Aspergillus and other molds start to grow on cured flower. Combustion is also affected. The smoke gets heavier and harder to draw, and uncombusted plant matter ends up in the lung.
The 58 to 62 percent window: Buds are pliable enough that trichomes do not shatter, dry enough that no mold growth is possible, and contain enough residual moisture that terpenes continue re-equilibrating across the bud through the month. Combustion is even and the smoke is smooth.
62 percent is the top of that window, not its center. It is where the 2-way humidity pack makers settled, and it works; we run the drier end ourselves, and flower is fine down to 55 percent. Drier is safe, wetter is not.
How Long to Cure Cannabis

14-Day Minimum (The Bare Floor)
Two weeks is the minimum cure that produces properly smokeable flower, and 14 to 30 days is the window we recommend. Most of the chlorophyll has broken down by day 14, the worst of the hay smell is gone, and the harsh edge has softened. You can smoke flower at 14 days and it will be passable. Some growers go as short as 7 days and smoke that too. It is not ruined, and we are not going to pretend it is - it is simply greener and sharper than it needs to be, because the chlorophyll has not finished breaking down. A week gets you flower you can smoke. A fortnight gets you flower worth smoking.
It will not be great. The terpenes have not finished re-equilibrating, the smoke is still sharper than it should be, and the strain expression is muted. 14 days is the answer when you cannot wait.
About One Month (The Target)
This is where curing earns its name. By 30 days, the chlorophyll breakdown is essentially complete, the terpene profile has re-equilibrated across the buds, and the smoke is noticeably smoother. The flower is expressing its strain character cleanly, and flavors that were buried at 14 days are now front and center.
About one month is the right cure window for a home grower. The flower is genuinely good, and you have not waited so long that storage degradation starts to matter. This is what cured flower should be.
Some growers cure for several months. It is not necessary, it is not what we recommend, and it is not where the returns are: a month of disciplined curing at the right RH beats half a year of drifting.
Why Curing Works
Three slow biochemical processes run in parallel during a cure:
- Chlorophyll degradation. The green-grass smell of fresh-dried flower is residual chlorophyll. Enzymes inside the plant tissue continue breaking it down for weeks after the dry ends, but only at the right moisture content. Below 55 percent RH the enzymes stop. Above 65 percent RH other (less desirable) reactions take over.
- Terpene re-equilibration. Terpenes are volatile compounds that migrate within the bud during the cure, distributing across the surface and inside the trichomes. A bud that smelled one-dimensional at week 2 develops a rounder, more complex aroma by the end of the month because the terpene gradient has settled.
- Slow non-enzymatic chemistry. Cannabinoids, terpenes, and minor compounds continue interacting with each other and with trace oxygen inside the jar. These reactions are slow and incomplete, and they are part of what a 30-day cure adds over a 14-day one. The literature here is thinner than the chlorophyll and terpene research.
Boveda 62 and Integra Boost: The Honest Truth About 2-Way Humidity Packs

2-way humidity packs (Boveda 62, Integra Boost, and various private-label equivalents) contain a salt-based gel that either releases moisture or absorbs it to maintain a target humidity. The target is printed on the pack: 62 percent is the curing standard, 58 percent is for finished flower headed to long-term storage, 65 percent is for sticky high-RH preference.
What They Actually Do
A 62 percent pack inside a sealed jar stabilizes the RH at roughly 62 percent. The pack absorbs excess moisture when the buds are too wet and releases moisture when the buds are too dry, within a limited working range. They genuinely do this. The chemistry is sound.
What They Do Not Do
A 2-way humidity pack cannot rescue buds that were jarred at the wrong moisture content. If you jar at 75 percent RH, the pack will absorb water for a few days and then become saturated, at which point it just sits there at 65 to 70 percent doing nothing. By the time it saturates, mold may have already started.
If you jar at 45 percent RH (dry as a bone), the pack will release water, but the buds have already over-dried. The volatile terpenes that escaped during the dry are gone. The pack will bring the humidity back up but it cannot bring the lost aroma back.
The framing that matters: a humidity pack is a stabilizer, not a corrector. Get the dry right. Get the jarring moisture right. Then the pack stabilizes the cure. In that order.
When 2-Way Humidity Packs Earn Their Keep
- Long-term storage (3+ months): Yes. A pack at 62 percent inside a sealed jar will hold the cure stable for months. This is what packs are best at.
- Active curing (the first 30 days): Optional. Burping does most of the work. A pack can help in a dry climate where buds keep drifting below 55 percent, or in a humid climate where buds drift above 65 percent.
- First-time growers: Useful as a safety net. The pack buys you forgiveness if your hygrometer reading slips a few percent.
- Sample jars: Not worth it. Small jars opened frequently lose pack saturation in days.
How to Know When Your Cure Is Done

The cure does not end on a calendar date. It ends when the buds tell you they are done. Use these five signals together, not in isolation.
- Aroma. Open the jar after a 24-hour seal. The first inhale should smell like the strain, not like hay. If you still smell green grass or wet leaves, the cure is not finished.
- Stable RH. The hygrometer should read 58 to 62 percent and stay there after 24 hours of being closed. If the number drifts up after sealing, the buds are still releasing moisture and the cure is not done.
- Stem snap (refined). Pull a small stem off a bud. It should snap cleanly, not bend and not crumble. Crumbling means too dry. Bending means too wet.
- Burn test. Light a small piece. White-gray ash means the cure is good. Black ash means the buds are still too wet. Ash color often gets blamed on nutrients that were never flushed out, but no controlled trial has found that flushing changes it, so read a black ash as a moisture reading and not as a feeding verdict.
- Smoke quality. Smooth, clean, no harsh edge in the throat. The flavor should match what you smell in the jar.
All five lining up is your green light. If 4 of 5 hit but the aroma is still hay-leaning, give it another 2 weeks. The aroma is the slowest to develop.
Common Curing Mistakes

1. Jarring Too Wet
The most common cure-killer. Buds jarred above 70 percent RH grow mold within days. The smell goes from sweet to ammonia. By the time you notice, the entire jar is compromised. Re-dry to under 62 percent before sealing. And if rot was already inside the bud before it went into the jar, no cure will stop it - what bud rot does after the chop covers how to tell the two apart.
2. Jarring Too Dry
The opposite mistake. Buds jarred below 50 percent RH skip the cure entirely. The chlorophyll never finishes breaking down (the enzymes need moisture). The hay flavor locks in and does not leave. A humidity pack will rehydrate the buds physically, but the lost aroma does not come back.
3. Plastic Containers
Tupperware off-gases plasticizers into the flower over time. The static charge pulls trichomes onto the container walls. The humidity does not stabilize. Use glass.
4. Skipping Week 1 Burps
Day 1 to day 7 is when anaerobic compounds build up fastest. Skip these burps and you create a stink that does not always vent out later. Daily burps are non-negotiable in week 1.
5. Trusting a Humidity Pack to Fix a Bad Start
Covered above. A pack stabilizes, it does not rescue. Get the dry and the jar moisture right first.
6. Storing in Light or Heat
UV light degrades THC. Heat accelerates the THC-to-CBN conversion. A jar on a sunny windowsill or a shelf above a heat vent can lose 20 to 30 percent of its potency in a few months. Dark cupboard, cool temperature, sealed lid.
Storage After Curing

Once the cure is done, your storage method determines how long the flower stays in its prime potency window. The four common methods give you very different results.
Mason Jar + 2-Way Humidity Pack
The default, and fine for flower you will finish reasonably soon. No mason jar is perfectly airtight, so oxygen exchanges slowly through the lid seal and the cannabinoids degrade on that schedule. Keep it in a dark, cool cupboard and the jar does its job.
Barrier Bag (TerpLoc-Style)
Better than a jar for anything you are holding rather than smoking. The oxygen barrier is the whole advantage, and you do not need a humidity pack because the film regulates moisture itself.
Vacuum Sealed + 2-Way Humidity Pack
Better again. Pulling most of the oxygen out slows the THC-to-CBN conversion, which is an oxidation reaction and needs oxygen to run. The catch is mechanical: vacuum compression squishes buds and breaks trichomes. Use a sealer with adjustable suction and stop before the buds visibly compress.
Vacuum Sealed in the Freezer (The Gold Standard)
The best option available to a home grower, because it attacks both drivers at once - almost no oxygen, and the lowest temperature you have. This is what we recommend for any harvest you will not finish within a year.
Two cautions: vacuum gently (over-compression breaks trichomes), and let the bag warm up to room temperature inside the sealed bag before opening. Condensation on cold flower causes mold quickly.
The THC-to-CBN Conversion: Why Cold Storage Wins
THC degrades into CBN through a slow oxidation reaction.1 CBN is not psychoactive in the same way as THC, but it is associated with sedative effects. Most growers consider this conversion a loss of the high they grew for.
The rate depends on three things: temperature, light exposure, and oxygen contact. Temperature is the one with actual numbers attached to it. In a controlled comparison of the same material held for two years, THC was lost at these rates:1
- Freezer, minus 18 degrees Celsius: about 3.8 percent of the THC per year.
- Refrigerator, 4 degrees Celsius: about 5.4 percent per year.
- Room temperature, 22 degrees Celsius: about 6.9 percent per year.
Worth being precise about two things, because this is widely misquoted. First, the freezer slows the conversion, it does not stop it. You will see "freezer storage halts degradation" repeated all over the internet; the measured figure is roughly 3.8 percent a year, not zero. Second, those rates are from sealed, dark storage. Light and air make it much worse: cannabis plant material held at room temperature lost 16.6 percent of its THC in the first year and 26.8 percent by the end of the second,1 and samples left in light at room temperature were close to fully degraded after four years.2 The same direction holds for concentrated forms - cannabis oil and resin degrade faster warm and lit than cold and dark.3,4
The takeaway: cold, dark, sealed and low-oxygen, in that order of leverage. If you grow more than you can smoke in a year, moving it to the freezer is the single highest-return decision you can make - not because it stops the clock, but because it slows it more than anything else available to you.
The Science of Curing
Most cure guides hand-wave the biology. Here is what actually happens during a 30-day cure.
Days 1 to 7 (anaerobic phase): The plant tissue continues respiring slowly even after the dry. Oxygen inside the jar gets consumed and CO2 builds up. Daily burping vents the CO2 and replenishes the oxygen, which keeps the next two processes running.
Days 7 to 21 (chlorophyll degradation): Enzymes inside the buds break down the chlorophyll that gave the flower its green color and grassy smell. The buds visibly shift from bright green to a tan-green, and the hay aroma fades. This phase needs both moisture (58 to 62 percent RH) and oxygen to proceed.
Days 14 to 30 (terpene re-equilibration): Terpenes are volatile and mobile. During the cure they redistribute across the bud surface and equilibrate inside the trichomes. A bud that smelled one-dimensional at week 2 develops a rounder, more complex aroma by day 30.
Day 30 onward (slow refinement): Cannabinoids, terpenes, and minor compounds continue interacting in slow non-enzymatic reactions. The chemistry of this phase is not fully characterized in peer-reviewed cannabis research (the literature is thinner than tobacco curing science), and it is not where the returns are: by day 30 the cure has done its work.
Frequently Asked Questions
How long do I have to cure cannabis before I can smoke it?
14 to 30 days is the window to aim for. Fourteen days is the floor that produces properly smokeable flower, and about one month is the target, where the cure earns its name. Some growers open the jar as early as 7 days and it is smokeable, but the chlorophyll has not finished breaking down, so it is greener and sharper than it should be. Waiting that extra week is the cheapest quality upgrade you will ever get.
What humidity should the jar be at?
58 to 62 percent relative humidity, measured by a mini hygrometer inside the jar after at least 24 hours of being sealed. We run the drier end of that window ourselves, and anything down to 55 percent is fine. Above 65 percent, mold risk climbs sharply. Below 55 percent, trichomes shatter and terpenes evaporate.
Why use 62 percent humidity packs and not 58 or 65?
62 percent sits at the top of the 58 to 62 percent window we target, and it is the number the pack makers standardized on. It keeps the jar inside the window without you managing it, and a jar that drifts a little drier is still fine down to 55 percent. 58 percent packs are for finished flower headed to long-term storage. 65 percent packs are for premium markets that prefer a stickier bud, but the mold risk margin is thinner.
Can I cure cannabis without a humidity pack?
Yes. Mason jars plus burping is a complete cure with no humidity pack required. Burping does the work that a pack would do, just with more manual effort in week 1. Packs are a convenience, not a requirement.
How often should I burp my jars?
Week 1: daily, 5 to 10 minutes each. Week 2: every 2 to 3 days, 2 to 3 minutes. Weeks 3 to 4: weekly, 1 to 2 minutes. After day 30: only as needed based on hygrometer readings.
What size mason jar should I use?
Wide-mouth 32 ounce (quart, 950 ml) jars are the workhorse. They hold roughly 1 ounce (28 g) of cured flower at the proper 75 percent fill level. 16 ounce (pint, 475 ml) jars are useful for small batches or sampling. Half-gallon (1.9 L) jars work but burping takes longer to fully exchange the air.
Should I cure cannabis in the fridge?
No. The fridge cycles temperature and humidity every time the compressor kicks on, which creates condensation inside the jar. Mold loves cold condensation. Cure at room temperature (60 to 70°F, or 16 to 21°C), in a dark cupboard. Save the fridge and freezer for long-term storage after the cure is finished.
Can you over-cure cannabis?
Not really, but there is no reason to try. Fourteen days is the floor and about a month is the target; past that you are holding flower, not improving it much. The risk is not over-curing - it is improper storage during a long cure (jar drifts out of safe RH range, light or heat exposure, oxygen ingress through bad seals).
Why does my flower still smell like hay after 2 weeks of curing?
Chlorophyll breakdown is incomplete at 2 weeks. The hay smell is residual chlorophyll. Give it until day 30 at 58 to 62 percent RH with regular burps. If the hay smell is still there at 30 days, the moisture was wrong: check the jar reading. Above 65 percent the flower was jarred too wet and needs a re-dry; below 55 percent the enzymes stop and the cure stalls.
Is freeze-drying a replacement for curing?
No. Freeze-drying is a replacement for the air-drying phase, not the cure. Freeze-dried flower still needs to be jar-cured for at least 14 days to break down chlorophyll and re-equilibrate terpenes. Skip the cure and freeze-dried flower tastes flat, regardless of how well the drying went.
Should I vacuum-seal during the cure?
No. Vacuum sealing during the active cure removes the oxygen needed for chlorophyll breakdown. Vacuum sealing is for after the cure is finished, when you are storing for the long term. Cure first, then vacuum seal for storage.
How do I rehydrate over-dried buds?
Add a 62 percent 2-way humidity pack to the jar and seal it. Check the RH every 24 hours. The pack will release moisture into the buds over 2 to 4 days. Do not add water directly to the buds or use orange peel (an old trick). Both introduce uneven moisture and mold risk. The pack is the clean solution.
Next Steps
You have the cure dialed. Quality traces back through the flowering window - the work you did at week 6 bulk and week 8 ripening shows up in the jar. The natural next moves:
- Refresh on the drying environment that sets up a great cure (the cure is only as good as the dry).
- If you are still on the fence about trim method, our complete trimming guide covers wet, dry, and partial-wet decisions.
- Check your harvest readiness signals before the next chop so you start the cure at the right point.
- For pre-harvest setup, pre-harvest defoliation reduces leaf mass and speeds the dry, which keeps your cure on schedule.
Ready for your next grow? We recommend the seeds from our friends at Seed Supreme.
FREE CHEAT SHEET
How long do you actually leave it shut?
The burp schedule week by week, the 62% number everything hangs on, and where to keep it after. Two pages, free.
Send me the Cheat SheetReferences
- Ross SA, ElSohly MA. CBN and Delta-9-THC concentration ratio as an indicator of the age of stored marijuana samples. Bulletin on Narcotics. 1997;49(1):139-147. Cannabis plant material stored at 20-22 degrees Celsius; also reports the temperature-comparison rates measured by Turner and colleagues at minus 18, 4 and 22 degrees Celsius. View study
- Zamengo L, Bettin C, Badocco D, et al. The role of time and storage conditions on the composition of hashish and marijuana samples: A four-year study. Forensic Science International. 2019;298:131-137. View study
- Trofin IG, Dabija G, Vaireanu DI, Filipescu L. Long-term storage and cannabis oil stability. Rev Chim (Bucharest). 2012;63(3):293-297. Cannabis oil and resin, not flower - cited here only for the direction of the effect in concentrated forms. View study
- Lindholst C. Long-term stability of cannabis resin and cannabis extracts. Australian Journal of Forensic Sciences. 2010;42(3):181-190. Resin and extracts, not flower. View study

About the Author
Henrique Dias is the CEO and co-founder of BudTrainer. He is a mechanical engineer who also holds a graduate certificate in Commercial Cannabis Production from Niagara College in Ontario, Canada - the first college-level cannabis cultivation program in North America. Before founding BudTrainer, Henrique worked with Health Canada licensed cannabis producers, where he gained hands-on experience in cultivation, processing, and post-harvest management of cannabis at commercial scale. He started BudTrainer to bring that same level of craft to home growers through better-designed gardening tools and clear, science-backed education.
DISCLAIMER: Everything taught and sold by BudTrainer® is to be used strictly for legal purposes. We do not endorse the production of illegal substances and it is your duty to ensure that you are complying with the law. The words "hemp," "cannabis," "weed," and "marijuana" are used interchangeably to refer to the same plant (legal hemp with less than 0.3% THC) for the purposes of this lesson.